Category Archives: AWD

Emission Testing State Subaru

 Emission Testing Subaru:

Emission testing of a Full-Time 4WD or all-wheel-drive vehicle must never be performed on a single two-wheel dynamometer, nor should a state I/M program inspector or its contractors install the FWD fuse in the engine compartment. Attempting to do so will result in uncontrolled vehicle movement and may cause an accident or injuries to persons nearby.
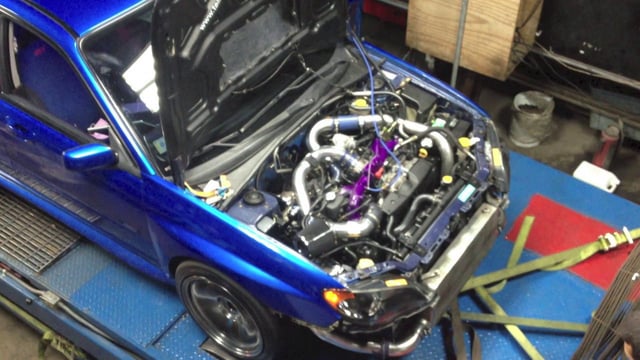
State Emission Testing Subaru: Emission testing of a Full-Time 4WD or all-wheel-drive vehicle must never be performed on a single two-wheel dynamometer
State Emission Testing Subaru: Emission testing of a Full-Time 4WD or all-wheel-drive vehicle must never be performed on a single two-wheel dynamometer.

Resultant vehicle damage due to improper testing is not covered under the SUBARU Limited Warranty and is the responsibility of the state I/M Program or its contractors or licensees.

The 1990 Clean Air Act Amendments require the Environmental Protection Agency (EPA) to implement programs to reduce air pollution from motor vehicles. Certain states are required to adopt either a “basic” or “enhanced” vehicle Inspection/Maintenance (l/M) Program, depending on the severity of their air pollution problem.

The ‘enhanced’ I/M emission testing simulates actual driving conditions on a dynamometer and permits more accurate measurement of tailpipe emissions than the ‘basic’ I/M test, which measures emissions only during engine operating conditions at idle and 2500 RPM. The ‘enhanced’ l/M test also includes a pressure check to identify evaporative emissions leaks in the fuel system.

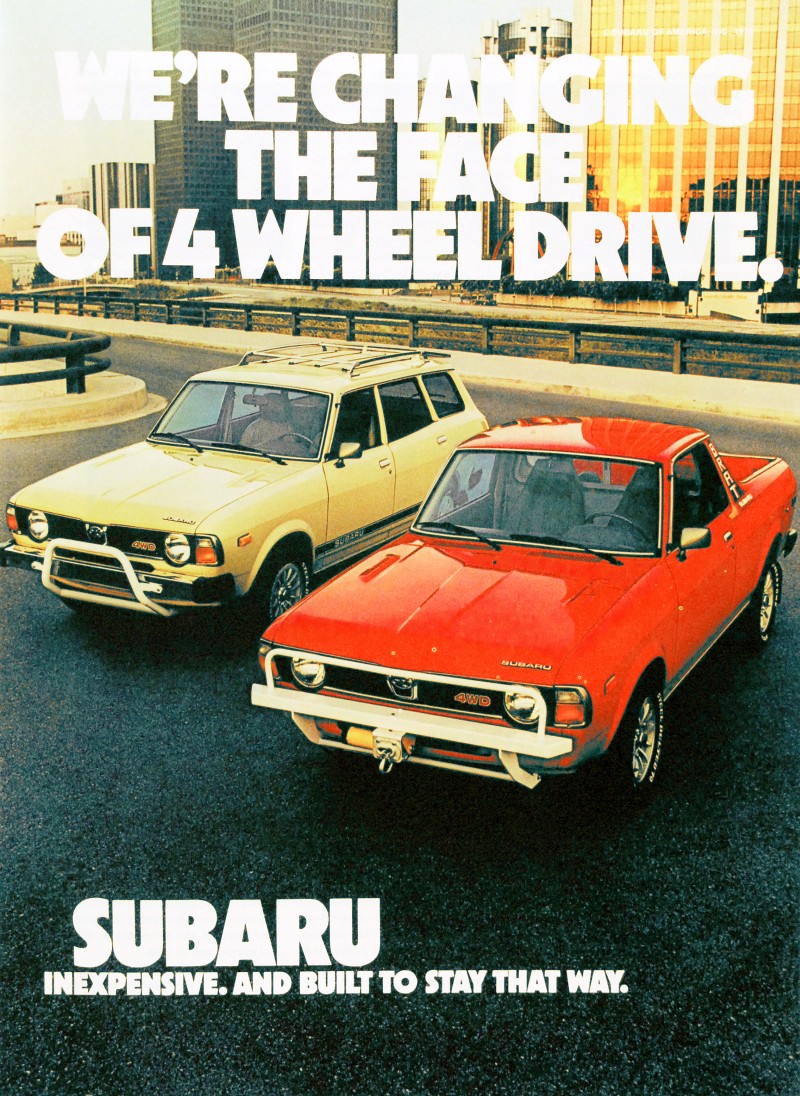
Subaru Brat Advertising Pictures

Subaru Brat Advertising Pictures:

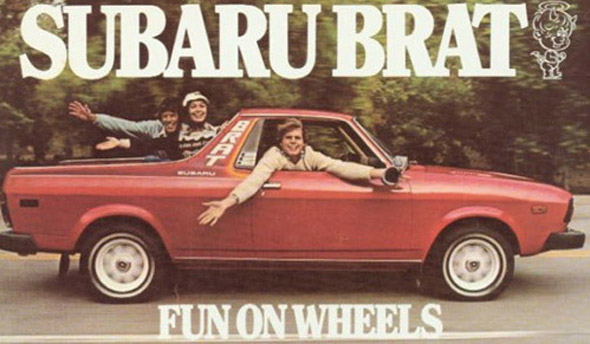
I really love the advertising that Subaru did with the brat.

Subaru Brat: We're changing the face of 4 wheel drive.
Subaru Brat: We’re changing the face of 4 wheel drive.

What I would give to find a mint Subaru Brat. That winch and bumper bar are really cool. I wonder if you could even find one of those these days.

Subaru Brat: If you tried cruising on this you would be pulled over immediately.

If you tried cruising on this you would be pulled over immediately.

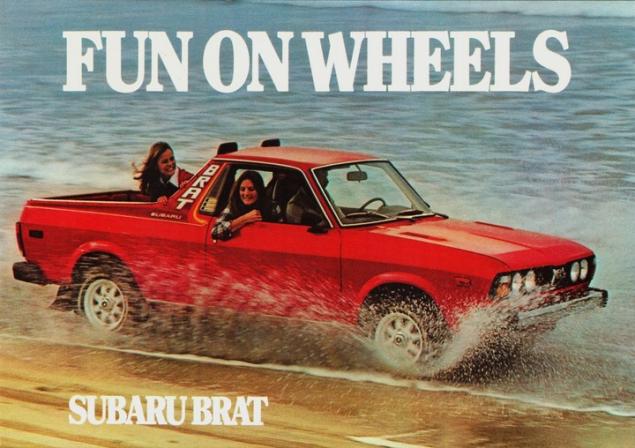
Subaru Brat: Fun on Wheels.

Later that day this Subaru Brat rusted through completely. The jump seats in the back are awesome to sit in. If you never have I suggest that you do.

AWD: The five types of Subaru systems

AWD: The five types of Subaru systems

Back in 1972, Subaru introduced the Leone 4WD Station Wagon. It was the first fourwheel drive vehicle designed specifically for everyday driving, rather than for off-road or rugged use.The safety and driving performance aspects of the Leone 4WD proved popular and made the car successful. It quietly set the standard for Subaru to become the global AWD leader of today.

AWD Genesis: The safety and driving performance aspects of the Leone 4WD proved popular and made the car successful.


Subaru Symmetrical All-Wheel Drive:

Subaru calls its system of mating a horizontally opposed (boxer) engine to various types of full-time AWD “Symmetrical All-Wheel Drive.” This system is based on the balance of both the powertrain and the straight, nearly-horizontal, flow of power to the wheels.The weight of the flat boxer engine and the transfer components lie very low in the chassis, providing a lower center of gravity, resulting in excellent traction and stability.

The Five Types of Subaru Symmetrical All-Wheel Drive:

Subaru currently uses five different types of Symmetrical AWD. Each is specific to the Subaru model and transmission.The five types are:

■ Continuous All-Wheel Drive
■ Active All-Wheel Drive
■ Variable Torque Distribution (VTD) All-Wheel Drive.
■ Driver Controlled Center Differential (DCCD) All-Wheel Drive
■ Vehicle Dynamics Control (VDC) All-Wheel Drive

OBD-II Subaru Diagnostic Systems

OBD-II Subaru Diagnostic Systems:

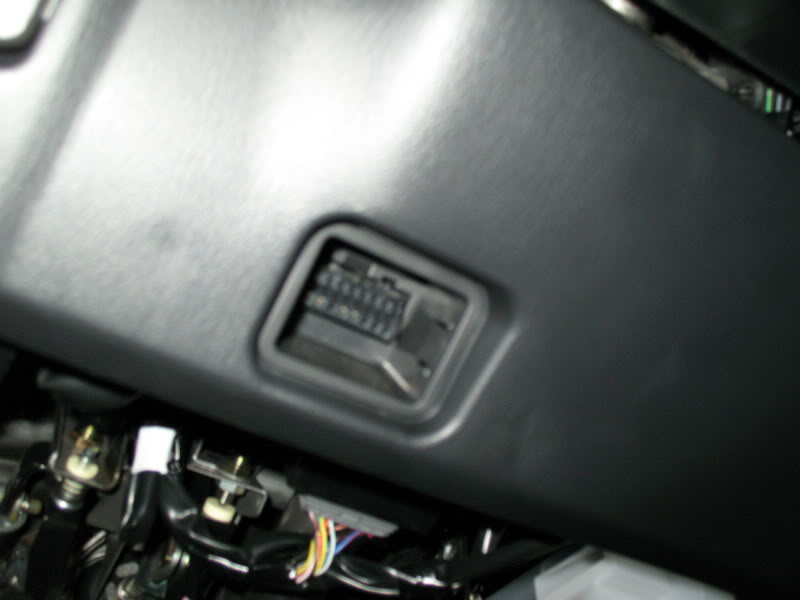
The Environmental Protection Agency (EPA) now has regulations in place that establish requirements for on-board diagnostic (OBD-II) systems on light-duty vehicles and light-duty trucks. The purpose of the OBD-II system is to ensure proper emission control system operation for the vehicle’s lifetime by monitoring emission-related components and systems for deterioration and malfunction.

OBD-II Subaru Diagnostic Systems: The Environmental Protection Agency (EPA) now has regulations in place that establish requirements for on-board diagnostic (OBD-II) systems on light-duty vehicles and light-duty trucks.
OBD-II Subaru Diagnostic Systems:
The Environmental Protection Agency (EPA) now has regulations in place that establish requirements for on-board diagnostic (OBD-II) systems on light-duty vehicles and light-duty trucks.

There’s a big difference between detecting only hard faults (OBD-I) and having the ability to actively monitor the system for proper operation, deterioration or a malfunction (OBD-II).

Engines in today’s vehicles are largely electronically controlled. Sensors and actuators sense the operation of specific components (e.g., the oxygen sensor) and actuate others (e.g., the fuel injectors) to maintain optimal engine control. An on-board computer, known as the “powertrain control module,” controls all of these systems.

Maintenance Inspections for Subaru:

Maintenance Inspections for Subaru:

Subaru vehicles are more reliable than ever before. To assure their continued reliability, a schedule of inspection and maintenance (I & M) services is prescribed by Subaru of America for every Subaru vehicle sold. A copy of this schedule can be found in the Warranty and Maintenance Booklet located in the vehicle glove compartment.

Maintenance Inspections for Subaru: Subaru vehicles are more reliable than ever before. To assure their continued reliability, a schedule of inspection and maintenance (I & M) services is prescribed by Subaru of America for every Subaru vehicle sold.
Maintenance Inspections for Subaru:
Subaru vehicles are more reliable than ever before. To assure their continued reliability, a schedule of inspection and maintenance (I & M) services is prescribed by Subaru of America for every Subaru vehicle sold.

Subaru vehicle maintenance inspections services are divided into recommended intervals beginning with three months or 3000 miles (whichever comes first). Each additional level in the maintenance schedule (7,500/15,000/ 30,000 miles) adds more maintenance and inspection steps to the process. The 15,000 (15 month) and 30,000 mile (30 month) services are ‘major’ services, and include the most comprehensive range of component checks, part replacements and adjustments.

If you are already familiar with Subaru vehicles, you may have developed a routine when performing a vehicle safety maintenance inspections. Following a set routine allows you to start at one end of the vehicle and end up at the other end, having performed all of the necessary safety inspection steps along the way.

Repetition of the safety inspection may also allow you to commit the steps to memory, but a checklist can be a helpful addition that leaves nothing to chance (or memory). Checking items off the checklist provides a written record that can be shared with the customer and retained for your service records as well.

Recommended steps in a Subaru Safety Maintenance Inspections  are also spelled out in the owner’s Warranty and Maintenance Booklet. Some of the steps overlap services performed during the scheduled maintenance program. It could be argued that any scheduled maintenance should always include a Safety Inspection. Most of the Safety Maintenance Inspection steps are based on common sense, but it’s surprising how frequently these simple suggestions are ignored.

Wheel Alignment For Subarus:

Wheel Alignment For Subaru:

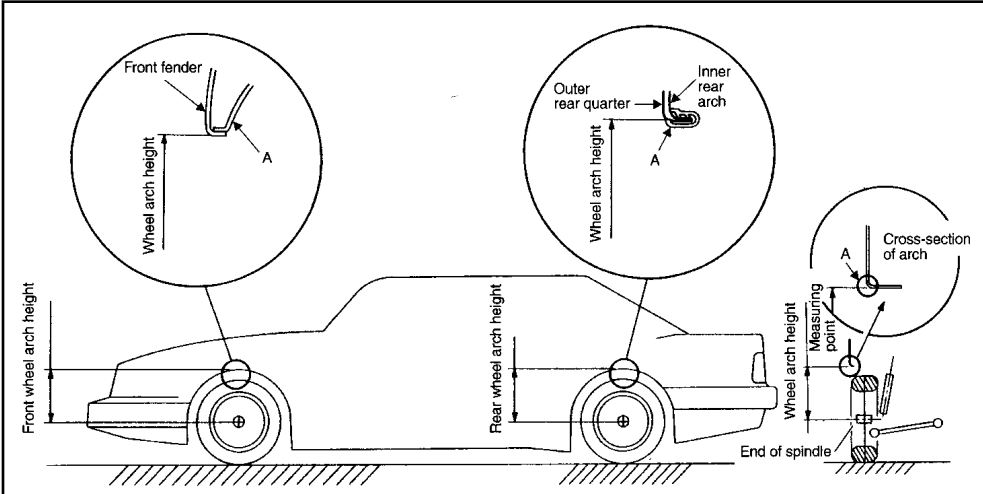
Wheel arch height (vehicle ride height) as well as front and rear wheel alignment should be inspected at 30 month/30,000 mile intervals. Winter driving and its attendant chuckholes may shorten that maintenance interval for some drivers

While inspecting wheel alignment, also check for obvious signs of damage to suspension components, tightness of bolts and nuts and the condition of other under car components.

Check, adjust and/or measure wheel alignment in accordance with the following procedures:

1.) Wheel arch height (front and rear)
2.) Camber (front and rear)
3.) Caster (front)
4.) Front toe-in
5.) Rear toe-in
6.) Thrust angle (rear)
7.) Wheel steering angle

1. Wheel Arch Height

1.) Adjust the tire pressures to specifications.
2.) Set the vehicle under “curb weight” conditions (empty luggage compartment, install spare tire, jack, service tools, and top off fuel tank).
3.) Set steering wheel in a wheel-forward position.
4.) Suspend a thread from the wheel arch (point “A” in figure above) to determine a point directly above the center of the spindle.

Subaru Wheel Alignment: Measure the distance between the measuring point and the center of the spindle.

5.) Measure the distance between the measuring point and the center of the spindle.
6.) Consult the service manual for Wheel Arch Height specifications.

Limited Spoiler 07 STi install:

Limited Spoiler 07 STi install:

This is a step by step guide in installing the Limited Spoiler from a 07 STi.

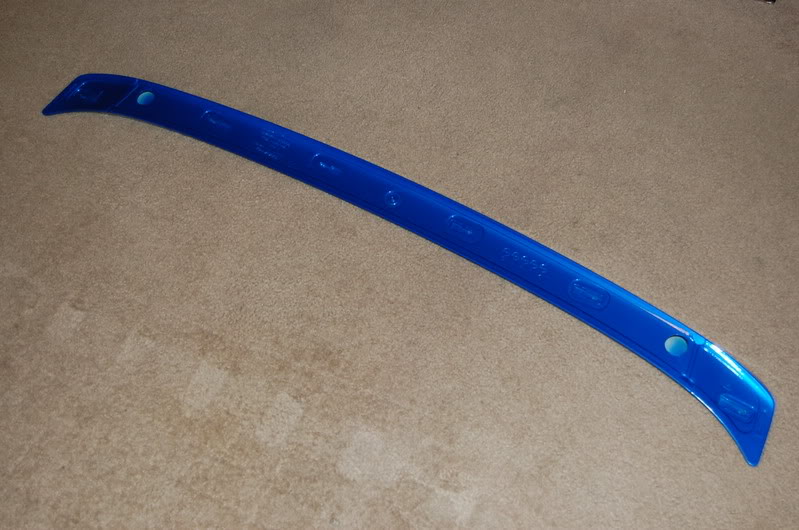
Here is the limited spoiler, already painted to match the lid:

The part number is actually E7210FE900 and the kit cost $221 shipped at the time of purchase, but prices may have changed.

Limited Spoiler 07 STi install: Here is the spoiler already painted and ready to install.

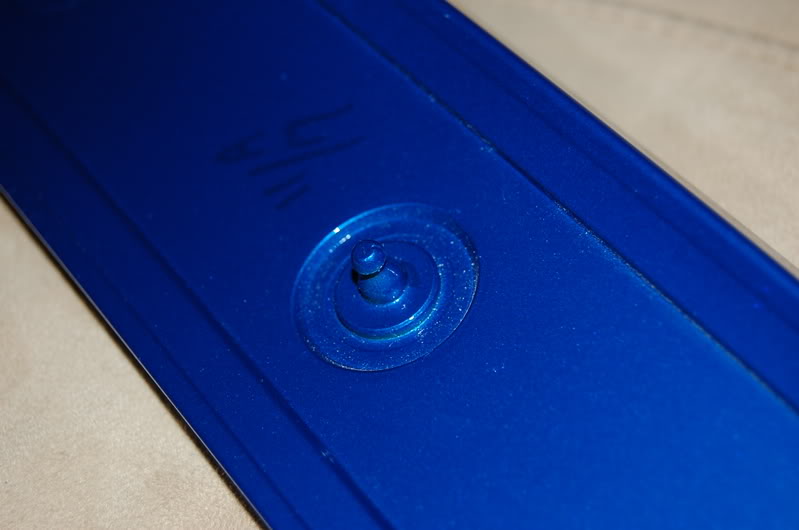
1.)From the factory this fitting is already installed in the center of the spoiler, if you bought it unpainted, remove this BEFORE you get your spoiler painted. It just makes it easier. I simply cut the nipple off so that nothing is protruding from the bottom of the spoiler. You can also use the nipple and cut a hole in your trunk.

Limited Spoiler 07 STi install: Limited Spoiler 07 STi install: If you bought it unpainted, remove this BEFORE you get your spoiler painted.
Limited Spoiler 07 STi install: If you bought it unpainted, remove this BEFORE you get your spoiler painted.

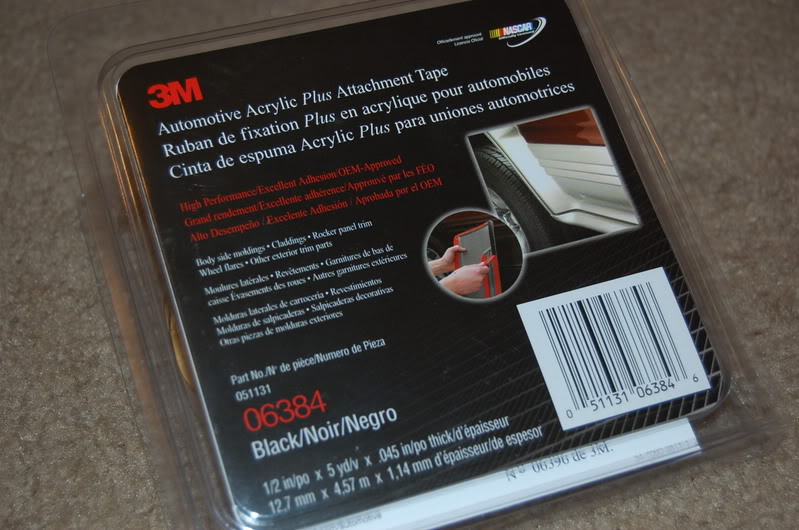
2.) The 3M tape you want to use looks like this, I picked it up at the local auto parts/auto body shop. You can see the part number in the picture. It costs around $15 and you will have enough for two or more installations.

The 3M tape you want to use looks like this, I picked it up at the local auto parts/auto body shop. You can see the part number in the picture.

You can buy the 3M Tape here:


3M(TM) Automotive Acrylic Plus Attachment Tape 06384, Black, 1/2 In X 5 Yds, 45 mil [PRICE is per ROLL]

Steering Rack Bushings Install on a 08+ STi

Steering Rack Bushings Install on a 08+ STi

This is a step by step guide on installing steering rack bushings (whiteline) on a 08+ WRX/STi. This needs to be done the right way and all the bolts NEED to be torqued with a torque wrench to factory spec for the car to be in a safe operating state.

1.) Remove the under tray. There are 2 12mm bolts towards the front, 1 12mm bolt on the rear, 2 clips on the rear. and 2 plastic pop-out clips on the sides near each wheel well.

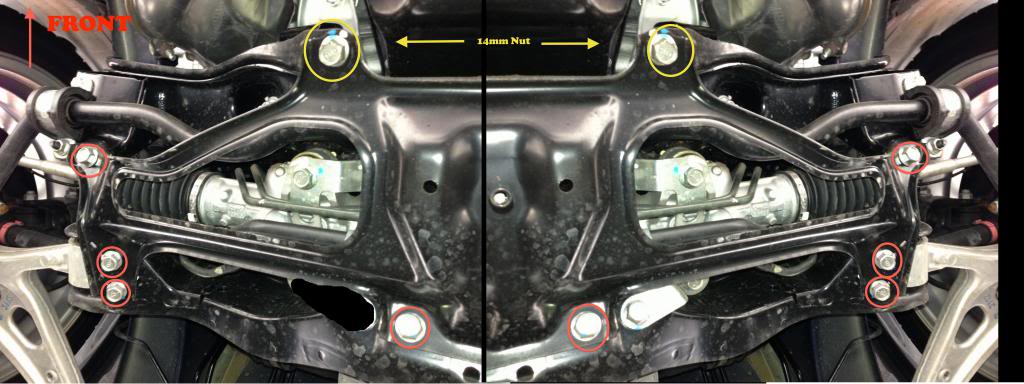
2.) After removing the under tray you will need to remove 10 14mm bolts holding the cross member support brace (otherwise known as the jack plate) in place. The bolts that are to be removed are circled in red and yellow.

Note: The bolts circled in yellow are secured by nuts on the topside so you will need the 14mm wench as well. These bolts are torqued down pretty tight if they have never been removed before.

Steering Rack Bushings Install on a 08+ STi: The bolts circled in yellow are secured by nuts on the topside so you will need the 14mm wench as well.

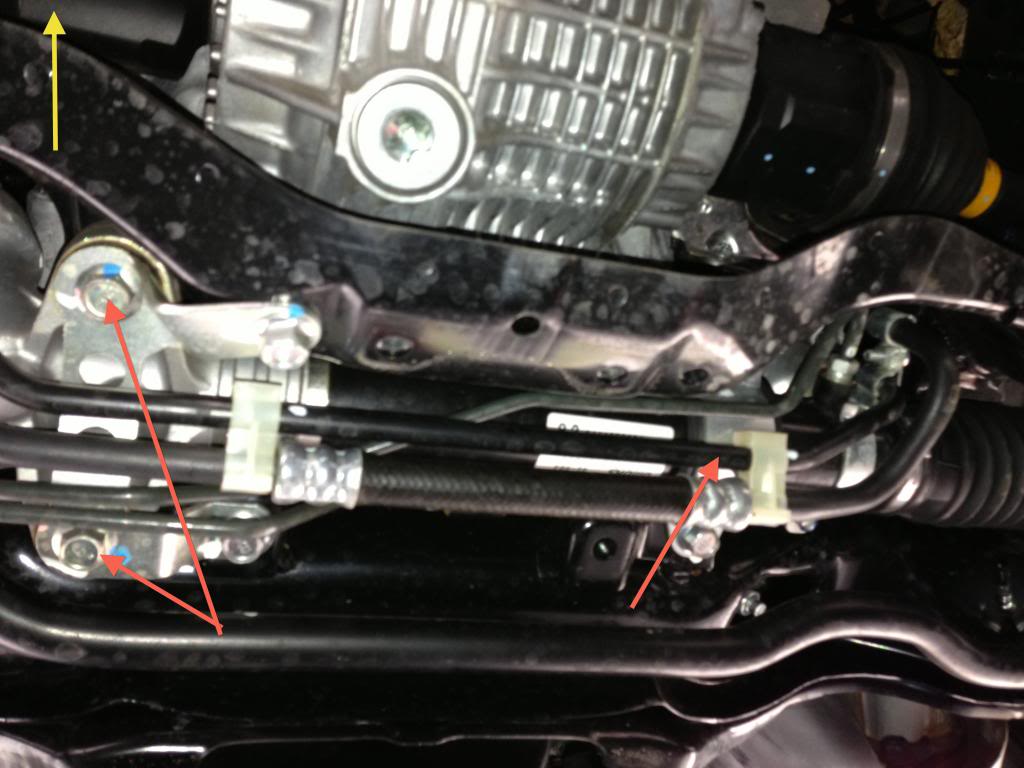
3.) Once the cross member support is removed the steering rack will be exposed as pictured below. Note the location of the 3 bushings denoted by the red arrows.

Steering Rack Bushings Install on a 08+ STi: Note the location of the 3 bushings denoted by the red arrows.