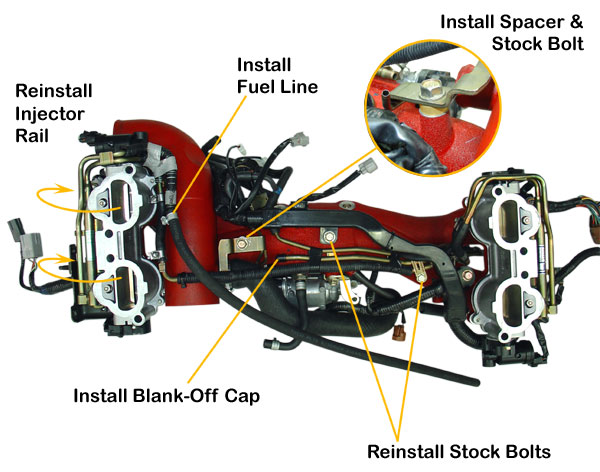
Don’t forget to tighten down your intake manifold bolts down to the correct torque values.
Intake manifold Subaru STi: Make sure to tighten down the bolts.
Otherwise you’ll end up with a broken sounding engine like this:
Luckily forgetting to tighten down the intake manifold bolts didn’t cause any permanent damage, but I wouldn’t go driving around like this either.
If you do TGV deletes like in this post. Make sure to use new intake gaskets where the TGV’s and the intake manifold meet up. What’s even more important is to make sure you tighten down those intake manifold bolts that hold the intake manifold to the TGV’s.
This is a step by step guide on removing and re-installing a oil pan on your Subaru Impreza STi or WRX. This guide is also useful for installing a STi spec oil pan onto your WRX. This guide also is helpful if you are removing your stock oil pickup tube that is known to crack on the STi. I suggest purchasing a Killer B Motorsport Pickup Tube along with a brand new STi oil pan. Both can be purchased from down below from Amazon.
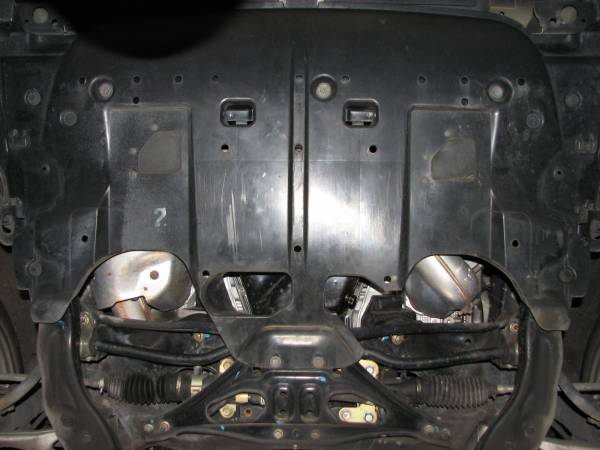
1) Remove the plastic under tray from your engine. This is secured using a few bolts and plastic push clips.
2) Remove the plastic under trays from either side of the car, the long ones.
Oil pan removal and install: Remove plastic to gain access to the bottom of the engine.
3) Remove the jacking plate. This is held on by 2 12mm bolts with nuts in the front, 2 12mm bolts in the rear and 4 14mm nuts on the sides.
4) Remove your subframe. This is secured by a few 19mm bolts, 2 12mm bolts in front and 4 14mm bolts. I highly recommend soaking these all in your PB blaster and waiting 5 minutes. Check out some of my other posts for instuctions.
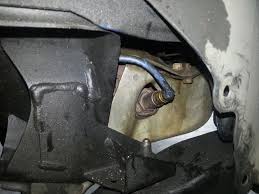
5) Remove the front oxygen sensor. The correct way is to unplug the clip, unhook it from the metal mount and then pull the wire through the fender-well so that the wire isn’t being stretched and twisted as you unscrew it.
2.) Start with the front wheel. First thing to do is clean all the fittings that will be loosened to prevent dirt from getting in the stainless steel brake lines. Use compressed air then some brake cleaner to do the job.
3.)Then, remove the 12mm bolt holding the line to the strut.
ALK (Anti-Lift Kit)install on 02-07 Subaru WRX/STi:
This is a step by step guide on how to install a Anti-Lift Kit (ALK) onto a 02-07 WRX/STi. These ALK (Anti-Lift Kits) are designed to be used with the STi’s aluminum control arms.
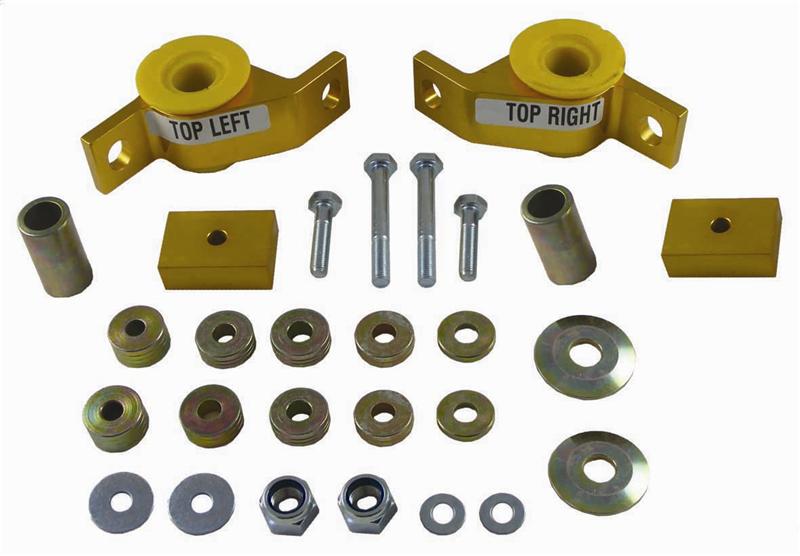
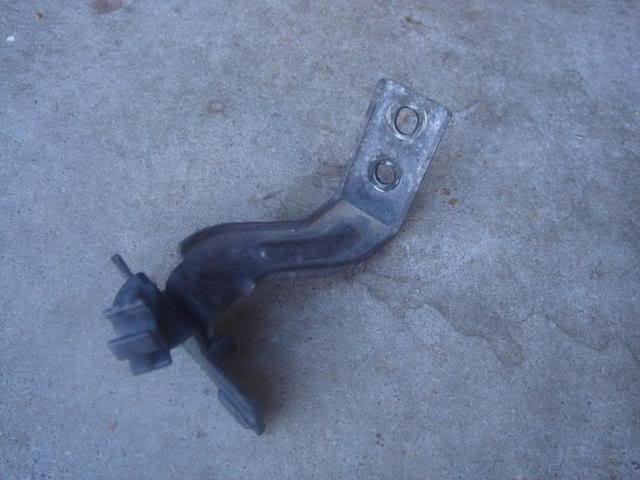
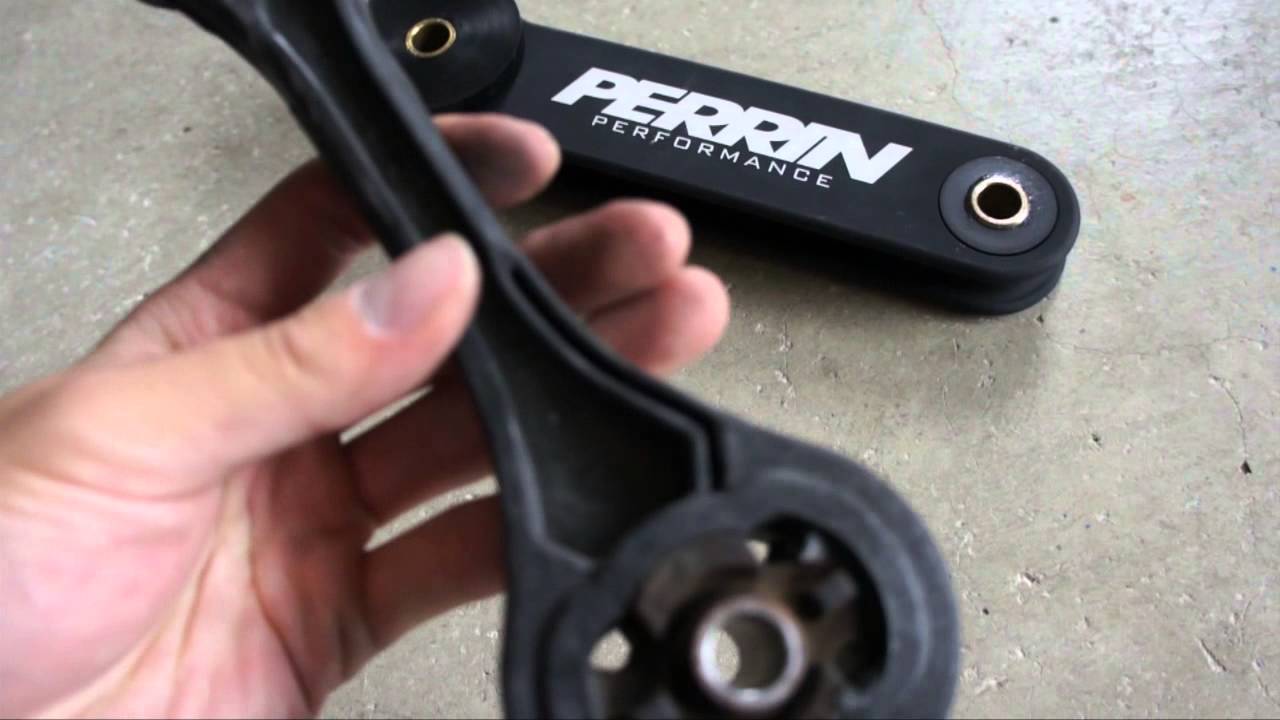
1.) First unpackage your Anti-Lift Kit (ALK) it’ll look something like this.
Anti-Lift Kit (ALK): This is all the components you’ll get with this kit.
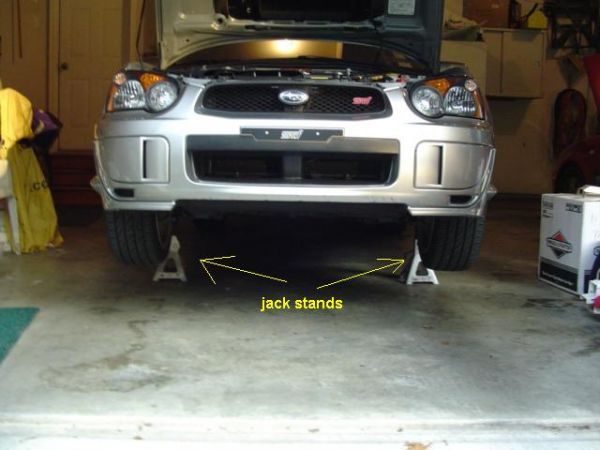
2.) Get your tools ready and mount the car up properly on jack stands to prevent the car falling down on you. Get as much clearance as you can as you’ll need a lot of room to work with.
Anti-Lift Kit (ALK): Get the front of your STi up on jack stands.
3.) Make sure you have a decent breaker bar. I’ve destroyed a breaker bar doing this before. Do not use a 3/8 inch drive. Use a 1/2 inch drive so you don’t break a breaker bar and a socket.
This is a step by step guide in installing a front sway bar with aftermarket endlinks on a 04-07 Subaru STi.
1.) Get the car in the air and be sure to secure the car. I used jack stands in the cutouts on the side of the car’s lower frame. It may be easier to use ramps since you will need to tighten the sway bar mounting bolts when the suspension is “loaded,” that is when the full weight of the car is on the wheels/tires.
2.) Remove the front lower cover (splash guard). There are five bolts that require a 12 mm socket, three in the front and two toward the rear. There are two pop fasteners on each side as well. These can be removed by using a small flat bladed screwdriver to pop up the center round plastic piece about a quarter of an inch then pulling/wriggling out the entire fastener.
3.) Remove the jack plate. There are four bolts in the center area to remove and two nuts on each side.
Front sway bar and endlinks: Remove splash guard and skid plate.
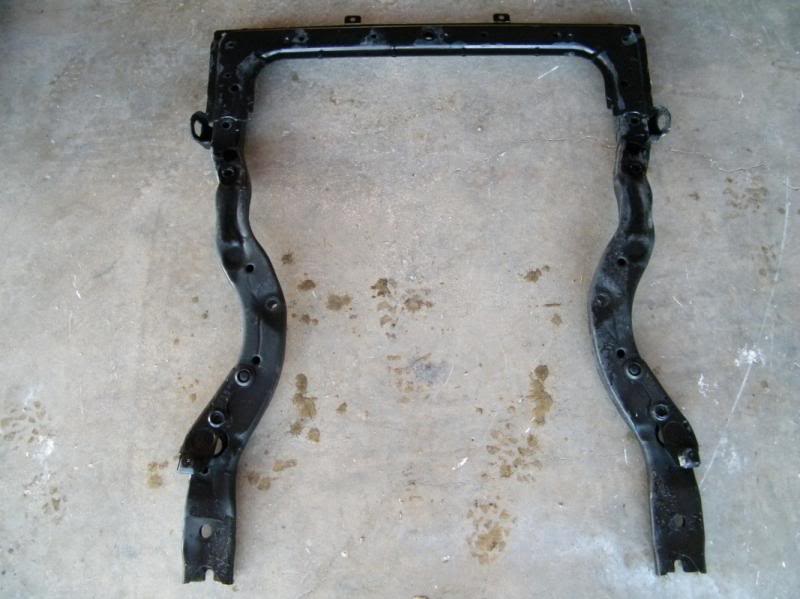
4.) The sub-frame is an odd looking, approximately C shaped, bracket under the front part of the car. The opening of the C is toward the rear of the car. It helps to remove this to make it easier to get to the bolts that hold the sway bar onto the frame.
The sub-frame has five bolts on each leg of the C and two toward the front of the car. The two rearmost bolts require a 14mm socket, the other three on each side require a 17mm socket and the two on the front require a 12mm socket. Start by removing a plastic cover on each side that is held in place by two pop fasteners.
Front sway bar and endlinks install on 02-07 STi: The sub-frame is an odd looking, approximately C shaped, bracket under the front part of the car. The opening of the C is toward the rear of the car. It helps to remove this to make it easier to get to the bolts that hold the sway bar onto the frame.
5.) Remove another pop fastener on each side of the sub-frame.
A step by step guide to rebuilding a Brembo caliper with rebuild kits. This guide includes separating the calipers as well if you want to go that route:
1.) If you have not yet removed calipers from the car remove them, I cleaned mine prior to starting. You will need to disconnect the brake lines and unbolt them from the hub. Also remove the pads, to remove the pads there are 2 pull pin clips thru a set of long pins. The pins hold the pad and metal bracket in place. Remove the 2 pull pins and slide out the 2 longer pins and everything will fall out. Keep in mind there are small plates on the back sides of the brake pads where the pistons hit the pad, these can be easily lost and are marked with arrows for direction.
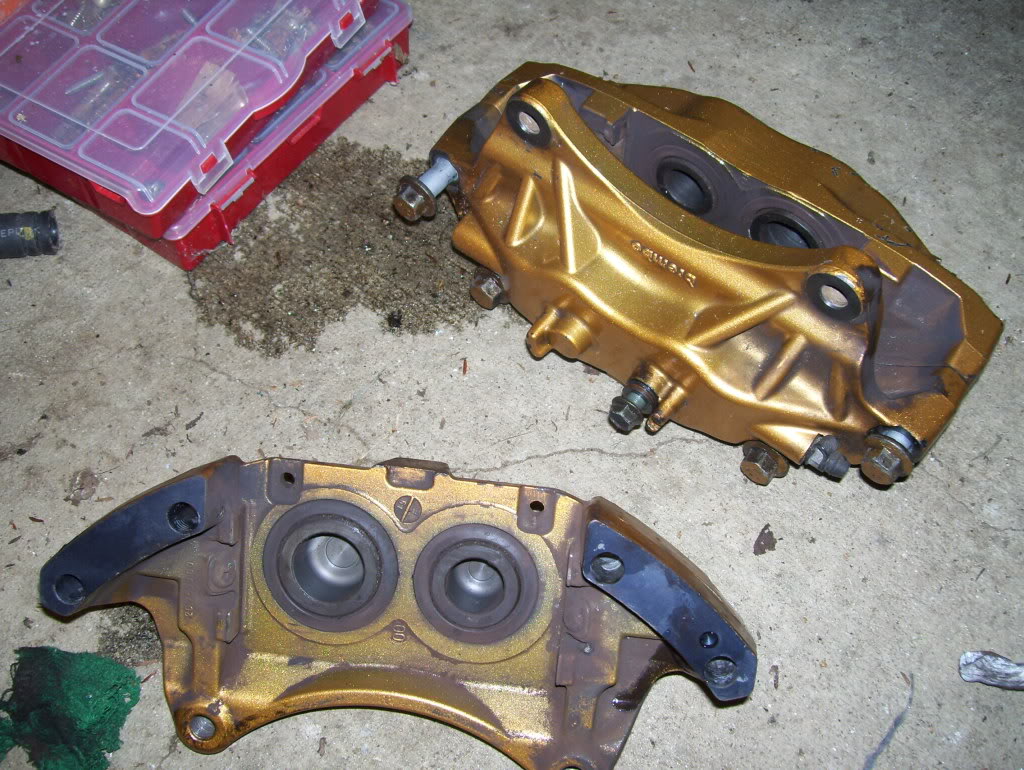
2.) You then need to split the calipers apart, to do this I used a impact wrench but if you have some good strength it is possible to break the bolts. Pretty sure the bolts on the front are a 13mm and the rears use a allen wrench style bolt which i believe is a size 6.
3.) You will want to pop the pistons out. In order to do this I used, for the rear a inch by 5 inch block of wood, for the front you will need a little thicker of a block. Place the block where the rotor would sit so that the piston doesn’t shoot out and kill someone. (trust me these things will FLY) After doing this i made sure my bolts were very lightly tightened into place, I did this because if you leave the gap the pistons will put force in the way of least resistance which basically means its going to shoot the caliper apart and split it which could cause some pain.
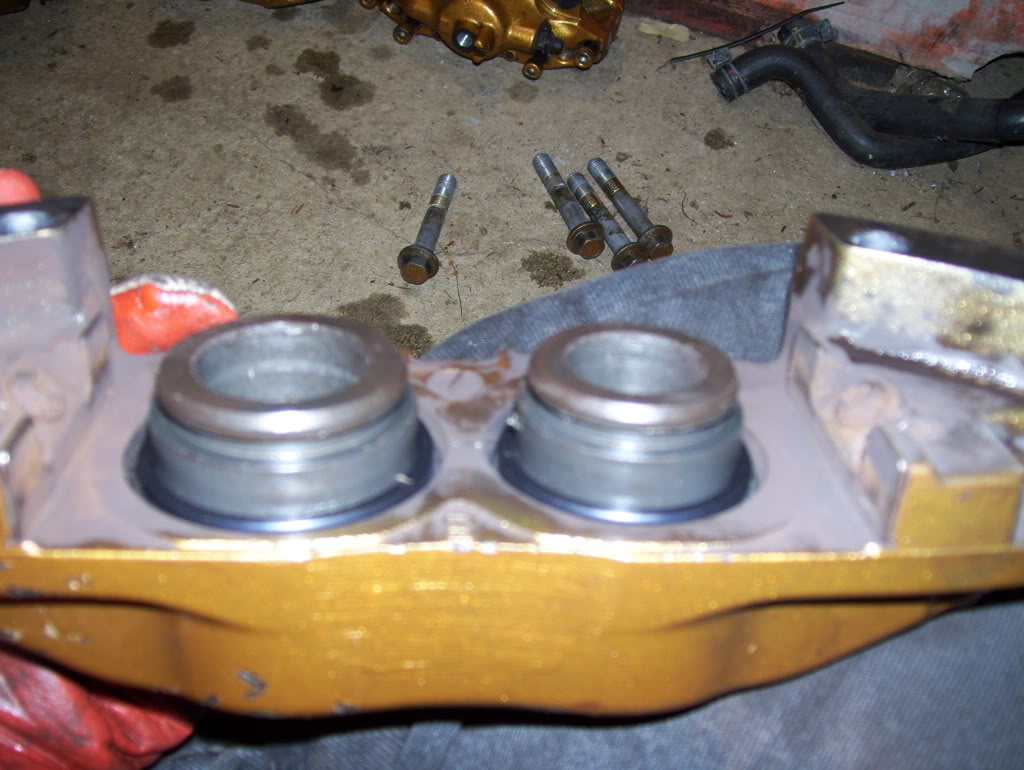
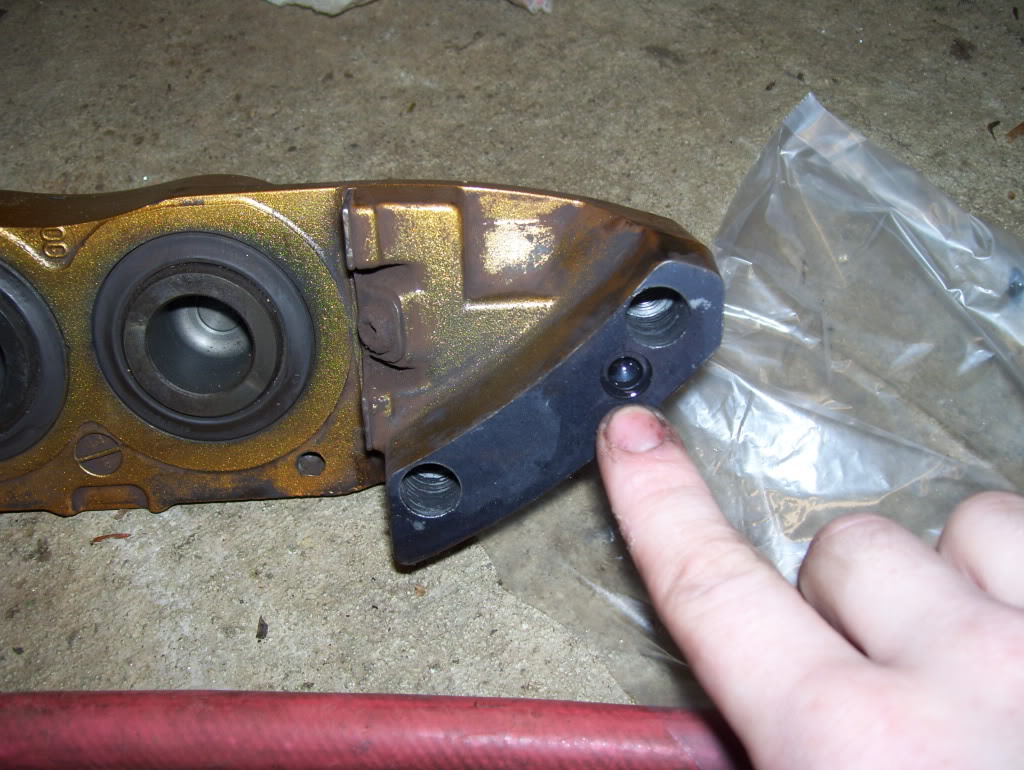
4.) After splitting the calipers and popping the pistons I removed the rubber seal between the 2 pieces as it is small and could very easily be lost. Don’t remove the o-ring prior to step 3 or step 3 is pretty much impossible.
Brembo Caliper: O-Ring removed.Brembo Caliper: O-ring location in a brembo caliper.
The brake master cylinder is located by the driver’s side strut tower and once you find it the rest is pretty self explanatory. I have a 2005 Subaru STi. Some later years might be slightly different.
Tools needed:
10 mm socket and wrenches
Zip tie (optional)
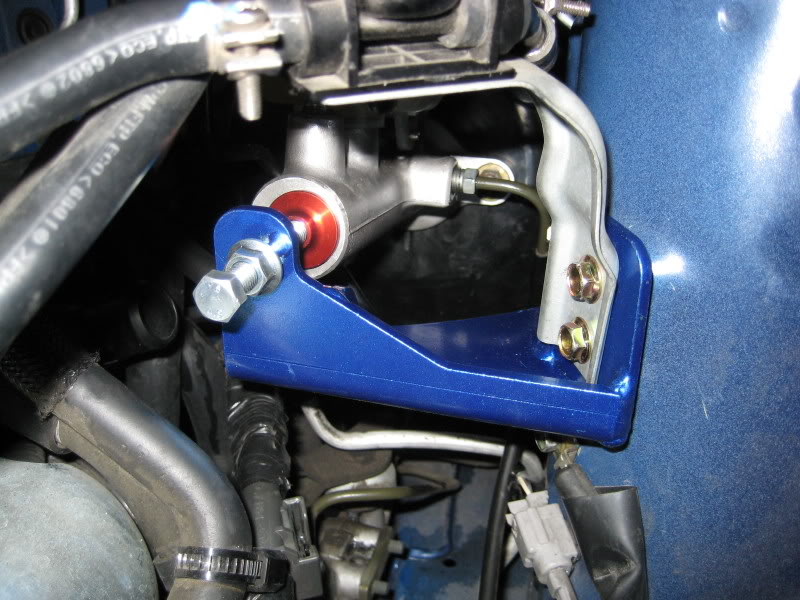
Master Cylinder Brace: A installed Cusco master cylinder brace.
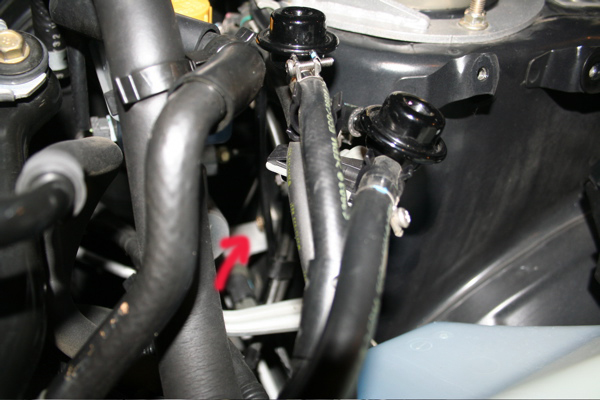
1.) Find the brake master cylinder located just inboard of the drivers side strut tower. The washer fluid bottle will be in the way so unbolt the two bolts and lean it forward, no need to disconnect it altogether.
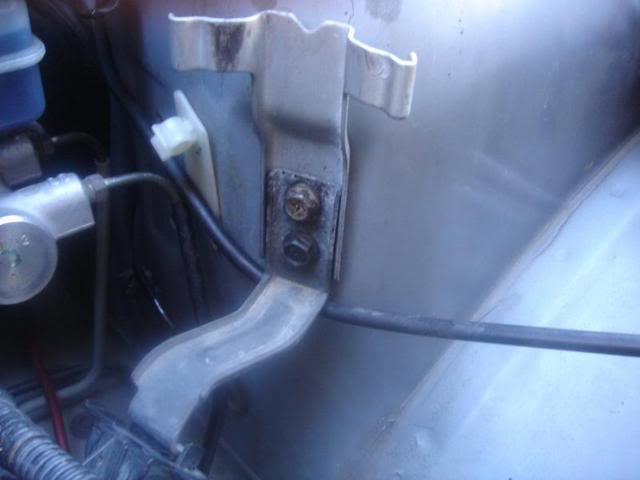
2.) There are two brackets bolted to the strut tower visible in this picture. These are the two holes used to mount the brace. Unbolt these two holes.
Master Cylinder Brace: There are two brackets bolted to the strut tower visible in this picture.
3.)The lower bracket is not compatible with the master cylinder brace. Its best to remove the bracket, then zip tie the lines to the master cylinder brace at the end to keep them secure.
4.)The next bolt to take out is difficult to get a picture of but you will see it easily you can barely see it here, it is located slightly farther towards the back of the car, undo it as well.
Master Cylinder Brace: The hidden bolt is located slightly farther towards the back of the car, undo it as well.
1.) Locate and remove the three 10 mm Gold colored bolts that secure the black vacuum lines to the bottom of the intercooler. You will need a shallow socket as it gets tight around the BOV. Careful not to drop them into the engine bay, it will be a PITA to find and retrieve them.
2.) Locate and remove the two 12 mm bolts that secure the recirculating BOV to the bottom of the intercooler. Again be careful not to drop these into the engine bay as it’s a jungle down there and it will be a PITA to retrieve them.
3.) Locate and remove the two 12 mm bolts that secure the intercooler to the engine. These are located one on each side of the intercooler.
4.) Now the intercooler is only held in place by the rubber intake hoses with the clamps. The one that is on top, from the intercooler to the throttle body/intake manifold is easier so do them first. Using the Flat head screw driver or an 8 mm socket loosen the clamps holding the intake piping to the Intake manifold and intercooler. And leave it for now.
5.) This is a little tough to do, but its not impossible. You should be able to do it even if you have large hands. Using the flat head or 8 mm socket, loosen the clamp that holds the intake tube coming from the cold side of the turbo to the intercooler. This is located underneath the intercooler.
We use cookies on our website to give you the most relevant experience by remembering your preferences and repeat visits. By clicking “Accept”, you consent to the use of ALL the cookies.
This website uses cookies to improve your experience while you navigate through the website. Out of these, the cookies that are categorized as necessary are stored on your browser as they are essential for the working of basic functionalities of the website. We also use third-party cookies that help us analyze and understand how you use this website. These cookies will be stored in your browser only with your consent. You also have the option to opt-out of these cookies. But opting out of some of these cookies may affect your browsing experience.
Necessary cookies are absolutely essential for the website to function properly. These cookies ensure basic functionalities and security features of the website, anonymously.
Cookie
Duration
Description
cookielawinfo-checkbox-analytics
11 months
This cookie is set by GDPR Cookie Consent plugin. The cookie is used to store the user consent for the cookies in the category "Analytics".
cookielawinfo-checkbox-functional
11 months
The cookie is set by GDPR cookie consent to record the user consent for the cookies in the category "Functional".
cookielawinfo-checkbox-necessary
11 months
This cookie is set by GDPR Cookie Consent plugin. The cookies is used to store the user consent for the cookies in the category "Necessary".
cookielawinfo-checkbox-others
11 months
This cookie is set by GDPR Cookie Consent plugin. The cookie is used to store the user consent for the cookies in the category "Other.
cookielawinfo-checkbox-performance
11 months
This cookie is set by GDPR Cookie Consent plugin. The cookie is used to store the user consent for the cookies in the category "Performance".
viewed_cookie_policy
11 months
The cookie is set by the GDPR Cookie Consent plugin and is used to store whether or not user has consented to the use of cookies. It does not store any personal data.
Functional cookies help to perform certain functionalities like sharing the content of the website on social media platforms, collect feedbacks, and other third-party features.
Performance cookies are used to understand and analyze the key performance indexes of the website which helps in delivering a better user experience for the visitors.
Analytical cookies are used to understand how visitors interact with the website. These cookies help provide information on metrics the number of visitors, bounce rate, traffic source, etc.
Advertisement cookies are used to provide visitors with relevant ads and marketing campaigns. These cookies track visitors across websites and collect information to provide customized ads.