Batteries low in voltage (below 11.6 volts) need to be specially charged. A battery at this voltage is heavily sulfated and needs either a very long, slow charge, or a very high initial charge voltage.
Battery Charging Subaru: Batteries low in voltage (below 11.6 volts) need to be specially charged. A battery at this voltage is heavily sulfated and needs either a very long, slow charge, or a very high initial charge voltage.
The battery should be left on the battery charger for at least two days. Since the acid in the battery will mostly be stratified, it needs sufficient overcharge to mix. Even after a two day charge, the battery still may only come to 60-80 percent of capacity and may need to be cycled to come to full charge. If possible, once the battery is fully charged by this method, it’s advisable to finish with a constant 1 amp for an additional 24 hours.
A battery that is below 11.6 volts can also be hydrated. This means there is lead sulfate in the separator that will form lead shorts once the battery charges. Because of these shorts, the battery may self discharge once the battery has been recharged.
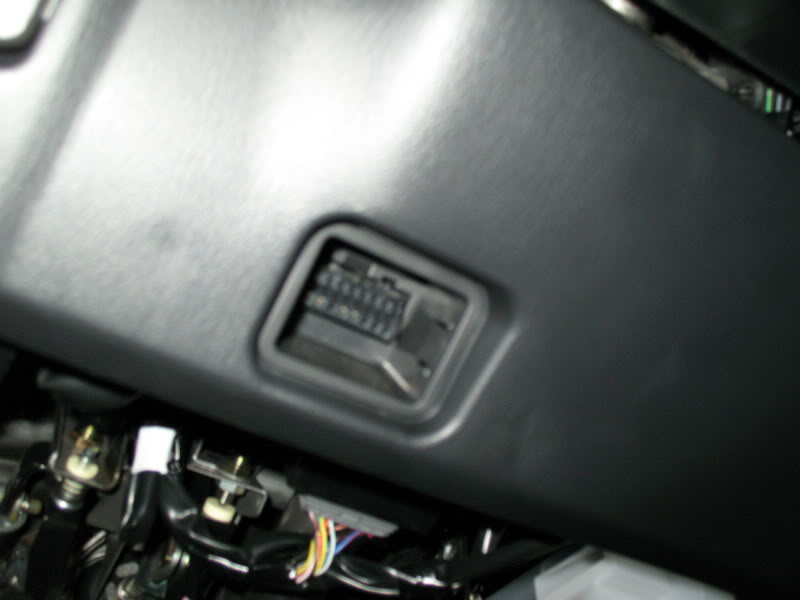
Emission testing of a Full-Time 4WD or all-wheel-drive vehicle must never be performed on a single two-wheel dynamometer, nor should a state I/M program inspector or its contractors install the FWD fuse in the engine compartment. Attempting to do so will result in uncontrolled vehicle movement and may cause an accident or injuries to persons nearby.
State Emission Testing Subaru: Emission testing of a Full-Time 4WD or all-wheel-drive vehicle must never be performed on a single two-wheel dynamometer.
Resultant vehicle damage due to improper testing is not covered under the SUBARU Limited Warranty and is the responsibility of the state I/M Program or its contractors or licensees.
The 1990 Clean Air Act Amendments require the Environmental Protection Agency (EPA) to implement programs to reduce air pollution from motor vehicles. Certain states are required to adopt either a “basic” or “enhanced” vehicle Inspection/Maintenance (l/M) Program, depending on the severity of their air pollution problem.
The ‘enhanced’ I/M emission testing simulates actual driving conditions on a dynamometer and permits more accurate measurement of tailpipe emissions than the ‘basic’ I/M test, which measures emissions only during engine operating conditions at idle and 2500 RPM. The ‘enhanced’ l/M test also includes a pressure check to identify evaporative emissions leaks in the fuel system.
A major component of the Subaru OBD-II system is the system’s ability to monitor the evaporative emissions system. Today’s vehicles are producing very low emissions from the tailpipe, so it has become increasingly important to monitor and contain emissions from other vehicle sources.
Evaporative Emissions Testing Subaru: A major component of the Subaru OBD-II system is the system’s ability to monitor the evaporative emissions system.
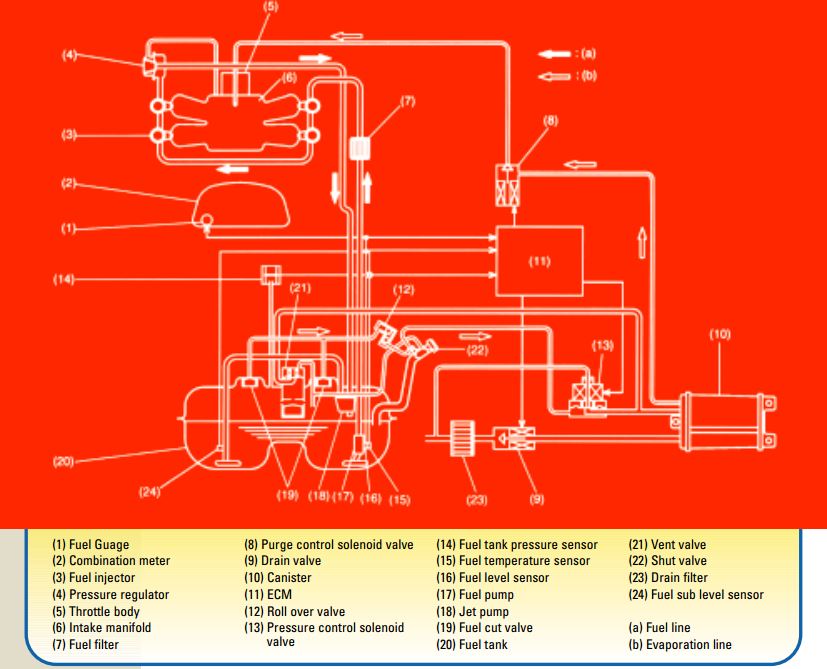
A potentially large source of emissions is the vehicle’s fuel system. If not properly contained, vapors escaping from the fuel tank could produce a larger quantity of harmful emissions while the vehicle was standing still than what would be emitted via the tailpipe when the engine was running and the vehicle was driving down the road.
The Subaru OBD-II system monitors the evaporative emissions system by drawing the system to a negative pressure. If the system holds vacuum, it passes the test. If the system fails to hold vacuum for the prescribed period, it fails and a diagnostic trouble code (DTC) P04440 is stored in the ECM memory. The malfunction indicator light (MIL) also comes on in the dash to alert the driver to the problem.
The charts that follow were collected through the data link connector using the New Select Monitor (NSM), during the diagnosis of a DTC P0440 on a 1997 Subaru Legacy 2.5 liter. We’ll begin with a description of system operation under normal operating conditions.
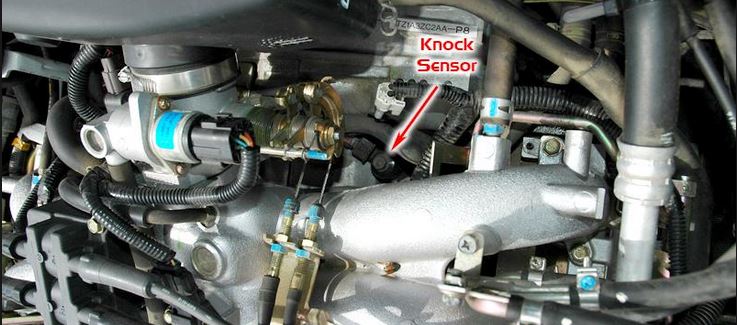
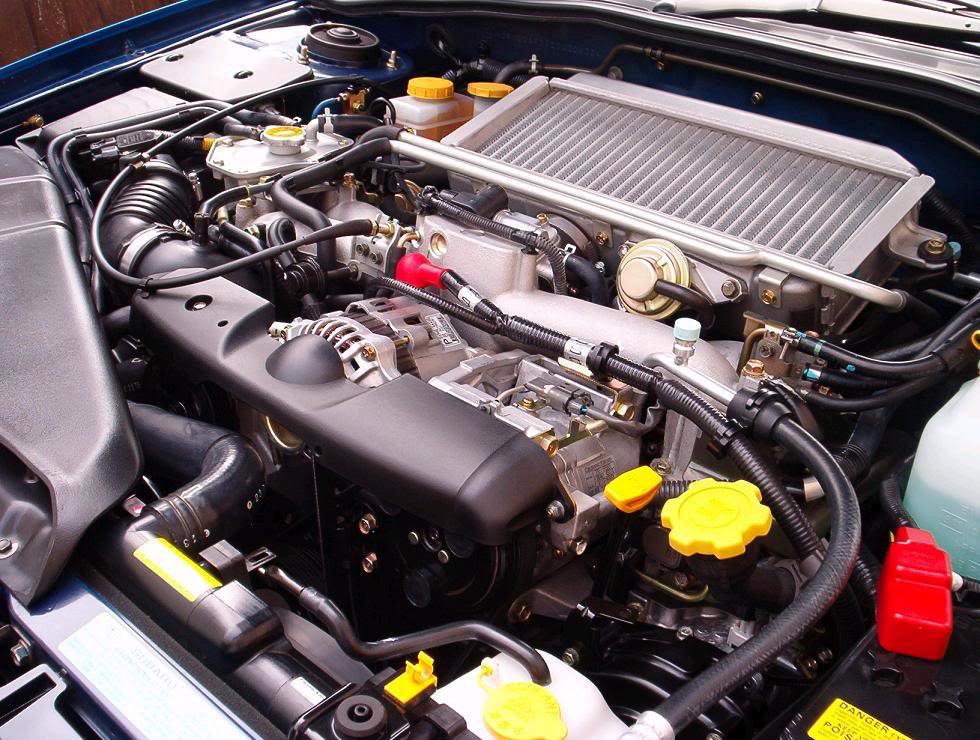
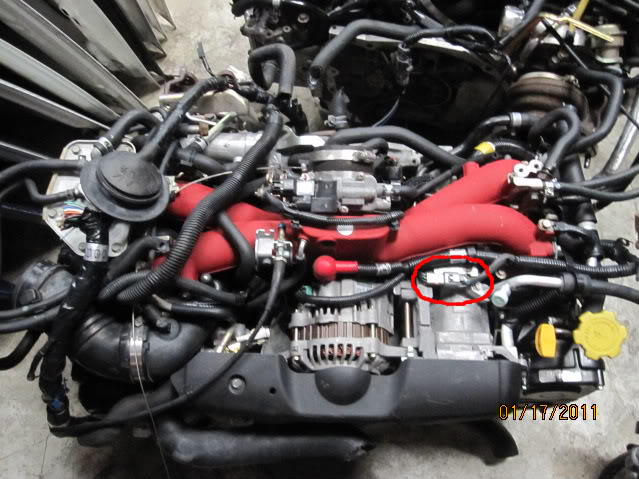
This is a simple overview on diagnosing knock sensor issues with your Subaru Impreza/Forester/Legacy/Etc.
The knock sensor is designed to sense knocking signals from each cylinder. The knock sensor is a piezo-electric type element which converts knocking vibrations into electrical signals.
The knock sensor is designed to sense knocking signals from each cylinder. The knock sensor is a piezo-electric type element which converts knocking vibrations into electrical signals. The electrical signal is sent to the ECM, which changes the ignition timing to reduce the engine knock or ping. For this system to work correctly, the knock sensor must first hear the engine ping. The driver of the vehicle may also hear a small engine ping. A delay of approximately 1-2 seconds is normal, depending on the fuel quality, engine load, air temp, etc. At this time, the ECM will retard the timing.
This function can be viewed on the Select Monitor RTRD mode. When the knock is eliminated, the timing is gradually advanced to the specified setting. If engine ping is heard again this process is repeated. This will continue until the knock sensor no longer hears the engine knock or ping.
Note: This is a normal operation of the knock sensor. Do not try to repair it.
The next page will discuss asking the right questions on diagnosing knock sensor failures.
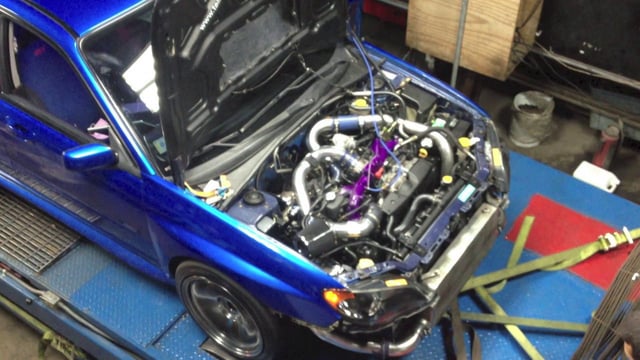
It is not necessary to perform a cool down/idling procedure on Subaru WRX turbo models, as was recommended with past turbo models. “The current 2.0 liter turbo engine has a far greater cooling capacity and, coupled with technology advances, makes this practice no longer necessary. This explains why information about a cool down is not included in the Impreza Owner’s Manual.
Cool Down WRX Turbo Procedure: It is not necessary to perform a “cool down/idling” procedure on Subaru WRX turbo models, as was recommended with past turbo models.
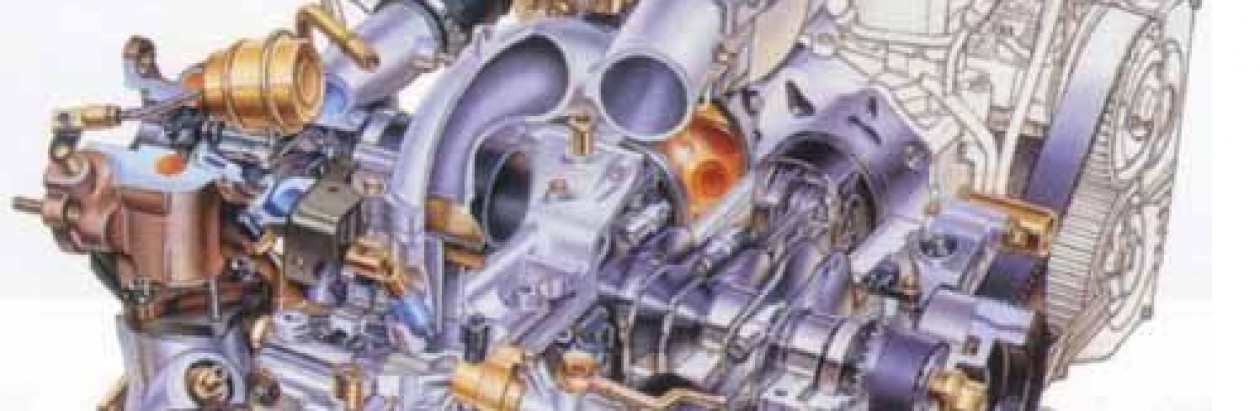
The heat contained in the turbocharger begins to vaporize the coolant at the turbocharger after the engine is stopped. This hot vapor then enters the coolant reservoir tank, which is the highest point of the coolant system.
At the same time the vapor exits the turbocharger, coolant supplied from the right bank cylinder head flows into the turbo. This action reduces the turbocharger temperature. This process will continue until the vaporizing action in the turbocharger has stopped or cooled down.
The Environmental Protection Agency (EPA) now has regulations in place that establish requirements for on-board diagnostic (OBD-II) systems on light-duty vehicles and light-duty trucks. The purpose of the OBD-II system is to ensure proper emission control system operation for the vehicle’s lifetime by monitoring emission-related components and systems for deterioration and malfunction.
OBD-II Subaru Diagnostic Systems: The Environmental Protection Agency (EPA) now has regulations in place that establish requirements for on-board diagnostic (OBD-II) systems on light-duty vehicles and light-duty trucks.
There’s a big difference between detecting only hard faults (OBD-I) and having the ability to actively monitor the system for proper operation, deterioration or a malfunction (OBD-II).
Engines in today’s vehicles are largely electronically controlled. Sensors and actuators sense the operation of specific components (e.g., the oxygen sensor) and actuate others (e.g., the fuel injectors) to maintain optimal engine control. An on-board computer, known as the “powertrain control module,” controls all of these systems.
For those of you who are interested, this is how Subaru breaks down a part number. This could help you guess a part number if one that you found on a part is missing digits or is damaged.
Part number decoder for Subaru: For those of you who are interested, this is how Subaru breaks down a part number.
Genuine Part Classification Codes
A = Part Description Code
B = Part Sequential Code
C = Part Category Code
D = Specific Code
E = Modification Code
F = Color Code
Description of Genuine Part Classification Codes
A. Part Description Code: Identifies part name and function. If the first position is an alpha, it identifies an accessory.
B. Part Sequential Code: Sequential number system assigned to the part number by Fuji Engineering Division.
C. Part Category Code: Key position of the part number in determining the logic of the numbering system:
A = Engine and Transmission Parts
K = Engine and Transmission Parts
X = Some Automatic Transmission Parts
G = Body Parts
D. Specific Parts: Identifies specific characteristics of parts with the same part description code and designated sequences from A00. The specific code is assigned by the Fuji Engineering Division for internal use only.
E. Modification Code: Identifies an engineering change to the part. For example:
0 = original
1 = 1st modification
2 = 2nd modification
3 = 3rd modification
F. Part Color Code: Identifies color coded parts for digits 11 and 12. Digit 11 = color and digit 12 = degree.
Code E or F in the 12th digit is for Fuji Heavy Industries (FHI) internal purposes only.
Note: Code E or F in the 12th digit is for Fuji Heavy Industries (FHI) internal purposes only.
For example look at these rare 22B parts with their part numbers.
Since 1996, original equipment manufacturers have been using R-134a in all automotive air conditioning systems. R-134a is now the refrigerant of choice. This short article will help you learn proper safety procedures regarding the use of R-134a. Also, to stress the importance of refrigerant identification for OEM automotive A/C systems, we will explain some of the specific system component changes, and discuss important changes to A/C service equipment.
You may already be familiar with R-134a, A/C retrofits, and proper procedures. If you are confident of your abilities and retrofit knowledge, try answering the 20 question quiz that ends this article. If you are not sure about your R-134a retrofit knowledge, read this article first.
R-134a A/C refrigerant guide for Subaru cars: Since 1996, original equipment manufacturers have been using R-134a in all automotive air conditioning systems. R-134a is now the refrigerant of choice.
What Is R-134a?
R-134a does not contain suspected ozone-depleting chlorofluorocarbons. The chemical compounds and molecular structures of the old refrigerant R-12 and the new refrigerant R-134a are completely different. However, the temperature/pressure relationships of the two are very similar. Automotive publications, equipment manufacturers, and refrigerant suppliers, provide technical specifications and properties for R-134a.
R-134a and R-12 are not compatible. Under no circumstances should they be mixed. Vehicle and service manufacturers have gone to great lengths to prevent cross-charging or contamination of these two refrigerants. For instance, R-12 systems use a small high-side service port, and a large low-side service port. R-134a service fittings are completely different. The high side service port is now the larger of the two. These quick disconnect fittings will not work with R-12 service equipment.
We use cookies on our website to give you the most relevant experience by remembering your preferences and repeat visits. By clicking “Accept”, you consent to the use of ALL the cookies.
This website uses cookies to improve your experience while you navigate through the website. Out of these, the cookies that are categorized as necessary are stored on your browser as they are essential for the working of basic functionalities of the website. We also use third-party cookies that help us analyze and understand how you use this website. These cookies will be stored in your browser only with your consent. You also have the option to opt-out of these cookies. But opting out of some of these cookies may affect your browsing experience.
Necessary cookies are absolutely essential for the website to function properly. These cookies ensure basic functionalities and security features of the website, anonymously.
Cookie
Duration
Description
cookielawinfo-checkbox-analytics
11 months
This cookie is set by GDPR Cookie Consent plugin. The cookie is used to store the user consent for the cookies in the category "Analytics".
cookielawinfo-checkbox-functional
11 months
The cookie is set by GDPR cookie consent to record the user consent for the cookies in the category "Functional".
cookielawinfo-checkbox-necessary
11 months
This cookie is set by GDPR Cookie Consent plugin. The cookies is used to store the user consent for the cookies in the category "Necessary".
cookielawinfo-checkbox-others
11 months
This cookie is set by GDPR Cookie Consent plugin. The cookie is used to store the user consent for the cookies in the category "Other.
cookielawinfo-checkbox-performance
11 months
This cookie is set by GDPR Cookie Consent plugin. The cookie is used to store the user consent for the cookies in the category "Performance".
viewed_cookie_policy
11 months
The cookie is set by the GDPR Cookie Consent plugin and is used to store whether or not user has consented to the use of cookies. It does not store any personal data.
Functional cookies help to perform certain functionalities like sharing the content of the website on social media platforms, collect feedbacks, and other third-party features.
Performance cookies are used to understand and analyze the key performance indexes of the website which helps in delivering a better user experience for the visitors.
Analytical cookies are used to understand how visitors interact with the website. These cookies help provide information on metrics the number of visitors, bounce rate, traffic source, etc.
Advertisement cookies are used to provide visitors with relevant ads and marketing campaigns. These cookies track visitors across websites and collect information to provide customized ads.