Tag Archives: Swap

Transmission: STi 6-Speed basic swap info into a WRX

Front Differentials:
02-07 WRX: open
04 STi: “SureTrac” LSD
05-07 STi: “Helical” LSD
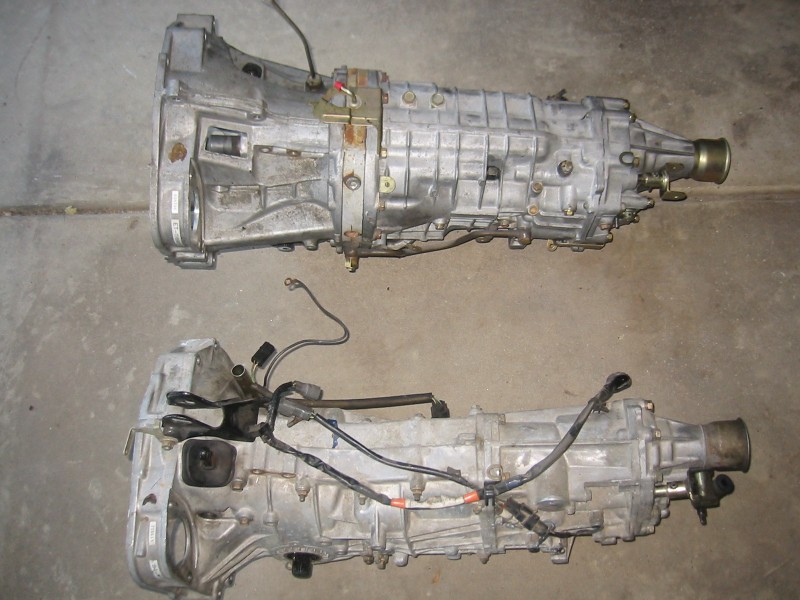
Transmission: Sti 6-Speed vs. WRX 5-speed

Rear Differentials: R160, R180
These were originally used in the Datsun 510, 610 and other IRS Datsuns. The “R” stands for Fuji Heavy Industries. The R180 was used in the front axle of Datsun 4×4 trucks (720, etc). The number represents the ring gear size in millimeters.

R160 – 52lbs. WRX rear differential. It has a viscous LSD which is no better than an open differential since the unit is so tiny in this differential.
02-05 have a 3.54 gear ratio
06-07 have a 3.70 gear ratio
R160’s on 2.2L Legacy/Impreza’s have a 3.9 gear ratio

R180 – 64lbs. STi rear differential. It has a mechanical clutch type LSD.
04-05 R180’s have a 3.90 gear ratio
06-07 R180’s have a 3.54 gear ratio

Center Differentials:
02-07 WRX: Viscous coupling type
02-05 has a 1.1:1 gear ratio
06-07 has a 1:1 gear ratio
04-07 STi: DCCD (Driver Controlled Center Differential)
04-05 has a 1:1 gear ratio
06-07 has a 1.1:1 gear ratio

Do I need different front axles?
02-early 04 WRXs have female axles and need to use stubs that go inside the transmission . Late 04-07 WRXs use male ended axles that slide inside the front differential so there is no need for stubs. For the female axles, you need axle stubs, circlips, and seals to reuse the WRX axles (check out the seal differences link for part numbers). You can use the stubs from your 5MT. For the male ended axles, they just slide right into place with the correct seals and circlips. 04 STi front axles will work too.

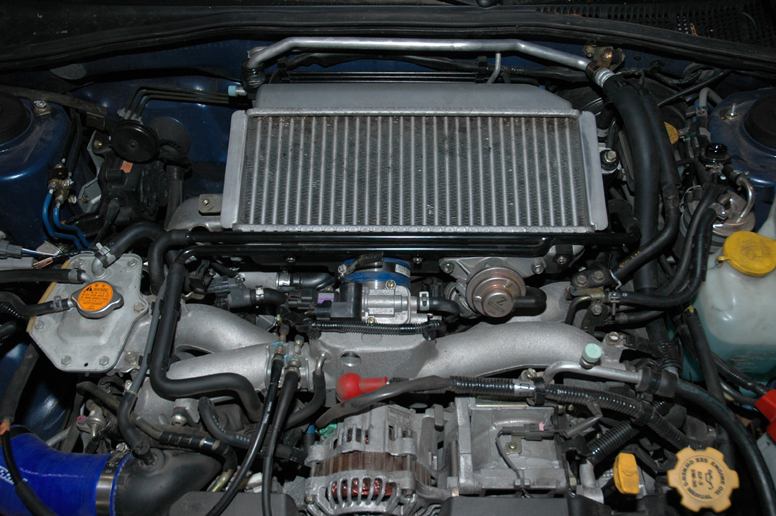
STi intercooler install on a Subaru WRX

You can easily install the upgraded STI top-mount intercooler in your garage using basic tools.

1. Disconnect your battery and make sure you have all the necessary tools. You need a flat bladed screwdriver, a 10mm wrench, and a 12mm wrench. Consider the picture before you in the engine compartment. The parts you’re looking for are centered on top of the engine. You need the new intercooler, an STI Y-pipe and inlet elbow and a new gasket for the bypass or blow-off valve. You also need the STi air conditioning line bracket for the firewall.

This is the stock WRX engine with the stock intercooler on top.

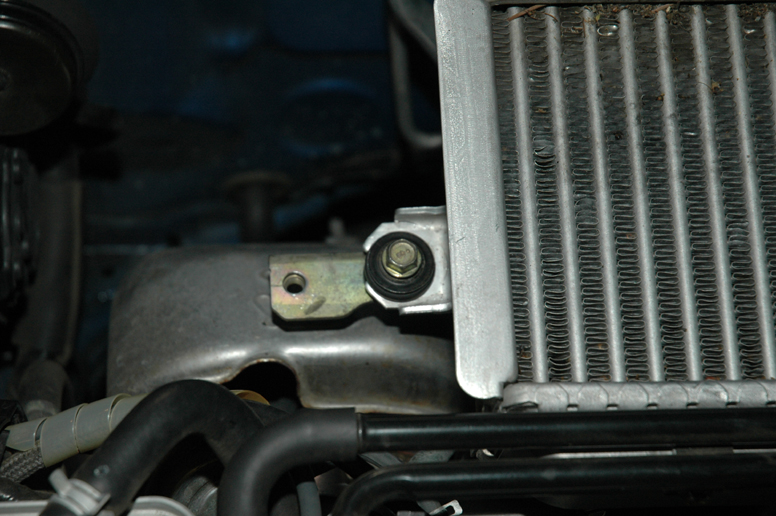
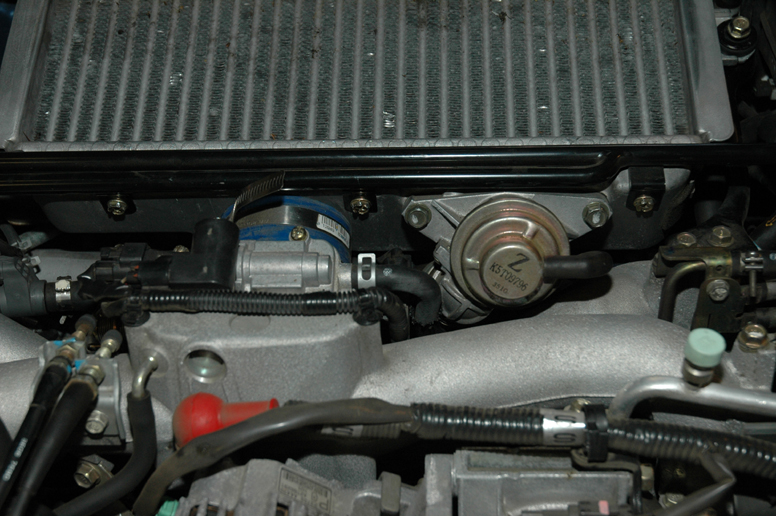
2. Two 12mm bolts that hold the intercooler to its mounting bracket on either side of the cooler. On the passenger side, note that there’s an open hole in the bracket—this hole is there to accommodate the STI intercooler. Three 10mm bolts hold a metal tube to the front of the intercooler, and two 12mm bolts that attach the bypass valve. Underneath the intercooler on the passenger side, there’s a hose clamp that holds the Y-pipe to the turbo, and there’s another hose clamp in front that holds the intercooler to the throttle body.

Note the extra bolt-hole Subaru thoughtfully placed in just the right spot for an STI intercooler.
You need to undo all these bolts along the front of the intercooler.

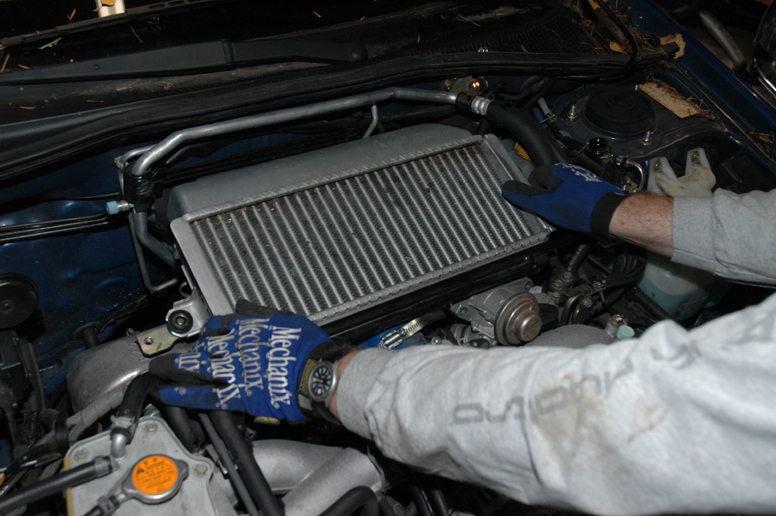
3. Loosen the hose clamps first (and hopefully the one under the intercooler is oriented to make this easy) and then undo all the bolts. The intercooler should lift out and take the Y-pipe with it. Leave the bypass valve on the intake manifold—you don’t need to totally disconnect it. You might need to wiggle it loose, but don’t pull too hard.

Carefully lift out the intercooler and the hoses should come free if you’ve loosened the clamps.

Trunk swaps for STi and WRXs

Remove the glow in the dark release handle. Once this is done you can get to the lock. Simply twist the orange thing around, and pop the metal rod. Take a screw driver (you also might need a hammer as well) and pry that black clip off. Its really tight on there so you will need to use some force (this clip is exactly like the clip securing the brake lines).

Remove latch from trunk (optional as it may not be needed)
Remove the 2 bolts, twist yellow thing around and pop out that metal rod. You will also need to pop out the cable from that glow in the dark handle.

Remove trunk
Remove the 4 12mm bolts that secure the trunk to the trunk arms. Beware that the STi trunk weighs a TON (something like 50+ lbs). You will also have to unplug the 3rd brake light and clip all the wire retainers off the STi trunk arm to get the trunk off.

VF39 STi turbocharger onto your WRX/Forester

VF39 STi turbocharger onto your WRX/Forester:

Swapping a STi VF39 turbocharger onto your WRX/XT is really easy. Find out here the step by step process on swapping a VF39 onto your Subaru WRX/XT.

You can buy a brand new VF39 Turbocharger here:

Subaru 14411aa5729L Turbocharger

A lot of people seem to be getting hung up on the oil return lines and coolant lines. The coolant lines and banjo bolts from the TD04 ARE interchangeable if your vf39 doesn’t have them (mine didn’t). The oil return line is not and must be modified in order to fit the vf39, (mine had it). Or get a new one from the dealer. I will explain in the pictures when I get to these items.

First remove the intercooler, pretty self explanatory there are 2 bolts that it mounts to, 2 on the BPV and the hoses. Done Deal. Next the heat shield. You should be somewhere around here:

VF39 STi turbocharger onto your WRX/Forester: Start removing the head shield and downpipe.


Remove the downpipe:

VF39 STi turbocharger onto your WRX/Forester: Start removing the downpipe.

Then remove the bolt for the oil inlet (top of the turbo), and start removing the coolant lines (2 lines coming off the side of the turbo 1 goes up 1 goes down). Be careful as you will lose coolant during this step be prepared to either catch it under the car or plug the line:

VF39 STi turbocharger onto your WRX/Forester: Remove coolant lines and oil lines.

Then remove the 3 bolts that hold the turbo to the uppipe. Loosen from the intake remove vacuum lines and anything else attached to the turbo and you should be ready to take it off. The hose that the oil return line fits into is directly under the turbo and you should probably just lift straight out. Try to leave the hose where it is and lift the line out.

Now that the turbo is off you can start swapping out the parts you need from the td04. The coolant lines from the TD04 will fit the VF39 however they are attached and too close together to fit directly on the VF39 see pic:

VF39 STi turbocharger onto your WRX/Forester: changing out oil lines.

Steering wheel Subaru GD/GR STi steering wheel removal

GD STi steering wheel
Subaru Impreza GD STi steering wheel


When removing the airbag from the steering wheel, be sure to turn the ignition switch to OFF, disconnect the ground cable from battery, and wait for more than 60 seconds prior to starting work. The airbag system is fitted with a backup power source. If the airbag system is serviced within 60 seconds after the ground cable is disconnected, it may inflate.

When storing a removed airbag module, do not place any objects on it or pile airbag modules on top of each other. If the airbag inflates for some reason when it is placed with its pad side facing downward or under any object, a serious accident may result. Do not drop the airbag modulator parts.


REMOVAL

1) Disconnect the ground cable from battery.

  • Use a 10mm socket to do so
  • Please remember that if you have Cobb AccessPort, your real time map will be need to be reflashed after disconnecting the battery

2) Set the tires to straight-ahead position.

  • Do your best to park as straight as possible. We suggest straightening the wheel and driving forward approximately 15ft. Try having a friend help you with this.

3) Remove the airbag.

  • In order to remove the airbag, you will need a T30 TORX bit.
  • You will find the two bolts on the left and right-hand side of the steering wheel, approximately at 9 and 3 o’clock (refer to figure 1.0 in the “Reference Images” section of this installation guide).
  • These are lightly torque (~5 to 7.2 ft.lbs) and will not come out of the steering wheel.
  • Once these are loosened, you may gently remove the airbag.
  • You will immediately notice the airbag harness. There may be one or two plugs and one ground plug connected to the airbag. The ground is removed with another gentle pull. The main connectors, located on the center of the rear of the airbag, will have either one yellow or one yellow and one pick lock tabs. Use a small flat head to gently pry this upward. Place this yellow lock tab in a safe place (refer to figure 1.2 or 1.3 for applicable model year).
  • Your airbag is now ready to be removed! Please take great care in storing your airbag!