Category Archives: Ej20

Oil pan removal and install on Subaru STi/WRX:

Oil pan removal Subaru STi/WRX:

This is a step by step guide on removing and re-installing a oil pan on your Subaru Impreza STi or WRX. This guide is also useful for installing a STi spec oil pan onto your WRX. This guide also is helpful if you are removing your stock oil pickup tube that is known to crack on the STi. I suggest purchasing a Killer B Motorsport Pickup Tube along with a brand new STi oil pan. Both can be purchased from down below from Amazon.

Brand new STi oil pan:

Subaru 11109AA131 Oil Pan

Killer B Motorsport Pickup Tube:

Killer B Motorsport Subaru Oil Pan Pickup Tube for EJ25 WRX/STI


Oil Pan Removal Steps:

1) Remove the plastic under tray from your engine. This is secured using a few bolts and plastic push clips.

2) Remove the plastic under trays from either side of the car, the long ones.
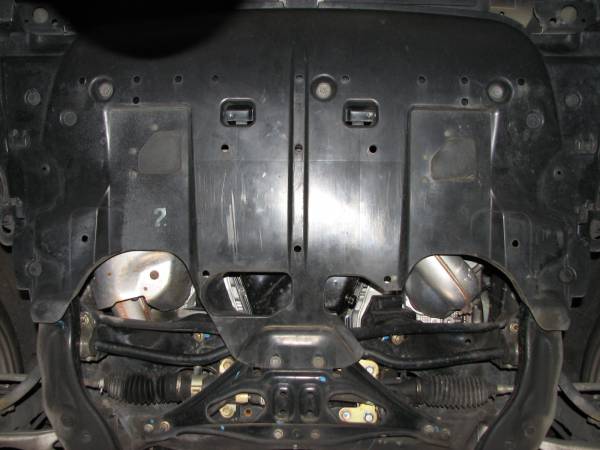
Oil pan removal and install: Remove plastic to gain access to the bottom of the engine.

3) Remove the jacking plate. This is held on by 2 12mm bolts with nuts in the front, 2 12mm bolts in the rear and 4 14mm nuts on the sides.

4) Remove your subframe. This is secured by a few 19mm bolts, 2 12mm bolts in front and 4 14mm bolts. I highly recommend soaking these all in your PB blaster and waiting 5 minutes. Check out some of my other posts for instuctions.

5) Remove the front oxygen sensor. The correct way is to unplug the clip, unhook it from the metal mount and then pull the wire through the fender-well so that the wire isn’t being stretched and twisted as you unscrew it.
O2 sensor location in the exhaust manifold.

Pitch Stop Install on Subaru WRX/STi

Pitch Stop Mount Install on Subaru WRX/STi:

This is a step by step guide on how to install an aftermarket Pitch Stop Mount to your 02-07 Subaru WRX or STi.

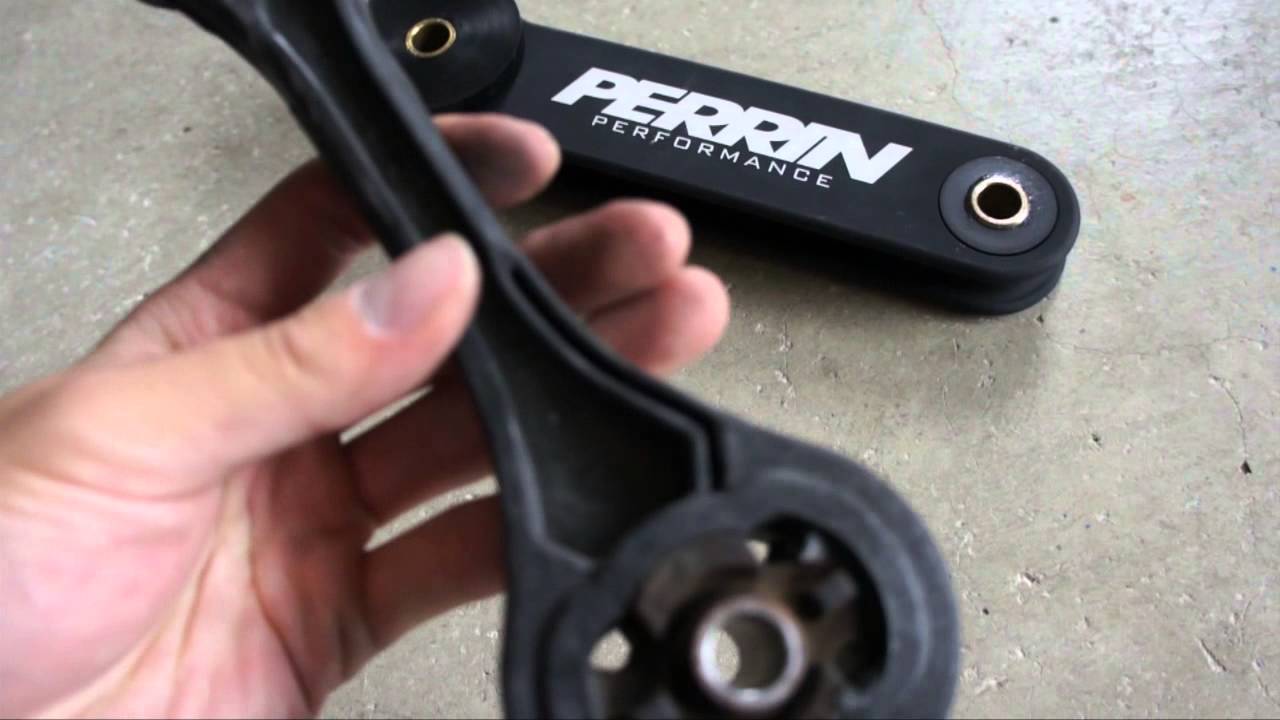
Pitch Stop Mount: In the foreground a oem plastic pitch mount and in the background a Perrin Performance pitch stop mount.

1.) Locate and remove the three 10 mm Gold colored bolts that secure the black vacuum lines to the bottom of the intercooler. You will need a shallow socket as it gets tight around the BOV. Careful not to drop them into the engine bay, it will be a PITA to find and retrieve them.

2.) Locate and remove the two 12 mm bolts that secure the recirculating BOV to the bottom of the intercooler. Again be careful not to drop these into the engine bay as it’s a jungle down there and it will be a PITA to retrieve them.

3.) Locate and remove the two 12 mm bolts that secure the intercooler to the engine. These are located one on each side of the intercooler.

4.) Now the intercooler is only held in place by the rubber intake hoses with the clamps. The one that is on top, from the intercooler to the throttle body/intake manifold is easier so do them first. Using the Flat head screw driver or an 8 mm socket loosen the clamps holding the intake piping to the Intake manifold and intercooler. And leave it for now.

5.) This is a little tough to do, but its not impossible. You should be able to do it even if you have large hands. Using the flat head or 8 mm socket, loosen the clamp that holds the intake tube coming from the cold side of the turbo to the intercooler. This is located underneath the intercooler.

Oil Change 04-07 Subaru WRX/STi DIY:

Oil Change 04-07 Subaru WRX/STi DIY:

If you’ve never changed oil on a 04-07 WRX STi this guide will take your step by step through the oil change process. This guide should be applicable to most turbocharged Subaru cars throughout the years. Check at the end of the post for part numbers, oil, filters and tools needed to complete an oil change.

Oil Change: The legendary oil filter subaru ring of fire.

1.) Get you car on a hard, even, flat surface and get your car up on jack stands. I put mine up on 4 jack stands, so that later on when you are draining the oil, the car is already level and will drain properly.
Where to jack and put jack stands has been debated many times before.

2.) Once you get your car up on 4 jack stands, it is time to remove the brush guard. There are 5 bolts to remove and they are all 12mm.

3.) Now that you got your brush guard off its time to get under the car and start your oil change. You should take a second and locate the oil filter and the oil drain plug.

4.) If your engine is cool, go ahead and start it up and let it run for about 5 minutes. This helps with the oil change. The oil gets warm and drains much easier and quicker.

Turboback Exhaust Install on 02-07 Subaru WRX:

Turboback Exhaust Install on 02-07 Subaru WRX:

Bone stock the WRX is one of the best performing entry level sports cars you can find, but there’s always room for improvement. Replacing the stock 2.25″ turboback exhaust and it’s 2 catalytic converters with a 3″ turboback exhaust, featuring one high flow cat, should allow the turbo to spool up easier and quicker for more low end grunt.

1.) Remove the heatshield. You’ll be amazed at the amount of bolts used to hold on this simple piece of metal. There are 5 on the left side (viewing from the front of the car), one on the back, and two on the right side. After you have all the bolts removed you’re going to need some keen geometry skills to get the heat shield out of the engine bay but once you do, the downpipe to turbo connection is easily available. Once the downpipe is exposed look for the bottom heatshield. It connects to the downpipe by one bolt.

2.) Loosen the downpipe. There are only 5 bolts holding the downpipe to the turbo. They are surprisingly easy to get to. Now would also be a good time to remove the O2 sensor from the Downpipe.

3.) Disconnect the remaining hangers. It’s a good idea to use photos of the exhaust out of the car in order to point out where the hangers are in relation to the whole system. Install the new downpipe by lining up the turbo/downpipe bolts then securing the hangers. There are 2 hangers for the downpipe shown here. The front one bolts into the transmission. The second rests on a J bracket and is screwed in.

O2 Sensor replacement on 02-07 Subaru WRX/STi:

O2 Sensor replacement on 02-07 Subaru WRX/STi:

This is a guide to replace your front 02 sensor in your 02-07 Subaru WRX/STi. This guide will go step by step through the process.

Denso 234-9120 Oxygen Sensor (Air and Fuel Ratio Sensor)

O2 sensor location in the exhaust manifold.

1.) The first thing you need to do is place the jack under your car. I chose to use the pinch weld under the passenger’s door area. Next you will want to remove the wheel from the car so you will have better access to the O2 sensor. I did this by using a 19mm socket with an extension.

2.) Upon removing the wheel, you should notice a small plastic flap with a few plastic retaining screws holding it in place. I have circled them in red in the picture below.

3.) You are going to want to remove these using flat head and phillips head screw drivers. Take care in making sure you do your best to not strip them out. If you do, you will end up having to either pry them out or pull them out with a set of pliers. If you need to replace any of these, you can usually find them at any autoparts store.

4.) Once you have all of the plastic screws pulled out, remove the plastic cover.

5.) If you pull the remaining plastic cover to the right, you will be able to see the O2 sensor. You can opt to remove the larger of the plastic fender well shields, but I did not see much point in doing so as it would not really yield much more room for access.

6.) With the O2 sensor exposed, you will want to spray it with some lubricant and my preferred lubricant is PB Blaster. With that now soaking in a bit, you are now going to want to go and pop your hood to gain access to the plug end of the sensor.

7.) Looking at your engine bay, you will want to move to the left side (passenger side). Underneath this cover are two connections, the top one is for your front O2 sensor. Go ahead and disconnect that plug.

Banjo Bolt (Union) removal/install on a Subaru WRX STi

Banjo Bolt (Union) removal and install on a Subaru WRX STi:

This is Banjo Bolt step by step guide on the removal and installation of a Banjo bolt and new copper washers for a Subaru WRX/STi or any other turbocharged Subaru.The Banjo bolt is the one with a filter screen that others have indicated should be cleaned or replaced periodically. Subaru calls it a “Union screw (with protrusion).”
Tools needed:
12 mm socket – for intercooler bracket bolt
14 mm deep-well socket – for up-pipe bracket nut and bolt
10 mm socket or wrench – for stock turbo heat shield bolt
17 mm ratcheting wrench – for Banjo bolt
10 inch or longer extension – to reach up-pipe bracket bolts

Parts needed:
Union screw/Banjo Bolt (If replacing which I highly suggest you do.) – Subaru part # 14445AA090

Subaru 14445AA090 Oil Filter Bolt

OR

Genuine Subaru Turbo Banjo Bolt with Screen – 14445AA090a
Copper washers (2) – Subaru part # 803912040
Subaru 803912040 Banjo Washer


Removal and re-install takes about one hour.

Start by removing any heat shields that are in the way. I have the SPT heat shield that comes off by removing the 12 mm intercooler support bolt.
(See pic “Engine bay area”). I also have the stock turbo heat shield installed. I didn’t take it off, but there will be a little more room to work if you do. A 10 mm socket is needed to remove the stock heat shield bolts.

The next page will describe the removal and re-installation process of the Banjo Bolt and copper washers.

Motor Mount install for Subaru Impreza WRX/STi

Motor Mount install for Subaru Impreza WRX/STi:

This how-to is based off a GR, but the concepts should be similar to a GD. I’m not sure how different the front subframe is or how it might interfere with the install.

Here is a selection of stiffer motor mounts:

Group-N motor mounts:

Group N Subaru Motor Mounts Set! Legacy Gt, Sti, WRX See Listing for Fitment!

Perrin Performance motor mounts:

Perrin Performance Motor Mount Kit Subaru WRX/STI 02-14

Torque Solution motor mounts:

Torque Solution Engine Mounts: Subaru Wrx Sti 2002-2016

I’m making this as a response to so many people saying that motor mounts are a terrible install. I think they’re cake, and I want to show why. I had originally installed the Tigwerks motor mounts, but their NVH was a little much for my tastes so I went to Group Ns, and that’s where this install was born (my second time through). I’d do it again and could accomplish the whole process inside of two hours with mandatory beer breaks.

Flywheel: Flywheels for Subaru WRX/STi’s FAQ

Flywheel FAQ:

How does a lightweight flywheel improve performance? A transmission can be thought of as a fulcrum and lever in a car. First gear has a really long lever; second gear has a shorter lever, etc. The lever represents the mechanical advantage that gears give your vehicle. When your car is moving, you have two factors that are present during acceleration, one is driveline losses, which are constant and the variable, which is vehicle weight and the mechanical advantage supplied by each gear.

Flywheel: SPEC flywheels are CNC manufactured at an unheard-of .001 tolerance, in an industry where the standard is .010. This precision manufacturing process ensures perfect balance and a perfectly flat bedding surface for the clutch disc, both of which also contribute to the ultimate in safety for competitive environments. All SPEC flywheels carry SFI certification.

While changing to a lighter flywheel will give the user little to no changes on a dyno, the apparent changes are quite dramatic due to the greater mechanical advantage. Consider these made up figures for consideration: Drive line losses, 45 pounds and vehicle mass (weight) at the driveline (remember your gear’s mechanical advantage reduces your actual car weight). We know that within reason, vehicle mass is a constant.

Now imagine if you reduced the driveline loss from 45 to 35 with the use of a lightweight flywheel. Since the engine has less drivetrain losses to compensate for, this means the “gained” horsepower can be applied to moving the vehicle mass. Using mathematics, one can realize that the higher you go up in gears, the less effect that a lightened flywheel will have to the overall equation.

Are there any downsides to a lightweight flywheel? While the performance characteristics of a lightweight flywheel seem to be the perfect solution, there are compromises:
a. Low end performance is affected. This usually means that higher revs are necessary for smooth starts due to the reduced rotational mass. For drag racers, this can be a BIG issue.
b. Possible missfire check engine light.
c. Possible chatter, like missfire this affects some users and not others.