Category Archives: WRX

Rear Differential Bushings install Subaru WRX/STi

Rear Differential Bushings install Subaru WRX/STi:

This rear differential bushing install process took all of about an hour and a half. What you will need is:

Rear Diff Bushings:

Whiteline KDT905 Rear Differential Support Bushing

Whiteline W92835 Rear Differential Mount Bushing


I used a 3/8″ drive set
17mm Medium Depth socket
17mm Open ended Wrench
Swivel For socket (optional) i didnt need this
Torque Wrench (specs for all of these nuts and bolts are 51.6ft lbs)
Couple of screwdrivers or Pry bars ( i prefer Prybars)
C-clamp
Hammer (optional)
Transmission lift (to hold up the rear diff when the bolts are out, you will also need this to lower the diff down to get the outside bolts over the rear axles)

1.)
Get the vehicle in the air some how, this is easiest if you have access to a garage with a lift. Which i did that only costs about $2.00 an hour. Once its on the lift go ahead and locate the area with the bolts and make sure you unplug the rear diff sensor and ground.

2.)
Unbolt the two outer nuts, you will notice that the bolt goes in from the axle side. Make sure to put them back the same way.

3.)

Now that the outside bolts are out, what you need to do it take the nuts that you have taken off from the outside and thread them over the two inner bolts that hold on the rear diff. What this does is make it able for you to take out the bolt that is directly screwed into the diff. Make sure you thread it all the way, and once they are tight, using your open ended wrench start to back off the inner nut, and it might turn a little bit without the whole thing moving but thats ok, a few turns and the whole thing will break free. ( be carefull for the rear diff sensor)

4.)
Once you get the two studs holding the rear differential in place you should be able to let down your transmission stand a little bit to move the axles out of the way and pull the studs out of the outside two bushings.

Lips: V-Limited Lip Subaru WRX STi Install guide:

V-Limited Lip Subaru WRX/STi Install guide:

Today we have for you an installation guide for the STi V-Limited Lip. It is being installed on a 2006 STi, but the procedure will be very similar for a V-Limited Lip installation on any other compatible Subarus.

Give your car that extra bit of JDM styling you’re looking for while adding performance at the same time! Constructed of 100% ABS plastic (the same material as your factory bumper), the V-Limited Lip is securely attached underneath the front bumper by a series of small bolts.
This is one of very few front lips available on the market that actually has a performance aspect too it. The design of the lip allows for an increase in front down force, improving your car’s handling at higher speeds. Don’t be fooled by imitations lips that are made of a hybrid material or fiberglass. These “replica” lips are flimsy and very prone to breakage. Treat yourself to the real thing and order your V-Limited Lip today! Don’t forget to protect your new V-Limited Lip with a rubber lip protector.

1. For this install you will need to get the front end of the car in the air. It doesn’t need to be that high, just enough to get under the front of the car. A jack stand under each of the two front lift points should do, ramps will also work if you have them.

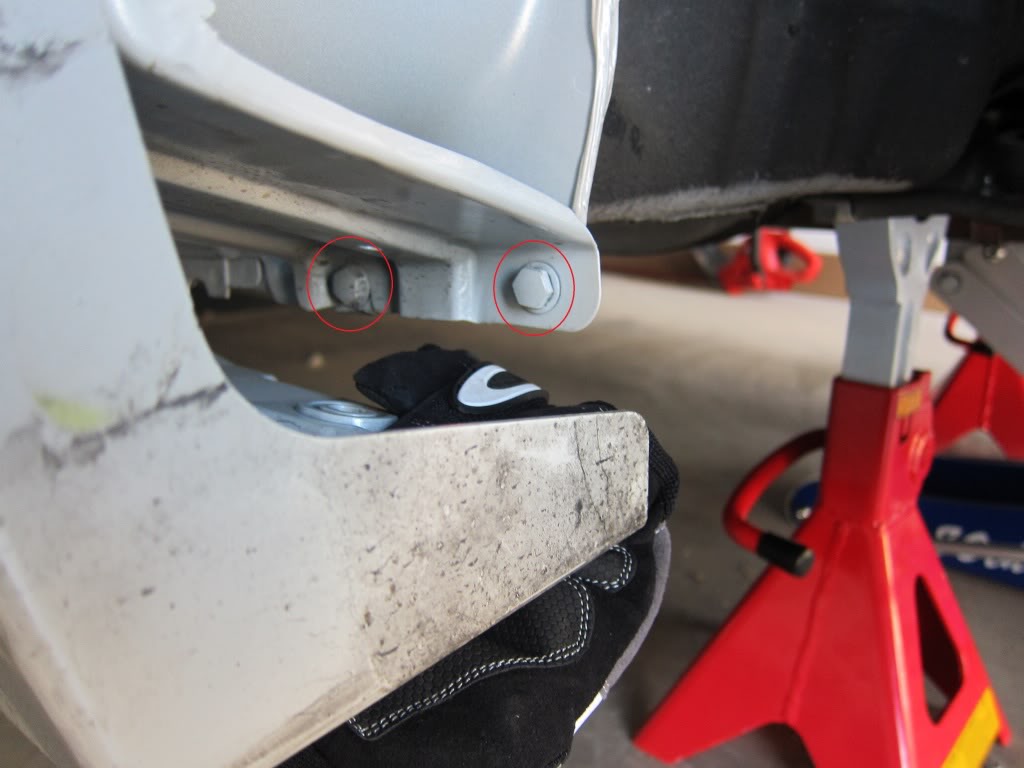
2. First, you will need to mount the lip under the bumper so that it will stay steady while you drill the holes. Remove the plastic clips circled in the picture (three more on other end of bumper). Attach the lip to the bumper, but do not reattach the plastic cover’s flaps to the bumper as they were before.

Banjo Bolt (Union) removal/install on a Subaru WRX STi

Banjo Bolt (Union) removal and install on a Subaru WRX STi:

This is Banjo Bolt step by step guide on the removal and installation of a Banjo bolt and new copper washers for a Subaru WRX/STi or any other turbocharged Subaru.The Banjo bolt is the one with a filter screen that others have indicated should be cleaned or replaced periodically. Subaru calls it a “Union screw (with protrusion).”
Tools needed:
12 mm socket – for intercooler bracket bolt
14 mm deep-well socket – for up-pipe bracket nut and bolt
10 mm socket or wrench – for stock turbo heat shield bolt
17 mm ratcheting wrench – for Banjo bolt
10 inch or longer extension – to reach up-pipe bracket bolts

Parts needed:
Union screw/Banjo Bolt (If replacing which I highly suggest you do.) – Subaru part # 14445AA090

Subaru 14445AA090 Oil Filter Bolt

OR

Genuine Subaru Turbo Banjo Bolt with Screen – 14445AA090a
Copper washers (2) – Subaru part # 803912040
Subaru 803912040 Banjo Washer


Removal and re-install takes about one hour.

Start by removing any heat shields that are in the way. I have the SPT heat shield that comes off by removing the 12 mm intercooler support bolt.
(See pic “Engine bay area”). I also have the stock turbo heat shield installed. I didn’t take it off, but there will be a little more room to work if you do. A 10 mm socket is needed to remove the stock heat shield bolts.

The next page will describe the removal and re-installation process of the Banjo Bolt and copper washers.

Short Shifter Install on 04-07/08-11+ Subaru STi:

Short Shifter Install on 04-07 Subaru STi:

A step by step guide on installing a short shifter for a 04-07 Subaru STi and 08-11+ Subaru STi/Legacy.

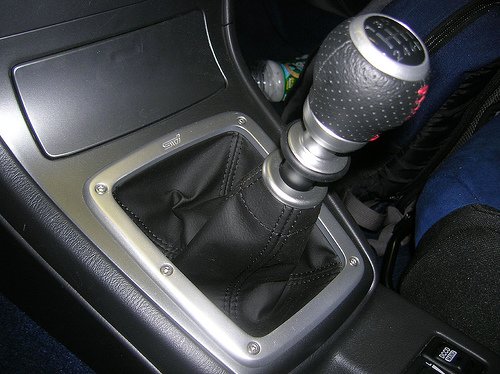
OEM Short shifter: Installed and ready to go.

Tools needed:
10, 12, 14, 17mm wrenches
Jack Stands
Jack
Needle nose pliers

Short Shifters used:

Subaru OEM Short Shifter 04-07 STi:

Genuine Subaru STI Short Throw Shifter – 6MT

Subaru OEM Short Shifter 08-11 STi, WRX, Legacy:

Genuine Subaru C1010AG001 STI Short Throw Shifter


Step 1: Once the car is up on jack stands / a lift, you want to support the transmission and remove the rear cross member. You will need to remove it later anyway, it also makes it much easier to work without it in the way. I used a bottle jack and block of wood to support the tranny, but im sure a transmission jack would work much better if you have one.
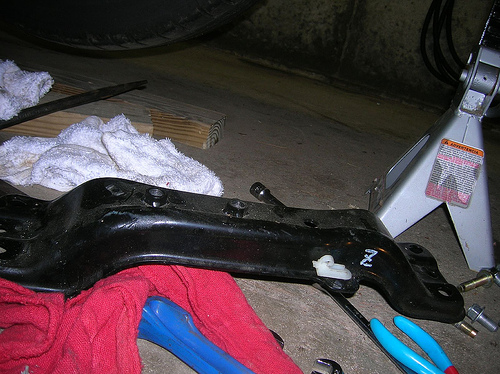
This picture shows the cross member removed.

Short shifter: This picture shows the cross member removed.

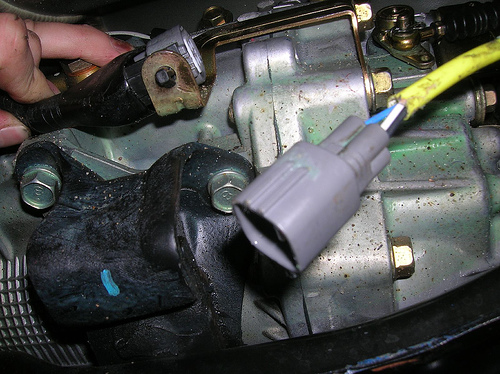
Step 2: Once the cross member is unbolted you will need to unplug the 02 sensor, and unclip its harness from the cross member. It is held by two plastic clips that can be pushed out of the holes in the member without much trouble.

Short Shifter: O2 sensor is held by two plastic clips that can be pushed out of the holes in the member without much trouble.

Step 3: Remove the bolt from the lower rod, I believe it is a 14mm. The nut on the other side is attached to the bracket, so you don’t need a wrench on it. I found that ratcheting wrenches work best for most of these bolts.
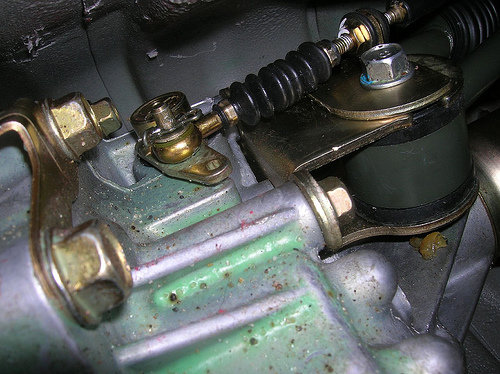
The bolt that needs to be removed is the one going through the rubber bushing shown in the upper right of this picture.

Short Shifter: The bolt that needs to be removed is the one going through the rubber bushing shown in the upper right of this picture.

Step 4: Now you can disconnect the reverse lockout cable. It is held in with a pin that can be pulled out with a pair of pliers. I stuck an Allen wrench through the cam as shown in the Cobb short shifter install when I removed it just in case. There is a washer on the lockout cable that may be stuck in the grease, you will want to take it off and set it aside so it doesn’t get lost. The lockout cable can be seen on the left side of the picture above. You can now move the lower rod down, and move the lockout cable out of the way.

Motor Mount install for Subaru Impreza WRX/STi

Motor Mount install for Subaru Impreza WRX/STi:

This how-to is based off a GR, but the concepts should be similar to a GD. I’m not sure how different the front subframe is or how it might interfere with the install.

Here is a selection of stiffer motor mounts:

Group-N motor mounts:

Group N Subaru Motor Mounts Set! Legacy Gt, Sti, WRX See Listing for Fitment!

Perrin Performance motor mounts:

Perrin Performance Motor Mount Kit Subaru WRX/STI 02-14

Torque Solution motor mounts:

Torque Solution Engine Mounts: Subaru Wrx Sti 2002-2016

I’m making this as a response to so many people saying that motor mounts are a terrible install. I think they’re cake, and I want to show why. I had originally installed the Tigwerks motor mounts, but their NVH was a little much for my tastes so I went to Group Ns, and that’s where this install was born (my second time through). I’d do it again and could accomplish the whole process inside of two hours with mandatory beer breaks.

Fender Brace GTSpec Install on GR Subaru WRX/STi

Fender Brace GTSpec Install on GR Subaru WRX/STi:


This fender brace install was performed on ’11 Subaru Impreza WRX STi 5 Door with GTSpec Fender Braces.

Required Tools:

Socket wrench with multiple extenders.
10mm, 12mm, and 14mm sockets
12mm wrench
Impact Driver (Not required but makes things easier)
Tire iron
Floor Jack/Jack stands
Screw Driver
Pliers/Cutting pliers
2 Zip ties
Gloves (Not required but always nice to have)
PB Blaster

Passenger side

I started off on the passenger side. Get the front end on jack stands. Also put chalks on the rear tires for added safety.

Now lets start by removing your tire. (This is where having an impact wrench makes things a breeze!)

*Note* If you have Rally Armor mudflaps you will need to remove those as well.

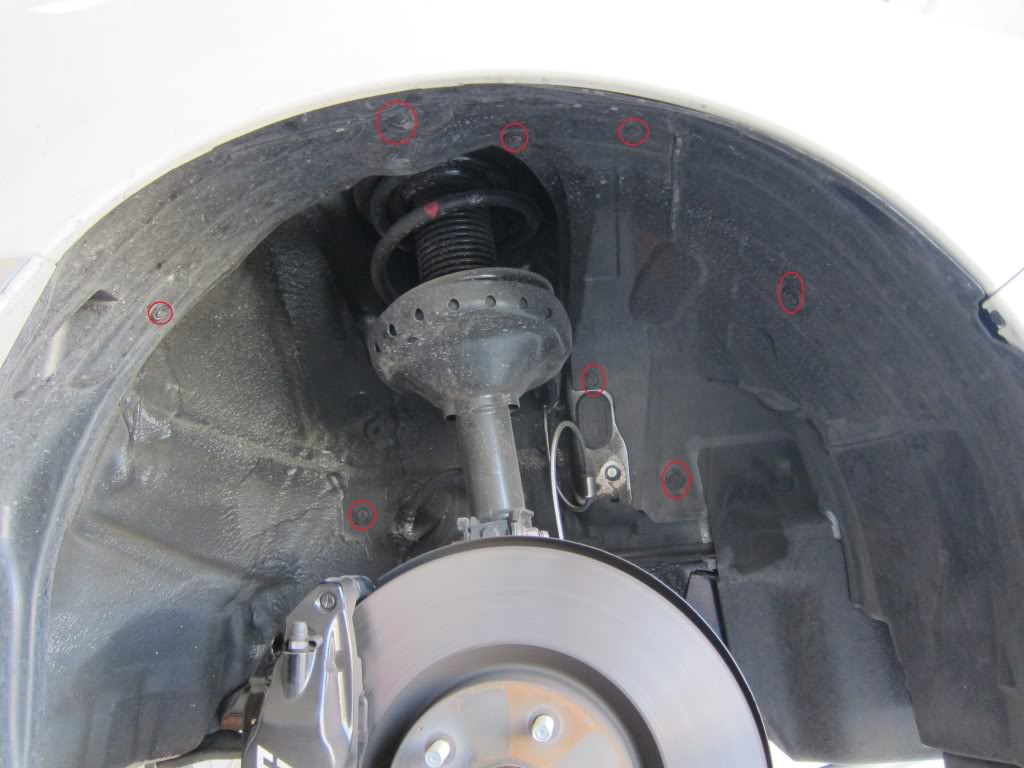
You will need to remove the fender liner and fender panel as well as the first three retaining clips under the side skirt.

A sample of a few clips that need to be removed:

Subaru STi Inner fender removal.

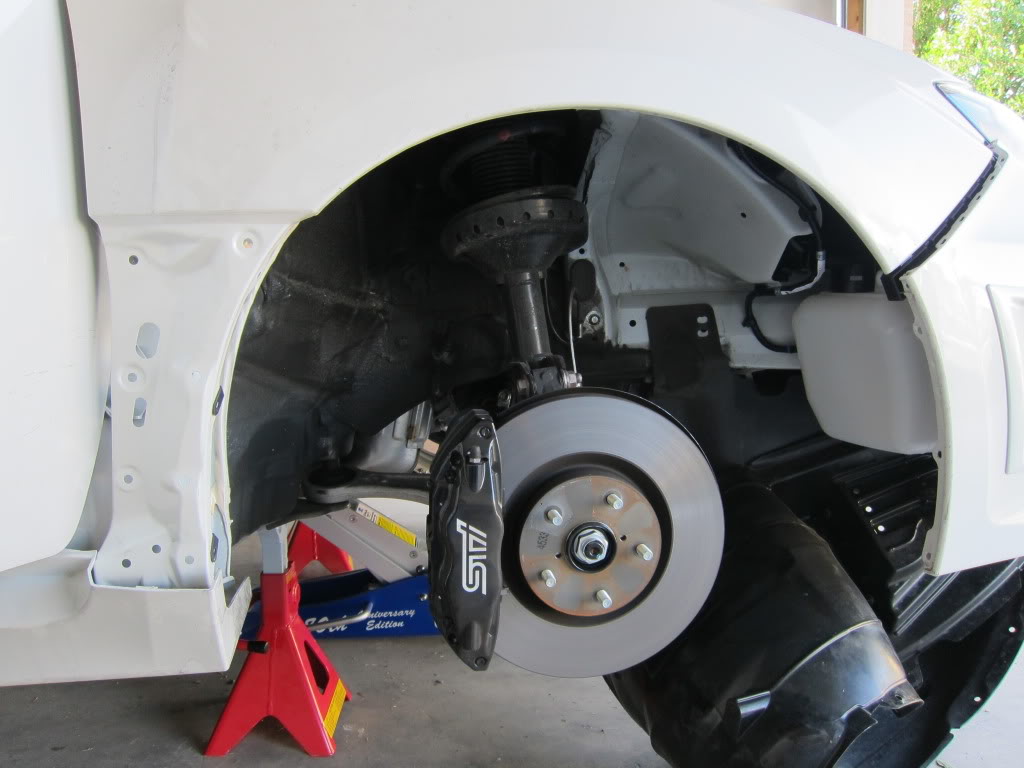
Fender liner and fender cover removed:

Subaru STi GR Inner fender removed.

*Note* I did not remove by front bumper however i did later on. I would suggest you go ahead and remove the front bumper to save yourself some time later on down the road. It makes things easier!

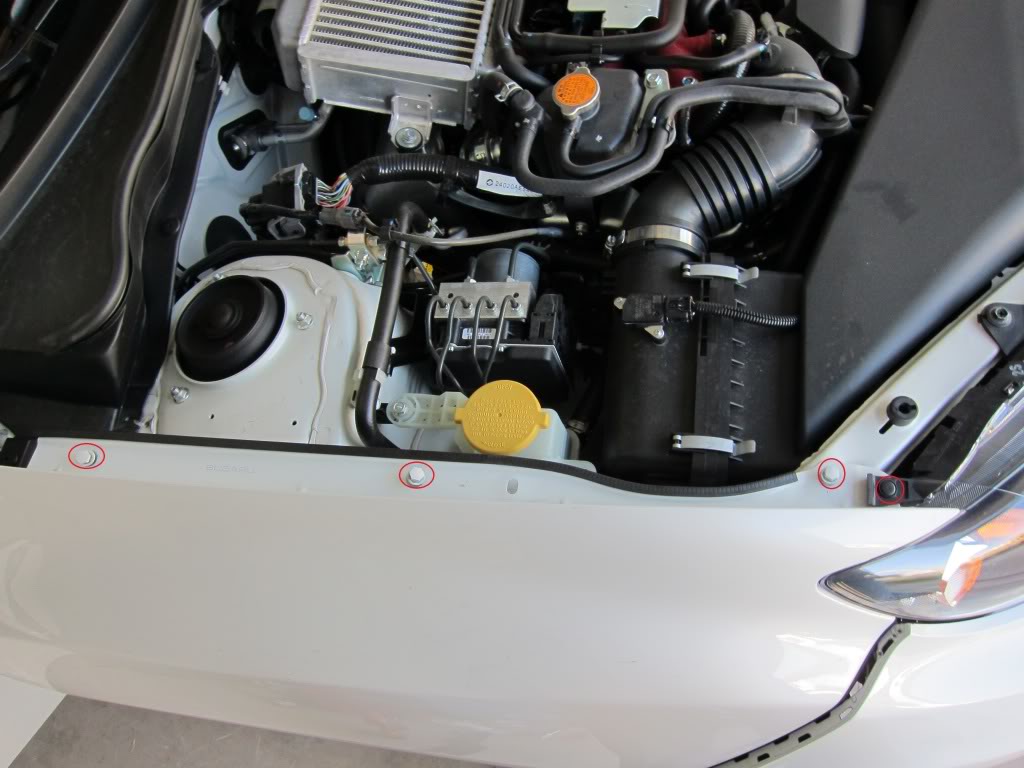
Now remove the 3 bolts in the engine bay and the one retaining clip on the headlight fixture.

Fender removal Subaru STi GR: Now remove the 3 bolts in the engine bay and the one retaining clip on the headlight fixture.

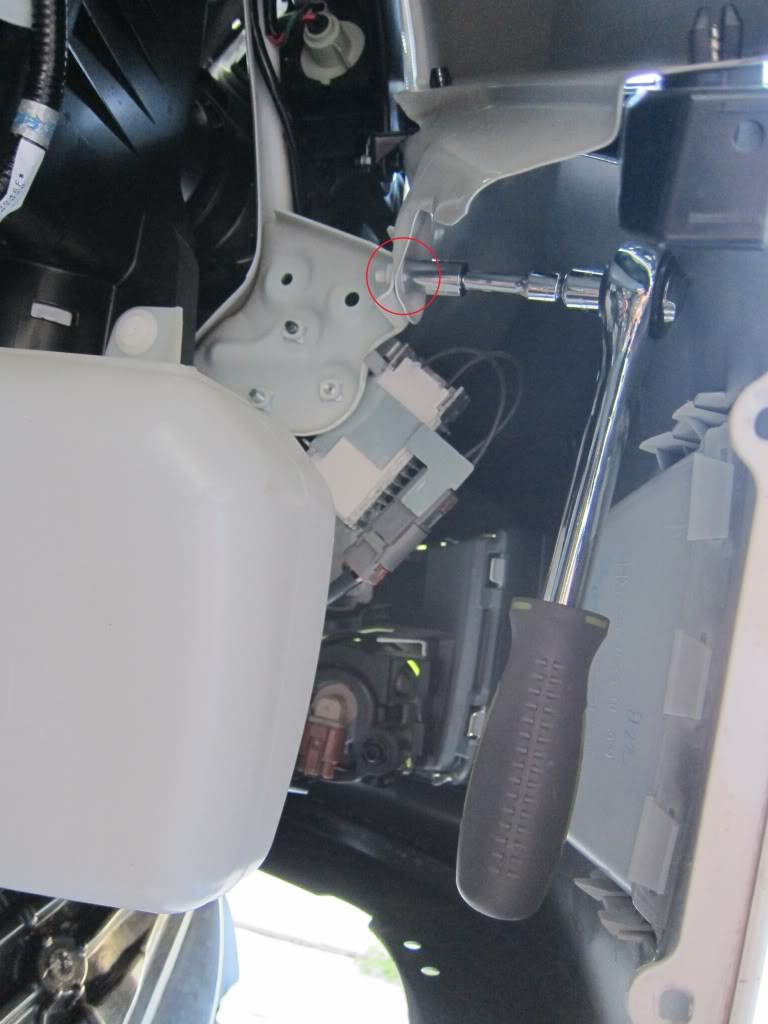
Remove the bolt behind the front bumper. (If the bumper is off it makes this next part very easy!)

Fender Removal Subaru STi GR: Remove the bolt behind the front bumper. (If the bumper is off it makes this next part very easy!)

Unscrew the black plastic bracket that secures the fender to the front bumper. (Again much easier to do with bumper off). I’d also suggest you remove the black bracket all together. This will come in handy when you reassemble the front fender.

There are two bolts under the side trim. This is where removing the 3rd retaining clip from under neath the side trim gives you a bit more wiggle room.

There are two bolts under the side trim. This is where removing the 3rd retaining clip from under neath the side trim gives you a bit more wiggle room.

Rear Wheel Bearing Repair 02-07 Subaru WRX/STi

Rear Wheel Bearing Repair 02-07 Subaru WRX/STi: This is a write up on how to replace your rear wheel bearing for your 02-07 WRX STi.

DISCLAIMER: WORKING ON YOUR CAR IS DANGEROUS. IF YOU FEEL YOU CANNOT COMPLETE ANY OF THESE TASKS, DON’T DO IT, THESE PARTS HOLD YOUR SUSPENSION AND WEIGHT OF YOUR CAR. THIS IS A REFERENCE ONLY! do not attempt.

Tools:
– 32mm Socket (axle nut)
– 19mm, 17mm, 14mm (suspension, and brake parts)
– Needle nose
– Sockets, breaker bar
Torque wrench
– Access to a press
– I used a 36mm to press the bearing
– 26-27 mm for the hub

Parts
– Check with your local Subaru dealer
– Or use online sites or vendors!

Parts I Used
Rear Wheel bearing – #28016PA010
Oil Seal #1 – #28015AA080
Oil Seal #2 – #28015AA070
Rear Axle nut – #28044AA001

Rear Wheel Bearing Install

– First you need to break the torque on your lug nuts
– Get your rear in the air and stable (your going to put some stress on some parts)
– Remove your wheel

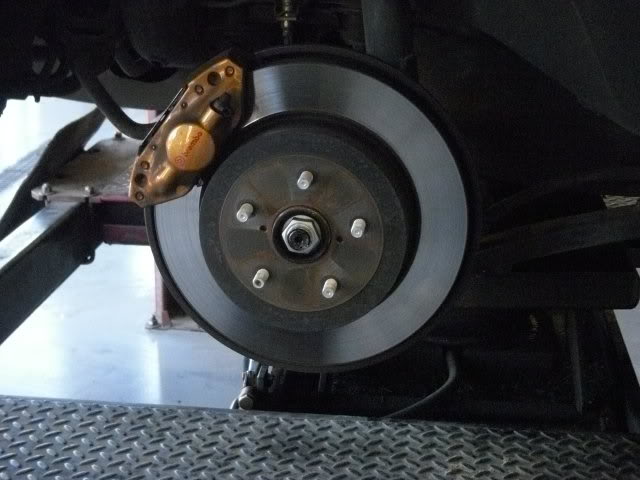
Rear Wheel bearing: Remove your wheel and Locate your axle nut and "uncrimp" it.
Rear Wheel bearing: Remove your wheel and Locate your axle nut and “uncrimp” it.

Locate your axle nut and “uncrimp” it. After its uncrimped, make sure you have your parking brake on really well. Either break the torque on it and back it off so its hand tight accessible, or remove it all together.

- Locate your axle nut and "uncrimp" it - After its uncrimped, make sure you have your parking brake on realy good. - Either break the torque on it and back it off so its hand tight accessible, or remove it all together
– Locate your axle nut and “uncrimp” it
– After its uncrimped, make sure you have your parking brake on realy good.
– Either break the torque on it and back it off so its hand tight accessible, or remove it all together

Spring Installation guide for Subaru WRX STi:

Spring Installation guide for Subaru WRX STi:


1.) Remove the rear seat.

Tools: 12mm socket. Socket extension helps.

There are two brackets at the front of the rear seat. Remove the bolts holding them in and pull out the lower seat cushion. There are three brackets holding the seat back in. Once the bolts are out you can lift the cushion off. There are brackets at the top that support the seat; make sure those clip in properly when you put it back in. Also pay attention to how the cushion fits through the seat belt.

2.) It is easiest to bust loose the 17mm strut top nuts while the car is on the ground. So that’s what we are doing here…

Once the seat is out you can get to the rear strut dust covers. You’ll want a couple of tools to get to these nuts since the access is pretty tight. A 12mm open gear wrench (pictured) is nice. Also, standard 12mm sockets in various depths will be helpful. Unless you have air tools that can fit on these, there is a lot of wrenching involved since you can only get a few degrees per turn on some of them. Strut cover removed. Note the “out” inscription, and make sure it faces “out” when you put it back on. Top of the strut showing the nut that needs to be loosened. You should be able to get on there with a 17mm deep socket and loosen it a few turns. Just bust it loose, do not remove it at this point!

This next part isn’t critical now, but you will need the info later.

In order to make sure the strut isn’t spinning in the shaft, you need to insert a 6mm hex/allen wrench
into the strut top, and hold that still while you turn the 17mm nut. This is the contraption I use.

Now to the front.

Remove the little rubber dust covers in the center of the top mounts. Again, bust the top nut loose. On the front passenger side there may be a bracket that holds an alarm chirper. It doesn’t really matter if you take the 12mm nuts off now or later, I am just including it at this point in the process. If you do loosen them now, again, make sure to keep them on at least a little bit so the struts don’t fall off later.