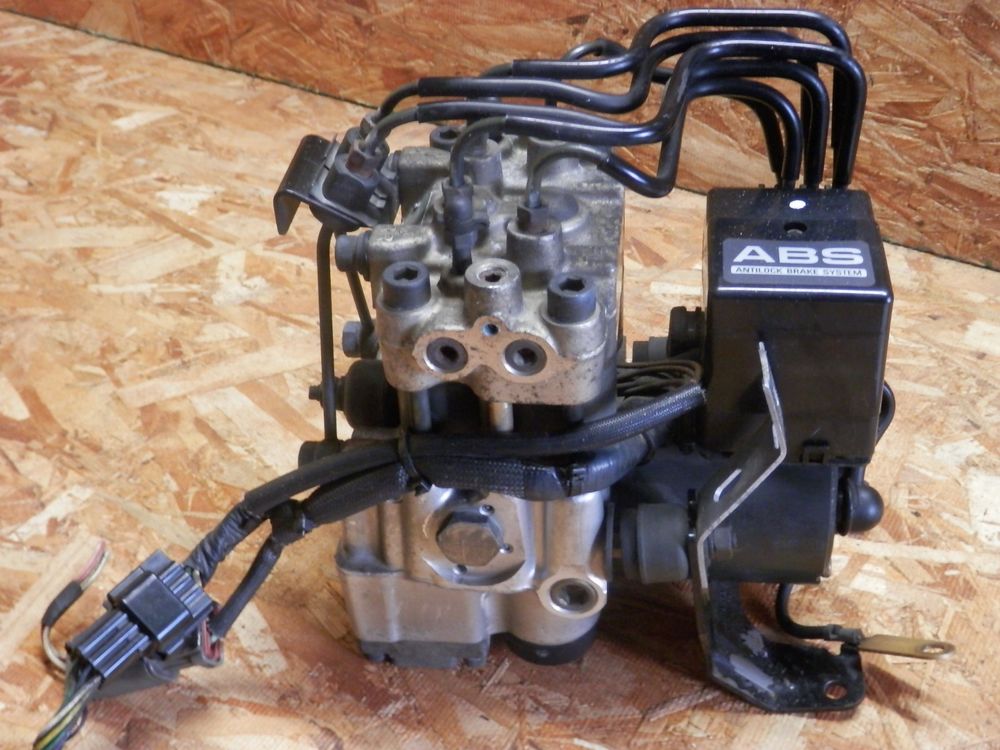
Antilock Brake System for Early Subarus: The first Subaru rally car the Legacy RS relied upon the bousch/nippon ABS units to perform on the WRC circuit.
Always check the fluid level of the master cylinder and bleed the wheel cylinders following the procedure listed in the service manual. When the HCU has been removed and/or replaced, the fluid must be drained. Replace the cone screws with bleed screws and attach a hose to drain fluid to a container.
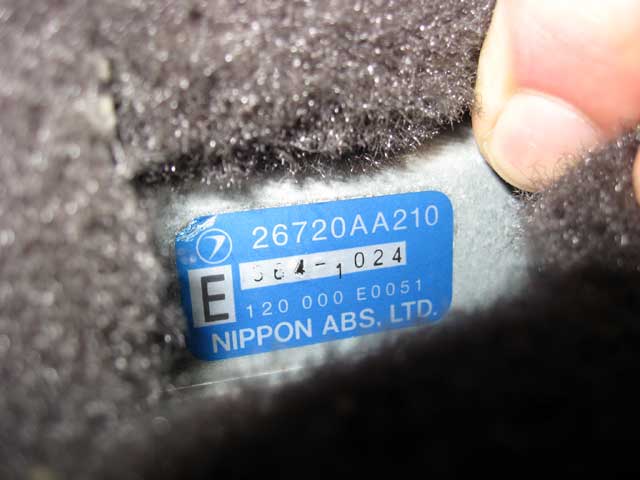
Antilock: ABS Service And Brake Bleeding Procedures: A early Subaru Nippon ABS unit ECU.
Use extreme care when performing this procedure to prevent damage to the internal components of the HCU. Do not apply AV signal for more than 5 seconds for each application. If no AV signal is received, it is not necessary to close bleed screw between brake pedal applications.
Antilock Brake System Notes and Cautions:
The ECU on early Subaru ABS systems can only display one trouble code–the lowest numbered code. Correct the fault indicated by the trouble code and recheck ECU for another code. Repeat the self-diagnostic procedure listed above, and the next highest code will be displayed. Refer to the appropriate model year service manual for the trouble codes and corrective actions. While the ABS ECU is in the fault mode, the ABS will go to fail-safe and remain passive under all braking conditions. The brake system will function as a conventional power-assisted system without ABS.
Many late model Subaru vehicles are equipped with ABS braking systems. The added complexity of these systems provides an additional incentive for following the recommended brake fluid replacement interval of 30 months or 30,000 miles. Brake fluid accumulates water and other contaminants over time. These contaminants can attack the internal parts of the brake system, compromising its performance and possibly causing brake failure.
Maintenance: Subaru Periodic Vehicle Maintenance Services: Make sure to replace brake fluid at least every 30 months of 30,000 miles. At least once a year if the Subaru sees heavy track use.
The brake master cylinder has a semi-transparent reservoir, making it possible to check the fluid level without removing the reservoir cover. This minimizes the exposure to outside air and limits the amount of moisture that can reach the brake fluid. The fluid level will drop as the brake shoes and pads wear, but the reservoir is large enough to compensate for these changes. If the fluid level is very low, it’s a sure sign the brake pads or shoes are nearly worn out, or there is a leak in the brake system.
Note: When the brake fluid level in the reservoir tank is lower than the specified limit, the brake fluid warning light in the combination meter will come on.
Subaru warns against mixing brake fluids from different manufacturers. Doing so may degrade the quality of the fluid. Only DOT 3 or 4 brake fluid should be used in any Subaru vehicle preferably Subaru brake fluid if you are not going to do a track day build. Consult the service manual for vehicle specific brake bleeding procedures.
A variety of antilock brake system (ABS) have been installed in Subaru vehicles since the first systems were installed in the 1990 Legacy. In the sections that follow, we’ll give you a brief overview of each system and explain proper diagnostic techniques.
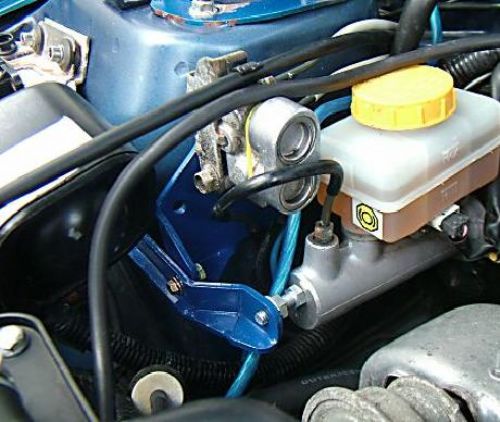
Antilock Brake System for Early Subarus: A Subaru SVX ABS system.
The original Subaru Legacy Antilock Brake System (ABS) was licensed by Bosch and manufactured by Nippon ABS, Ltd. The system electronically controls brake fluid pressure supplied to the brake system. This control helps to prevent “wheel lockup” during braking on slippery surfaces and emergency situations. The system includes a fail-safe feature, which indicates a malfunction by illuminating the warning lamp. The system is then returned to a conventional power brake system. The four channel system provides accurate individual wheelspeed control and improves the directional stability of the vehicle during braking.
A tone wheel is attached to each wheel hub and rotates at the same speed as the hub. The magnetic speed sensor is mounted in the axle housing. The notched tone wheel acts as a reluctor which modulates the magnetic field of the speed sensor. The tone wheels are individually replaceable.
The speed sensor provides an alternating voltage signal to the ECU. The alternating voltage and frequency corresponds to wheelspeed.
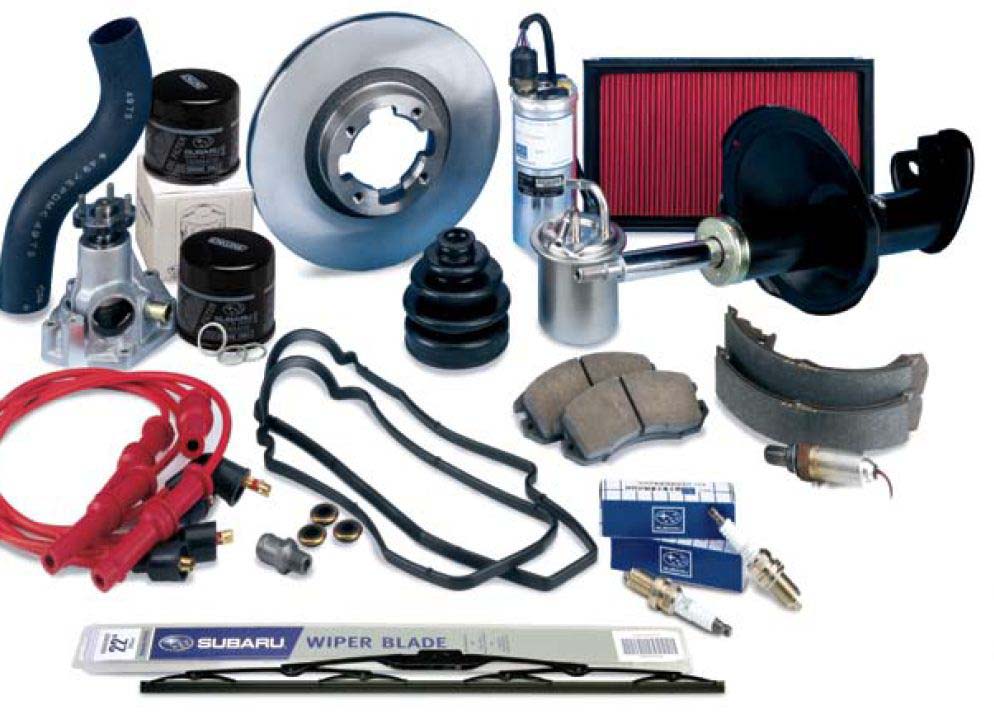
Maintenance: Subaru Periodic Vehicle Maintenance Services: Often the best value and best parts come from Subaru themselves and often aftermarket replacement parts will be of substandard quality.
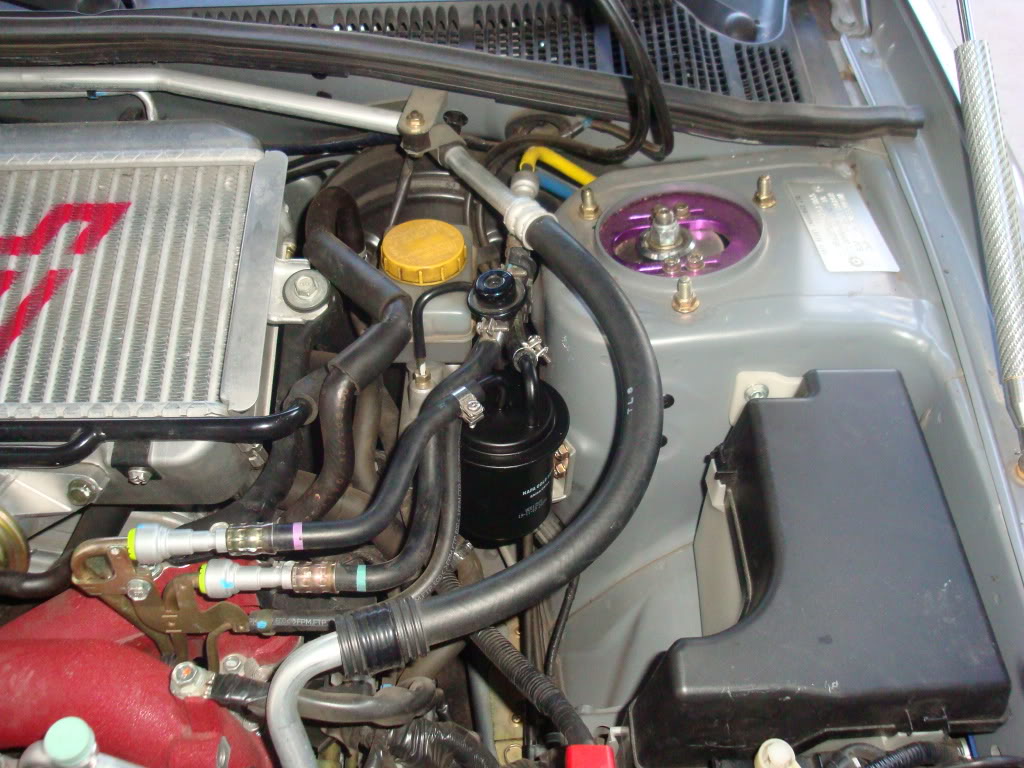
There’s no easy way to check the inside of a fuel filter for dirt or other contamination buildup. That’s why a 30 month or 30,000 mile replacement interval is prescribed. If the customer happens to buy a tank-load of bad gasoline before reaching this interval, it will be necessary to replace the fuel filter ahead of time. There’s no way to clean the filter—replacement is the only option. Remove the battery negative cable before you begin work on the fuel filter. Remember gasoline is a very flammable substance.
The fuel filter is just one small part of the fuel system. The fuel system includes many sections of steel and rubber fuel line that run the length of the vehicle several times. The fuel pump, fuel tank, and fuel pressure regulator are just a few of the other parts of the fuel system. While you’re replacing the fuel filter, don’t forget to check the condition of the rest of the fuel system.
Maintenance: Subaru Periodic Vehicle Maintenance Services: Pictured is a Subaru STi fuel system. Making sure your filter is in good condition and is replaced regularly will prevent problems from occurring.
If any of the rubber hoses (especially the ones that were opened up to replace the filter) look damaged or frayed, they must be replaced before they can cause any further damage. Weak fuel hose clamps should be replaced, and the new ones must be properly positioned and tightened to specification.
Vehicle maintenance is an important factor for proper vehicle operation. It’s the vehicle owner’s responsibility to ensure that fluid levels (engine oil, coolant, etc.) are checked frequently, in accordance with the instructions in the Subaru owner’s manual. However, many ‘gas and go’ vehicle owners may not take the time to fulfill these basic responsibilities. This places added importance on the performance of periodic maintenance services. If the Subaru owner isn’t looking after his vehicle, it falls to the automotive service professional to ensure that proper maintenance procedures are performed.
Maintenance: Subaru Periodic Vehicle Maintenance: It’s always important to periodically check your Subaru’s timing belt for wear and tear.
The frequency of scheduled inspection and maintenance services required by late model Subaru vehicles is minimal when compared with vehicles of the past. For example, even the very commonly used term ‘tune-up’ has lost most of its original meaning. In the old days, a ‘tune-up’ meant fresh spark plugs, points and condenser, and basic engine adjustments such as timing, idle mixture and idle speed. Modern technology has eliminated the need for many of these adjustments and replacement parts. However, the tune-up is alive and well— only its definition has changed.
While the number of vehicle items requiring regular replacement has decreased, the number of items needing periodic inspection has not. Whether you call it a tune-up or something else, this service offers an excellent opportunity for all engine belts, hoses and ignition wires to be checked for wear and tension. Old tune-up standbys like spark plugs, fuel and air filters are still on every Subaru vehicle and still require periodic inspection and replacement as necessary.
The same applies to all other items on the Subaru maintenance schedule. The important thing is to carefully inspect each item. If additional corrective action is required, now is the time to find out.
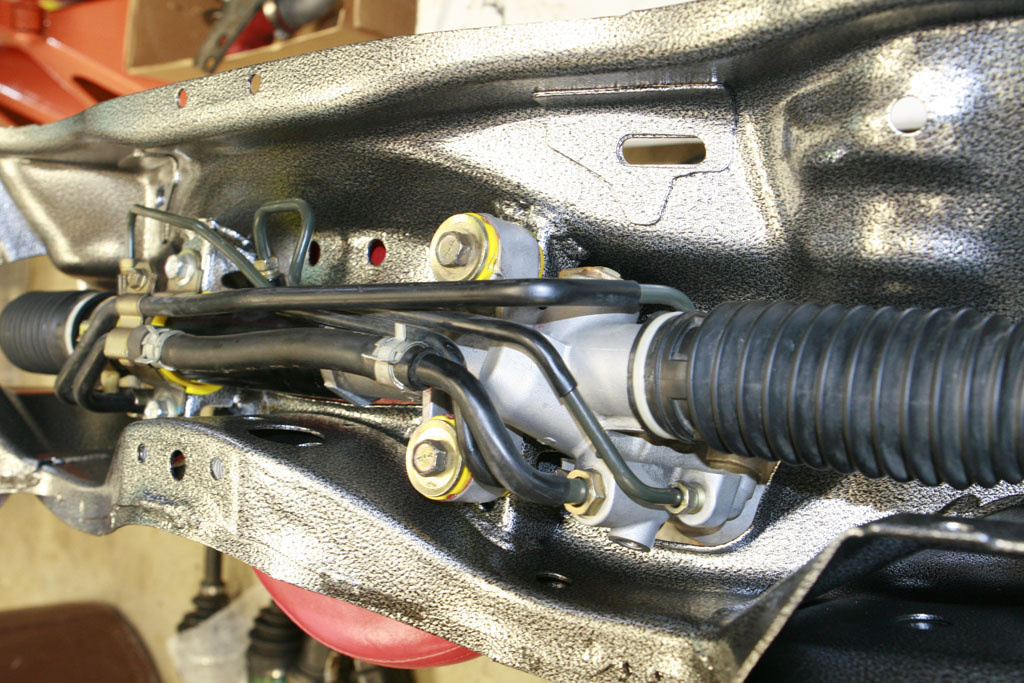
ATF Power Steering Fluid Replacement Subaru STi/WRX:
This is a step by step guide in replacing the ATF power steering fluid on your Subaru STi/WRX. This is pretty much a two person job unless you have a suction gun. I like to use Mobil 1 ATF Synthetic fluid.
ATF Power Steering Fluid Replacement Subaru STi/WRX: A how to guide on replacing the power steering fluid on a Subaru WRX/STi.
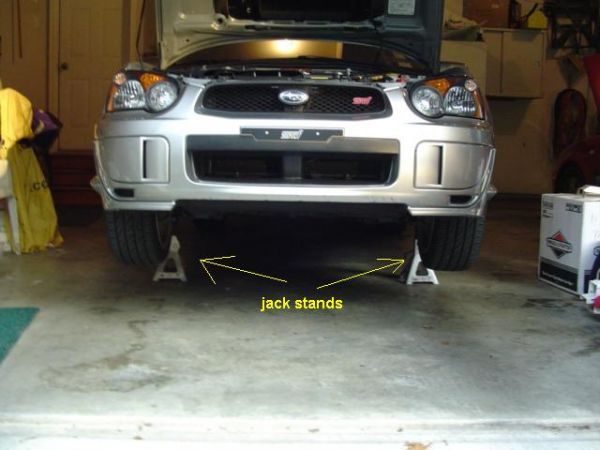
3.) Raise the car up (use jack stands “Safety first”), not to high. A person must sit in the car while another person fills the power steering reservoir.
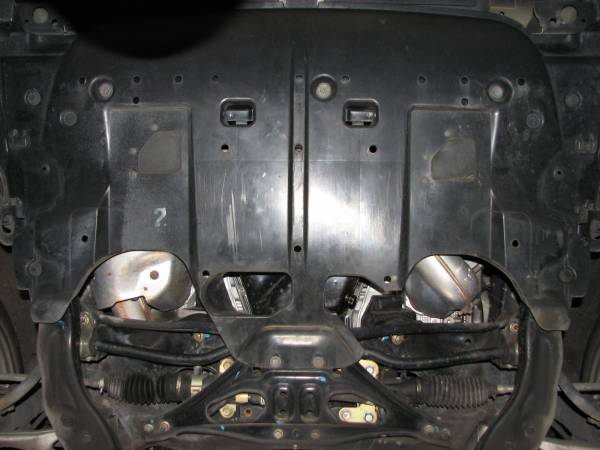
4.) Under the car – Remove the Plastic engine cover under the car, using the 12 mm socket (5 bolts) and flat tip screw driver (4 clips).
5.) Remove the center jack plate, using 14 mm socket (4 nuts), and 12mm socket and 12 mm wrench (2 rear bolts & 2 front nuts/bolts).
6.) Place a oil pan under the power steering gear box (just above jack plate location).
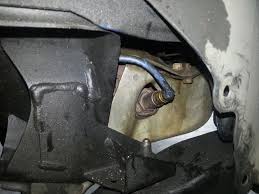
7.) Using the pliers slide one of the clips off the rubber hose (pipe joint) on the power steering gear box. Fluid will drain out immediately, so have that pan already in place under the hose.
8.) Slowly pour in some ATF into the reservoir, while another person sits in the car and SLOWLY turns the steering wheels from lock to lock – perform this at least 3 times. Watch the fluid in the reservoir so that it doesn’t drain out, and watch under the car to see when the old fluid is flushed out. The OEM fluid was brown and I used Mobile 1 ATF Synthetic which was red, so I could see when all the old fluid was flushed.
9.) Re-attach rubber hose (pipe joint) and slide the clip back into place. Put jack plate back on and put plastic undercover back on.
10.) Pour in ATF to the MAX cold line on the reservoir and be ready to add more when the person turns the steering wheel.
11.) Slowly turn the steering wheel lock to lock (3x or more) and watch the reservoir until bubbles stop appearing. Add ATF as needed! DO NOT LET THE RESERVOIR GET TOO LOW!!! This will suck more air into the system.
12.) Start the car and Slowly turn the steering wheel lock to lock (3x or more) and watch the reservoir until bubbles stop appearing. Add ATF as needed.
13.) Lower car onto the ground. Slowly turn the steering wheel lock to lock (3x or more) and watch the reservoir until bubbles stop appearing. Add ATF as needed.
14.) “In case the following happens, leave it about a half an hour and then do” STEP 11 to STEP 13 again:
a. Fluid level changes over 3 mm (0.12 in)
b. Bubbles remain on the upper surface of the fluid
c. Grinding noise is generated from power steering pump.
15.) Replace power steering cap and reinstall the intake scoop.
Now enjoy your smoother steering with your brand new ATF on your Subaru WRX/STi!
This is a step by step guide on removing and re-installing a oil pan on your Subaru Impreza STi or WRX. This guide is also useful for installing a STi spec oil pan onto your WRX. This guide also is helpful if you are removing your stock oil pickup tube that is known to crack on the STi. I suggest purchasing a Killer B Motorsport Pickup Tube along with a brand new STi oil pan. Both can be purchased from down below from Amazon.
1) Remove the plastic under tray from your engine. This is secured using a few bolts and plastic push clips.
2) Remove the plastic under trays from either side of the car, the long ones.
Oil pan removal and install: Remove plastic to gain access to the bottom of the engine.
3) Remove the jacking plate. This is held on by 2 12mm bolts with nuts in the front, 2 12mm bolts in the rear and 4 14mm nuts on the sides.
4) Remove your subframe. This is secured by a few 19mm bolts, 2 12mm bolts in front and 4 14mm bolts. I highly recommend soaking these all in your PB blaster and waiting 5 minutes. Check out some of my other posts for instuctions.
5) Remove the front oxygen sensor. The correct way is to unplug the clip, unhook it from the metal mount and then pull the wire through the fender-well so that the wire isn’t being stretched and twisted as you unscrew it.
2.) Start with the front wheel. First thing to do is clean all the fittings that will be loosened to prevent dirt from getting in the stainless steel brake lines. Use compressed air then some brake cleaner to do the job.
3.)Then, remove the 12mm bolt holding the line to the strut.
We use cookies on our website to give you the most relevant experience by remembering your preferences and repeat visits. By clicking “Accept”, you consent to the use of ALL the cookies.
This website uses cookies to improve your experience while you navigate through the website. Out of these, the cookies that are categorized as necessary are stored on your browser as they are essential for the working of basic functionalities of the website. We also use third-party cookies that help us analyze and understand how you use this website. These cookies will be stored in your browser only with your consent. You also have the option to opt-out of these cookies. But opting out of some of these cookies may affect your browsing experience.
Necessary cookies are absolutely essential for the website to function properly. These cookies ensure basic functionalities and security features of the website, anonymously.
Cookie
Duration
Description
cookielawinfo-checkbox-analytics
11 months
This cookie is set by GDPR Cookie Consent plugin. The cookie is used to store the user consent for the cookies in the category "Analytics".
cookielawinfo-checkbox-functional
11 months
The cookie is set by GDPR cookie consent to record the user consent for the cookies in the category "Functional".
cookielawinfo-checkbox-necessary
11 months
This cookie is set by GDPR Cookie Consent plugin. The cookies is used to store the user consent for the cookies in the category "Necessary".
cookielawinfo-checkbox-others
11 months
This cookie is set by GDPR Cookie Consent plugin. The cookie is used to store the user consent for the cookies in the category "Other.
cookielawinfo-checkbox-performance
11 months
This cookie is set by GDPR Cookie Consent plugin. The cookie is used to store the user consent for the cookies in the category "Performance".
viewed_cookie_policy
11 months
The cookie is set by the GDPR Cookie Consent plugin and is used to store whether or not user has consented to the use of cookies. It does not store any personal data.
Functional cookies help to perform certain functionalities like sharing the content of the website on social media platforms, collect feedbacks, and other third-party features.
Performance cookies are used to understand and analyze the key performance indexes of the website which helps in delivering a better user experience for the visitors.
Analytical cookies are used to understand how visitors interact with the website. These cookies help provide information on metrics the number of visitors, bounce rate, traffic source, etc.
Advertisement cookies are used to provide visitors with relevant ads and marketing campaigns. These cookies track visitors across websites and collect information to provide customized ads.