Brake Fluid Flush Subaru:
This is a step by step guide on how to do a brake fluid flush on most Subaru cars. It’s often a good idea to do a brake fluid flush at least once a year to keep your Subaru’s braking system in good condition. This is even more important if you autocross or do track days with your car. Use a good performance brake fluid and not whatever is cheapest at Autozone. I have a strong preference towards ATE and Motul brake fluid. Good fluid combined with good brake pads like a Hawks or Carbotechs will give your Subaru great stopping power.
1.) Either jack-up the vehicle and place a rigid rack under it, or lift-up the vehicle.
2.) Remove all the wheels.
3.) Drain the brake fluid from master cylinder.
4.) Refill the reservoir tank with recommended brake fluid.
NOTE:
• Avoid mixing different brands of brake fluid to prevent degrading the quality of fluid.
• Be careful not to allow dirt or dust to get into the reservoir tank.
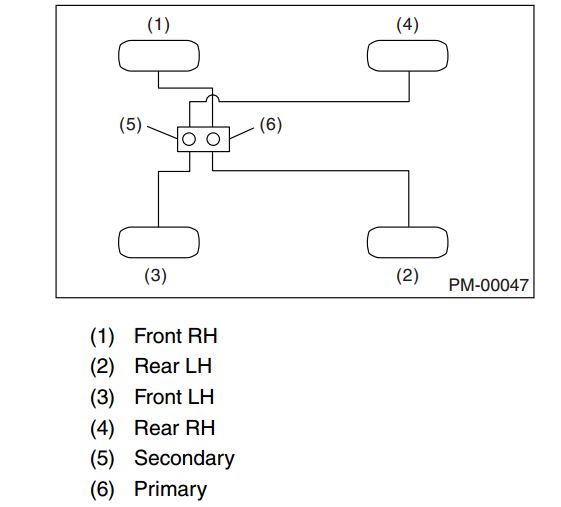
Air bleeding sequence (1) → (2) → (3) → (4)
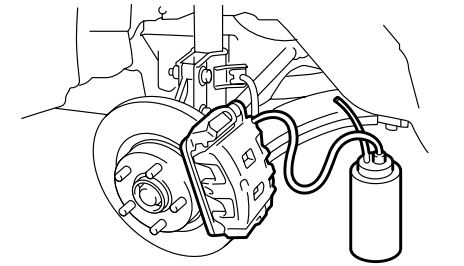
5.) Install one end of a vinyl tube onto the air bleeder and insert the other end of the tube into a container to collect the brake fluid.
NOTE:
• Cover the bleeder with cloth, when loosening it, to prevent brake fluid from being splashed over surrounding parts.
• During the bleeding operation, keep the brake reservoir tank filled with brake fluid to eliminate entry of air.
• The brake pedal operation must be very slow.
• For convenience and safety, two people should do the work.
• The amount of brake fluid required is approx. 500
m2 (16.9 US fl oz, 17.6 Imp fl oz) for total brake
system.
6.) Have a friend depress the brake pedal slowly two or three times and then hold it depressed.