Rear Wheel Bearing:
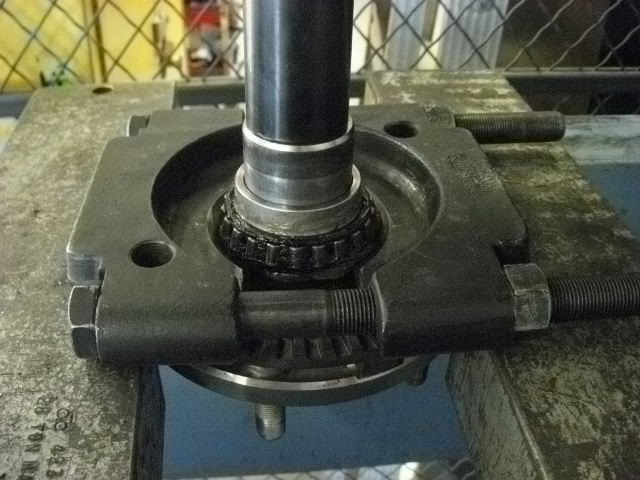
Press your bearing out (Inside out) I used the 36mm socket.


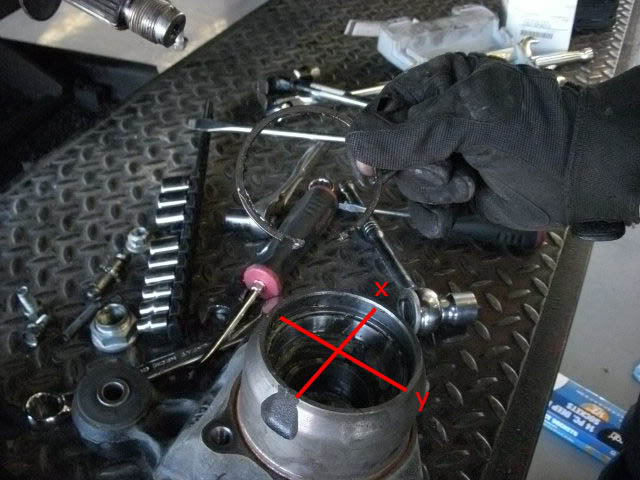
Ok now your bearing is out! Make sure your knuckle housing is in good condition. Clean, measure X and Y with a caliper, an inside micrometer or what ever you have, and make sure they aren’t more than .020mm (0.0008 in) difference. (if they are, replace housing or it can cause another bearing to go bad). You can remove your backing plate if you want. Its held on by four bolts (I did for more maneuverability on the press). Ok your ready to press in your new bearing. KEEP THE BEARING STAY IN THERE!(the plastic piece holding from the inner race’s) Press the bearing (Outside in) use the proper size fitting (I started it in with the plate, then switched to a 36mm socket later).

You will know when the bearing is pressed in all the way because you can see where the snap ring goes (IF YOUR USING A PNEUMATIC, OR HYDRAULIC PRESS, KEEP A GOOD EYE ON THE GAGE AND DO NOT EXCEED EXTREME PRESSURE).
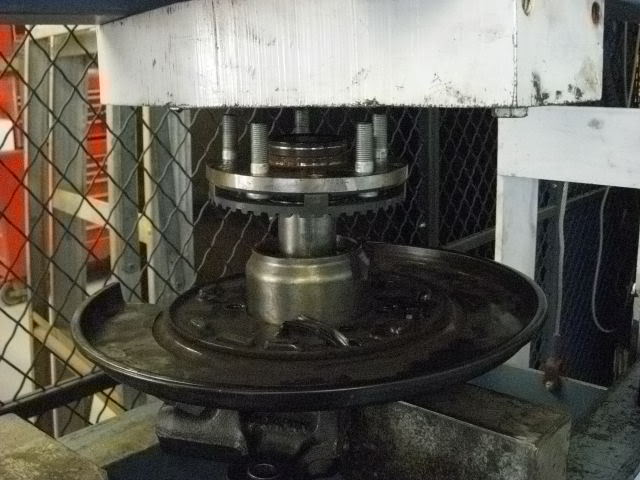
Install snap ring, and you can either press in the oil seal until it seats against the ring, or “Hand” press it in like I did. If you removed your backing plate, You need to install it now. Press your hub in to the bearing now. This part is tricky. The inboard side of the bearing will need to be supported by a 36mm socket.
Press the hub into the bearing (Outside in). It will take the place of the bearing stay, which is holding the two bearings together. Make sure there is room for the bearing stay to get pressed out, while the hub gets pressed in.
Now make your way back to your car and install your housing/hub. The hub is splined so wiggle it so the axle slides through it and begin assembly. I hand tightened the strut bolts, parallel links, and lateral link in. Fish the parking brake cable through the backing plate. Now that everything is good from here, torque down everything to specs.
Get your shoe that has the lever on it and “install it” against the thing sticking out, the anchor (where it pivots). Get your strut piece and spring and install the notch in the shoe. Now get your other shoe and “Install” (make sure the strut piece notch sits in the shoe) and install your shoe guide plate, primary and secondary springs. Next install your adjusting spring. Install your Adjuster. Install the two shoe holder springs. INSTALL THE CLIP ON THE BACK SIDE OF THE BACKING PLATE TO HOLD THE CABLE DOWN!
