Category Archives: Transmission

Antilock Brake System for Early Subaru Part 1:

Antilock Brake System for Early Subarus:

A variety of antilock brake system (ABS) have been installed in Subaru vehicles since the first systems were installed in the 1990 Legacy.  In the sections that follow, we’ll give you a brief overview of each system and explain proper diagnostic techniques.

Antilock Brake System for Early Subarus: A Subaru SVX ABS system.

Antilock Brake System for Early Subarus:

Early Subaru Antilock Brake Systems:

The original Subaru Legacy Antilock Brake System (ABS) was licensed by Bosch and manufactured by Nippon ABS, Ltd. The system electronically controls brake fluid pressure supplied to the brake system. This control helps to prevent “wheel lockup” during braking on slippery surfaces and emergency situations. The system includes a fail-safe feature, which indicates a malfunction by illuminating the warning lamp. The system is then returned to a conventional power brake system. The four channel system provides accurate individual wheelspeed control and improves the directional stability of the vehicle during braking.

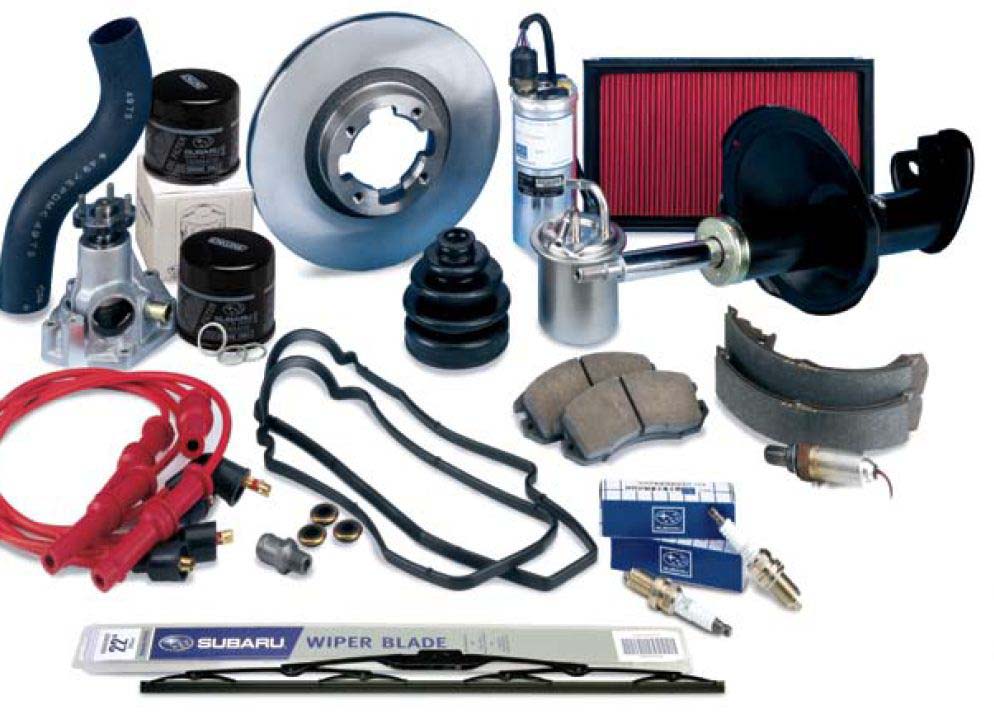
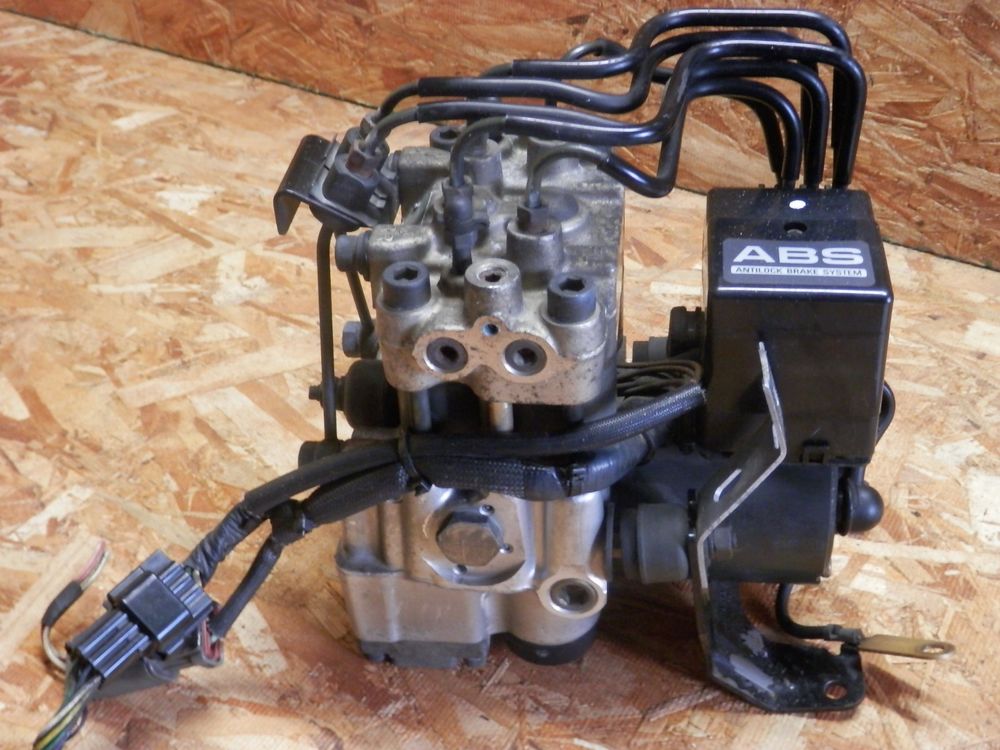
Antilock Brake System (ABS) Components
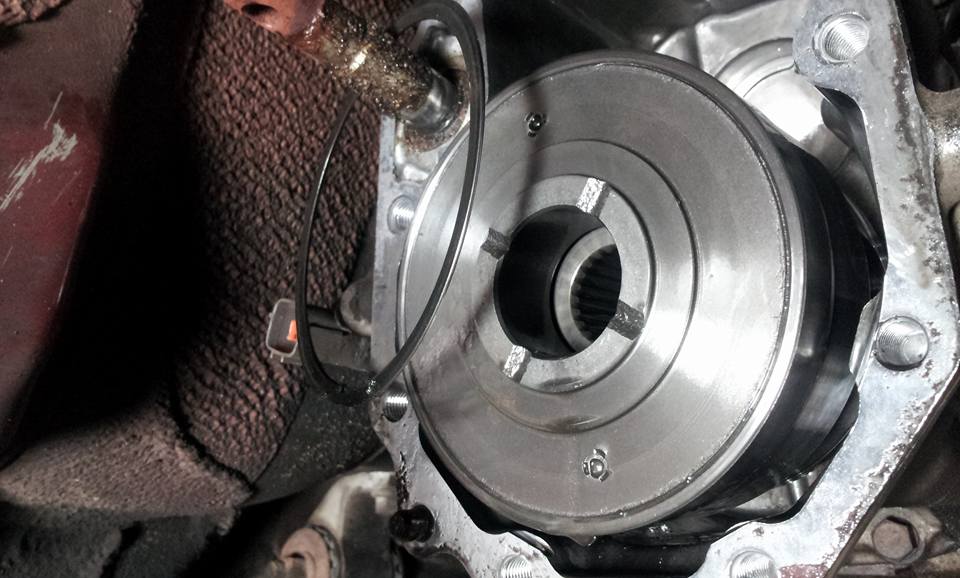
• Tone wheels (4)

• Speed sensors (4)

• Electronic control unit (ECU)

• Hydraulic control unit (HCU)

• G sensor (manual transmission models)

• Warning lamp

A tone wheel is attached to each wheel hub and rotates at the same speed as the hub. The magnetic speed sensor is mounted in the axle housing. The notched tone wheel acts as a reluctor which modulates the magnetic field of the speed sensor. The tone wheels are individually replaceable.

The speed sensor provides an alternating voltage signal to the ECU. The alternating voltage and frequency corresponds to wheelspeed.

Maintenance:Subaru Periodic Maintenance Part 2:

Maintenance: Subaru Periodic Vehicle Maintenance Services:

Maintenance: Subaru Periodic Vehicle Maintenance Services: Often the best value and best parts come from Subaru themselves and often aftermarket replacement parts will be of substandard quality.

Fuel Filter and Fuel Lines:

There’s no easy way to check the inside of a fuel filter for dirt or other contamination buildup. That’s why a 30 month or 30,000 mile replacement interval is prescribed. If the customer happens to buy a tank-load of bad gasoline before reaching this interval, it will be necessary to replace the fuel filter ahead of time. There’s no way to clean the filter—replacement is the only option. Remove the battery negative cable before you begin work on the fuel filter. Remember gasoline is a very flammable substance.

The fuel filter is just one small part of the fuel system. The fuel system includes many sections of steel and rubber fuel line that run the length of the vehicle several times. The fuel pump, fuel tank, and fuel pressure regulator are just a few of the other parts of the fuel system. While you’re replacing the fuel filter, don’t forget to check the condition of the rest of the fuel system.

Maintenance: Subaru Periodic Vehicle Maintenance Services: Pictured is a Subaru STi fuel system. Making sure your filter is in good condition and is replaced regularly will prevent problems from occurring.

If any of the rubber hoses (especially the ones that were opened up to replace the filter) look damaged or frayed, they must be replaced before they can cause any further damage. Weak fuel hose clamps should be replaced, and the new ones must be properly positioned and tightened to specification.


Subaru 42072PA010 Fuel Filter

Group N STi Transmission Mount Install:

Group N STi Transmission Mount Install:

How to install an STi Group N Transmission Mount for manual transmission only. There is a significant difference between the STi Group N transmission mount and the stock one. The STi Group N mount is not only harder, but has more material to it. The stock mount is soft enough to compress with your hand, whereas standing on the STi Group N mount barely deflects the material.

Group N: Stock transmission mount on the left. STi Group N transmission mount on the right.


1.) To start off, look for the long crossmember holding up the transmission- it will be at the end closest to the engine. The ends of this crossmember are right near the rear mount for the front A arm, and are held in with a large 17mm bolt, one on the driver side and one on the passenger side. Remove them both completely. Fair warning- these bolts were tight from the factory. I placed a 3 foot length of pipe over my socket wrench for leverage after I had a casualty- I broke one of the 4″ long socket extensions.

2.)  remove the 2 14mm nuts that hold the bottom of the transmission mount to the crossmember that runs the length of the transmission- these were also tight but came out without breaking any of my tools.

3.) At the rear of the transmission, you will find the third and final crossmember holding the transmission in its place. There are four 14mm bolts in this crossmember there are two on the driver side.

Transmission oil change for Subaru WRX/STi:

Transmission oil change for Subaru WRX/STi:

This is a guide on how to change your transmission oil in your turbo Subaru. Transmission oil is usually changed at 30,000 mile intervals, though more frequent changes are suggested if you take part in track days.

Transmission oil:

Subaru 75W90 Extra-S Gear & Transmission Fluid – 1 Quart Bottle

Subaru 803916080 Manual Transmission Drain Plug Washer

Tools needed:

21mm Socket wrench or other tool of your choice
(I used a socket set with the large spark plug fitting and hollow
extension for extra leverage, dad’s tent is now missing one pole.)
– New sump washer
– Funnel
– 2 foot length of garden hose or similar sized tubing.
– Gear oil* – 3.9 quarts for wrx/sti gearbox/front diff. (Extra 800ml for rear diff)
– Oilpan or large container capable of holding 4+ quarts.

1.) First things first, jack the car up, or drive it onto wheel stands. Make sure the hand brake is on. T
Do not go under the car unless you’re sure it’s secure on it’s stands.

2.) Ensure the car is cool enough to work on, wait at least an hour after driving. Now you’ll need to find the transmission dipstick, which is located between
the turbo and intercooler. Pull it out.

3.) Now you can crawl under the car with your socket, dropsheet & oil pan. Looking from the middle of the car towards the front, you’ll be able to
see the drive shafts, transmission & diff, transmission plug, the engine oil sump plug.

4.) The front transmission oil plug is the one you want, loosen it and then slowly unwind it by hand until the end of the thread, then get yourself and the cat out of the way before you both get covered in oil. If all goes to plan, you’ll get most of the spent oil into your container.

Short Shifter Install on 04-07/08-11+ Subaru STi:

Short Shifter Install on 04-07 Subaru STi:

A step by step guide on installing a short shifter for a 04-07 Subaru STi and 08-11+ Subaru STi/Legacy.

OEM Short shifter: Installed and ready to go.

Tools needed:
10, 12, 14, 17mm wrenches
Jack Stands
Jack
Needle nose pliers

Short Shifters used:

Subaru OEM Short Shifter 04-07 STi:

Genuine Subaru STI Short Throw Shifter – 6MT

Subaru OEM Short Shifter 08-11 STi, WRX, Legacy:

Genuine Subaru C1010AG001 STI Short Throw Shifter


Step 1: Once the car is up on jack stands / a lift, you want to support the transmission and remove the rear cross member. You will need to remove it later anyway, it also makes it much easier to work without it in the way. I used a bottle jack and block of wood to support the tranny, but im sure a transmission jack would work much better if you have one.
This picture shows the cross member removed.

Short shifter: This picture shows the cross member removed.

Step 2: Once the cross member is unbolted you will need to unplug the 02 sensor, and unclip its harness from the cross member. It is held by two plastic clips that can be pushed out of the holes in the member without much trouble.

Short Shifter: O2 sensor is held by two plastic clips that can be pushed out of the holes in the member without much trouble.

Step 3: Remove the bolt from the lower rod, I believe it is a 14mm. The nut on the other side is attached to the bracket, so you don’t need a wrench on it. I found that ratcheting wrenches work best for most of these bolts.
The bolt that needs to be removed is the one going through the rubber bushing shown in the upper right of this picture.

Short Shifter: The bolt that needs to be removed is the one going through the rubber bushing shown in the upper right of this picture.

Step 4: Now you can disconnect the reverse lockout cable. It is held in with a pin that can be pulled out with a pair of pliers. I stuck an Allen wrench through the cam as shown in the Cobb short shifter install when I removed it just in case. There is a washer on the lockout cable that may be stuck in the grease, you will want to take it off and set it aside so it doesn’t get lost. The lockout cable can be seen on the left side of the picture above. You can now move the lower rod down, and move the lockout cable out of the way.

Motor Mount install for Subaru Impreza WRX/STi

Motor Mount install for Subaru Impreza WRX/STi:

This how-to is based off a GR, but the concepts should be similar to a GD. I’m not sure how different the front subframe is or how it might interfere with the install.

Here is a selection of stiffer motor mounts:

Group-N motor mounts:

Group N Subaru Motor Mounts Set! Legacy Gt, Sti, WRX See Listing for Fitment!

Perrin Performance motor mounts:

Perrin Performance Motor Mount Kit Subaru WRX/STI 02-14

Torque Solution motor mounts:

Torque Solution Engine Mounts: Subaru Wrx Sti 2002-2016

I’m making this as a response to so many people saying that motor mounts are a terrible install. I think they’re cake, and I want to show why. I had originally installed the Tigwerks motor mounts, but their NVH was a little much for my tastes so I went to Group Ns, and that’s where this install was born (my second time through). I’d do it again and could accomplish the whole process inside of two hours with mandatory beer breaks.

Clutch replacement for a Subaru WRX/STi:

How to replace a Clutch for a GD Subaru:

This procedure was performed on a MY04 STi with some modifications which may or may not be relevant for the purposes of this How-To. This procedure is only ONE way of removing the transmission and is not meant to be the be-all method. This is a DIY on your driveway process only. If you have access to a lift, this would be the preferred and safest method.

Perform this procedure AT YOUR OWN RISK.

Clutch: This procedure allows you to remove the transmission from a Subaru STI for the purpose of gaining access to the clutch and flywheel system for inspection and or replacement

This procedure allows you to remove the transmission from a Subaru STI for the purpose of gaining access to the clutch and flywheel system for inspection and or replacement.

This procedure allows you to remove the transmission without the benefit of a lift and is meant as a DIY for the weekend warrior. This is by no means a simple or easy procedure and it requires a good deal of strength. IT IS RECOMMENDED YOU HAVE A FRIEND THERE TO HELP. You will need a second pair of hands at times.

5spd Subaru WRX five speed manual tips and tricks

5spd Subaru WRX five speed manual tips and tricks:

So you’ve got this noise coming from your 5spd transmission. It is starting to whine when you’re on/off the throttle. The sound seems to come right from below like around the shifter area. You may be a victim of the infamous falling apart center differential!

Don’t be too worried, transmissions are a dime a dozen! You still have the option to go 6spd or another 5spd transmission with different gear ratios if you choose.

5Spd: The damage. Most times the rear cover will back out minor like this photo. Other times it will completely come off. You can see the circlip survived this incident on this WRX