Tag Archives: Subaru

Steering Systems on early Subarus Part 1

Steering Systems on early Subarus Part 1:

Rack And Pinion Steering Mechanism

Subaru steering systems utilize a rack and pinion steering mechanism. As the pinion gear rotates, the rack moves left or right. Rack and pinion steering gives the driver precise control over the wheels. The simple, compact design is easy to service.

Steering Systems on early Subarus Part 1: The Subaru SVX used Subaru's early power steering system.
Steering Systems on early Subarus Part 1: The Subaru SVX used Subaru’s early power steering system.

CGR – VGR Ratios

Two manual steering racks are used in Subaru vehicles: a constant gear ratio (CGR) rack and a variable gear ratio (VGR) rack. The teeth on the CGR rack are equally spaced so the turning effort is equal throughout the turning range. The teeth on the VGR rack are spaced closer together on the ends of the rack than in the middle. The turning effort decreases as the turning angle increases so sharp-radius turns are easier to make.

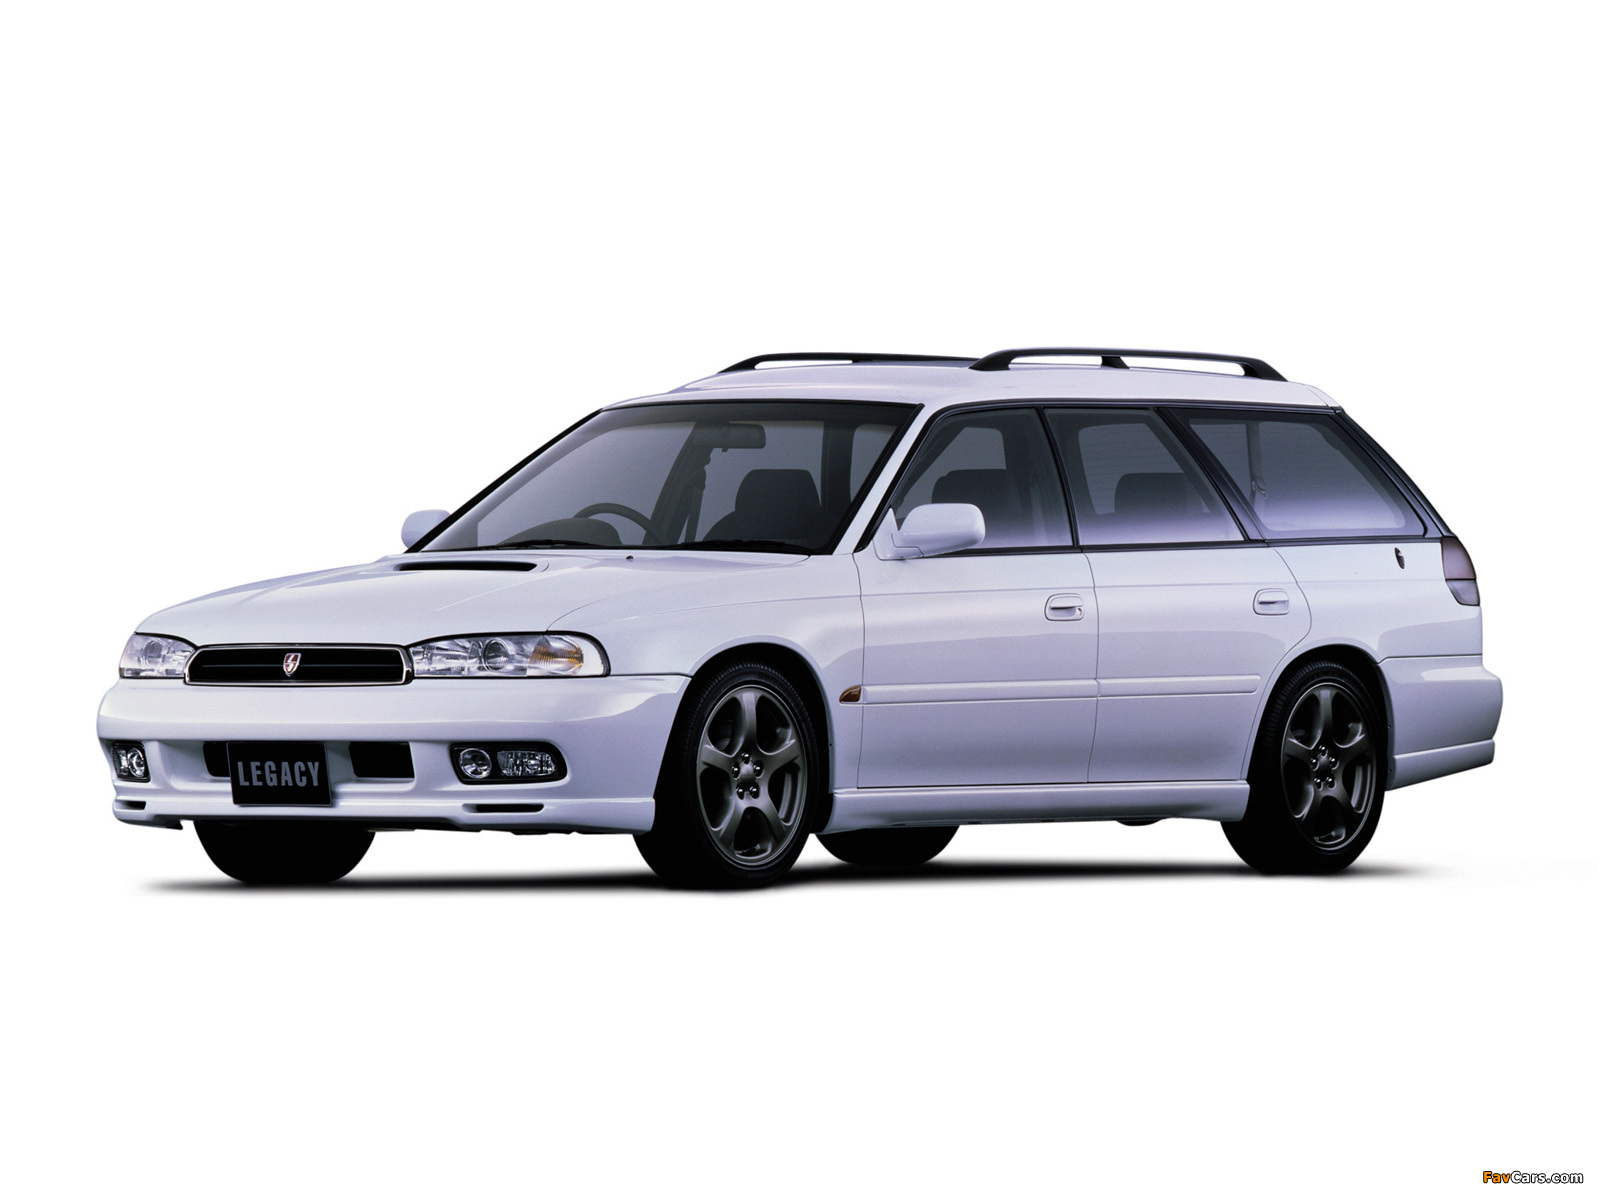
Legacy and SVX Steering Racks

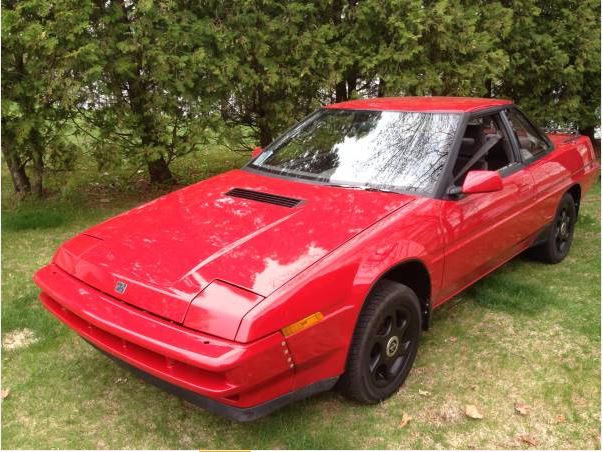
Several different power steering racks have been installed in Subaru vehicles. The racks used in the L-series, XT, Legacy and SVX vehicles are similar. All have a one-piece gearbox and lack the external air vent distribution tube found on the rack in pre-’85 and carryover vehicles. However, the XT rack differs from the L-series rack in several ways.

The XT rack is made of aluminum and has a different control valve. Different types of hydraulic seals are used in the two racks, and each has its own unique special service tool. The power steering rack in the pre-’85 model year vehicles and the Brat has a two-piece gearbox and an air vent distribution tube. It also has seals, service procedures and special service tools that differ from the other racks.

Rigid Steering Column

Three types of steering columns are used in Subaru vehicles: a rigid steering column, a tilt steering column and the XT and SVX tilt and telescoping steering column. The rigid steering column is found on L-series DL models, the Legacy standard model, and Justy vehicles. The rigid steering shaft does not tilt or pop-up, but is collapsible (a safety feature). The shaft is connected to the gearbox by universal joints.

Overboost and Underboost Subaru common causes:

Overboost and Underboost Subaru common causes:

The common causes for overboost or underboost: This is a basic guide on the possible causes and some solutions to those causes of a overboost or a underboost situation in a turbocharged subaru.

Overboost and Underboost Subaru common causes: This is the layout of the stock turbo subaru boost control system.
Overboost and Underboost Subaru common causes: Turbo Subarus: Common Overboost and Underboost issues with Turbo Subarus.

Overboost:

1.) Decat + High flow induction –  Cure: Reduction of the solenoid duty cycle or alteration of restrictor size will help return boost output to its normal level.

2.) Split, poor fitting, or disconnected pipes – Cure: Replace or refit pipes, the pipes that will cause this issue are between the wastegate actuator, solenoid, and the turbo. Including up to the restrictor on the return pipe of the 3 port solenoid.

3.) Manual Boost Controller – Electronic Boost Controller set too high – Cure: Don’t be so greedy and back the boost duty/adjuster off to a safe level.

4.) Restrictor Pill not fitted / size incorrect – Cure:  Ensure restrictor pill is fitted (3 port) if so on a 3 port reduce the restrictor size and on the 2 port increase the restrictor size to reduce the boost to a safe level.

5.) Clogged 3-port solenoid: It is possible that the flow of air through the 3-port solenoid could be restricted between the turbo outlet port and the wastegate actuator port if the solenoid is very dirty (usually oil vapor from the intake system), this allows the wastegate to remain clamped shut longer than it should be causing a potential overboost situation. Cure: Clean with carb or clutch/brake cleaner.

6.)Loss of solenoid funcation: Although this is not bverboost it shows itself with very simmilar symptoms, its an interesting scenario. It is possible for the solenoid to fail or even stick shut while under boost. This will result in a rapid reduction of boost pressure to wastegate pressure approx 0.5 BAR. So if you were running at full boost 1.0 BAR for example and the solenoid was to fail shut it would feel just like overboost as the wastegate rapidly opens due to the solenoid blocking off the spill from the wastegate. Cure: Either clean the solenoid with carb or clutch+brake cleaner or replace the solenoid.

ABS 5.3 Antilock Brake System for Early Subaru Part 5:

ABS 5.3 Antilock Brake System for Early Subaru Part 5:


ABS 5.3 Antilock Brake System for Early Subaru Part 5: Beginning in approximately December of 1996, a new antilock braking system called ABS 5.3 was installed on Legacy vehicles equipped with ABS.
ABS 5.3 Antilock Brake System for Early Subaru Part 5:
Beginning in approximately December of 1996, a new antilock braking system called ABS 5.3 was installed on Legacy vehicles equipped with ABS.


Beginning in approximately December of 1996, a new antilock braking system called ABS 5.3 was installed on Legacy vehicles equipped with ABS. This system uses a Bosch hydraulic control unit and a Nippon electronic control unit. ABS 5.3 is a four channel control design which can independently control the front wheels and utilize select low control to control the rear wheels (a system which provides the same fluid pressure control for the two rear wheels if either wheel starts to lock up).

Although similar to other Subaru ABS systems, there have been enhancements to component operation and location. Diagnosis has also improved because of the ability of the 5.3 ABS system to communicate with the Select Monitor. The hydraulic control unit or HCU is located under the hood on the right side of the engine compartment. The size of the HCU has decreased by approximately a third from that of the ABS-2E system, used on previous model year vehicles.

The HCU controls brake fluid flow by utilizing eight solenoid valves. There is an inlet solenoid valve and an outlet solenoid valve for each wheel. Mechanically, the inlet solenoid valve is open during normal braking, and the outlet solenoid valve is closed. The HCU also contains a motor and pump assembly, which operates only while ABS is actively controlling the brake fluid flow–preventing a wheel lock.

Beginning in approximately December of 1996, a new antilock braking system called ABS 5.3 was installed on Legacy vehicles equipped with ABS.
ABS 5.3: Beginning in approximately December of 1996, a new antilock braking system called ABS 5.3 was installed on Legacy vehicles equipped with ABS.

Externally the HCU of the ABS 5.3 has a relay box attached. This allows troubleshooting of the valve and motor relay area to be kept separate from the troubleshooting of the solenoid valves and pump motor. There are four modes of operation for the ABS 5.3 system. They are normal, pressure-drop, pressure-hold and pressure-increase. When wheel lockup is sensed, Mode Two, Mode Three and Mode Four may be activated. They are described as follows:

Boost control systems on a Turbo Subaru:

Boost control system on a Turbo Subaru:

This guide covers most  boost related issues including a short introduction on how your boost systems work. This information is based on the Classic Impreza’s, but will cover the newer WRX/STi cars to a certain extent.

Safe boost levels:

When modding your car without mapping (full de-cat and high flow induction etc) you increase the efficiency of your turbo which could result in engine damage due to lean running at high rpm / max boost. To prevent damage always try and keep your boost level as close to standard as possible until your car is mapped for the increase in boost pressure.

TLDR: Don’t screw with your boost levels until you get the car tuned by someone who knows what they are doing. Otherwise you’ll probably end up with a blown up Subaru.

Boost Issues:

Is the boost control system connected correctly:

Axle general maintenance:

Axle general maintenance:

Front stub axle seal replacements require special precautions. The seals are pressed into a side bearing retainer, which must be removed to replace a leaking seal. The side bearing retainers also control front differential side bearing preload, as well as ring and pinion backlash.

When replacing a stub axle seal, mark the position of the side bearing retainer before un-threading the retainer. Remove only one side bearing retainer at a time, or you’ll risk disturbing the differential adjustments. If you’ve marked the position before removal, the correctly installed position of the side bearing retainer will be obvious, as you will be unable to turn the retainer another complete turn.

2008-Subaru-Impreza-WRX-Hatchback-Front-Axle-Parts-Assembly
Axle general maintenance: A driveaxle for a 2008 Subaru Impreza WRX.

The driveaxles on some Subaru vehicles are pressed into the wheel hub with a light press fit. Blasting the axle out of the hub with an air chisel, center punch or other implement of destruction invites damage to the wheel bearings. All of the force brought to bear by these methods finds its way to the wheel bearings, possibly damaging their races or balls. Special tools are available for removing and installing  press-fit driveaxles. Ignoring these cautions invites a comeback for noisy wheel bearings shortly after your CV axle repair work.

Buy this now: 1989 Subaru XT6

Buy this now: 1989 Subaru XT6

A Subaru XT6.
Subaru XT6.

If you want to own a really cool and really rare piece of Subaru history you should take a look at this XT6:

I have a 1989 Subaru XT6 5 speed with full time all-wheel drive and low miles. It is a 2.7 liter flat six cylinder engine and functioning air ride suspension. I’ve had the car for two and a half years now and it looks completely different from when I bought it. I’ve spent more hours working on it than I would probably like to admit. It has a new water pump, new timing belts, new fuel pump, new radiator, new plugs, new tranny and rear diff fluid, and four new tires, new exhaust. Over this previous summer the whole car was sanded, cleaned up, dents removed and straightened the whole body. It has a fresh coat of factory Subaru red and it looks awesome, you need to see it in person to really appreciate it. Countless hours put into it. I really don’t want to sell this awesome car but it is a historic subaru that deserves to be kept clean and taken on the occasional cruise. I’d accept trade offers preferably a subaru or truck but shoot me an offer.

Subaru XT6 for sale.

Craigstlist

Is this 1989 Subatu XT6 a good deal or something that should be skipped? It’s from Wisconsin so I would be weary of rust, but it looks pretty rust free to me. I would inspect underneath the car however to be sure. What does everyone else think? Comment below!

ABS for Early Subaru Part 4:

ABS Brake System for Early Subaru Part 4:

Troubleshooting Process:

To troubleshoot ABS systems, it’s best to follow a step-by-step procedure like the one on the 1992 Legacy ABS-2E Service Manual Supplement. Enter the flow diagram with the symptom reported on the repair order.

ABS Brake System for Early Subaru Part 4: The Subaru Legacy RS was known for using this ABS System.

The diagram calls that Trouble Occurs. The first step in the procedure is “Basic Checks.” This calls for a visual inspection to look for obvious problems and includes the following items:

• improper battery voltage
• low brake fluid level
• brake fluid leaks
• brake drag
• condition of the brake pads and rotors
• size, type, and condition of the tires (Check the tires to confirm that they are the correct tires for the vehicle, that they are in good condition, and that they are inflated to the correct pressure).

If you find something wrong at this stage, correct it and see whether it eliminates the reported symptom. If not, continue to Step 3. Step 3 is Self-diagnosis. At this time, put the ECU into self-diagnostic mode, and monitor the ABS warning lamp for trouble codes.

Headlight aiming basics for Subarus:

Headlight aiming basics for Subarus:

Subaru models equipped with aerodynamic headlights require no special fixtures for headlight alignment. Each headlight is equipped with a built-in headlight aiming mechanism. The following sequence demonstrates the correct technique for adjusting the headlights on a Subaru Legacy equipped with aerodynamic headlights.

Headlight aiming basics for Subarus: Some basic headlight adjusting techniques for Subaru cars.

1.) Turn off the headlight before adjusting headlight aiming. If the light is necessary to check aiming, do not turn on the headlights for more than two minutes.

2.) Inspect the area around the headlight for any damage. If the vehicle has been involved in an accident, it may not be possible to properly adjust the headlights until the damage has been professionally repaired.

3.)The vehicle must be parked on level ground and all four tires must be properly inflated.