Tag Archives: Subaru

Pitch Stop Install on Subaru WRX/STi

Pitch Stop Mount Install on Subaru WRX/STi:

This is a step by step guide on how to install an aftermarket Pitch Stop Mount to your 02-07 Subaru WRX or STi.

Pitch Stop Mount: In the foreground a oem plastic pitch mount and in the background a Perrin Performance pitch stop mount.

1.) Locate and remove the three 10 mm Gold colored bolts that secure the black vacuum lines to the bottom of the intercooler. You will need a shallow socket as it gets tight around the BOV. Careful not to drop them into the engine bay, it will be a PITA to find and retrieve them.

2.) Locate and remove the two 12 mm bolts that secure the recirculating BOV to the bottom of the intercooler. Again be careful not to drop these into the engine bay as it’s a jungle down there and it will be a PITA to retrieve them.

3.) Locate and remove the two 12 mm bolts that secure the intercooler to the engine. These are located one on each side of the intercooler.

4.) Now the intercooler is only held in place by the rubber intake hoses with the clamps. The one that is on top, from the intercooler to the throttle body/intake manifold is easier so do them first. Using the Flat head screw driver or an 8 mm socket loosen the clamps holding the intake piping to the Intake manifold and intercooler. And leave it for now.

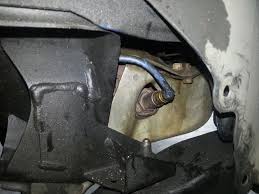
5.) This is a little tough to do, but its not impossible. You should be able to do it even if you have large hands. Using the flat head or 8 mm socket, loosen the clamp that holds the intake tube coming from the cold side of the turbo to the intercooler. This is located underneath the intercooler.

Oil Change 04-07 Subaru WRX/STi DIY:

Oil Change 04-07 Subaru WRX/STi DIY:

If you’ve never changed oil on a 04-07 WRX STi this guide will take your step by step through the oil change process. This guide should be applicable to most turbocharged Subaru cars throughout the years. Check at the end of the post for part numbers, oil, filters and tools needed to complete an oil change.

Oil Change: The legendary oil filter subaru ring of fire.

1.) Get you car on a hard, even, flat surface and get your car up on jack stands. I put mine up on 4 jack stands, so that later on when you are draining the oil, the car is already level and will drain properly.
Where to jack and put jack stands has been debated many times before.

2.) Once you get your car up on 4 jack stands, it is time to remove the brush guard. There are 5 bolts to remove and they are all 12mm.

3.) Now that you got your brush guard off its time to get under the car and start your oil change. You should take a second and locate the oil filter and the oil drain plug.

4.) If your engine is cool, go ahead and start it up and let it run for about 5 minutes. This helps with the oil change. The oil gets warm and drains much easier and quicker.

Brake Pad WRX install 02-05

Brake Pad WRX install 02-05:

This is a basic brake pad removal and install walk through with a Subaru Impreza WRX. Make sure to go slowly to ensure you don’t introduce air into the brake system.

1.)Loosen your lug nuts for the corner you are working on, jack the vehicle up and put it on a jack stand, then remove the wheel.

Brake pad: A Subaru Impreza WRX stock brake caliper.

2.)You now need to dislocate the caliper. There are two 14mm bolts that need to be removed: A lower one, and an upper one. Once removed you can wiggle the caliper back off the rotor, and lay it up on top of the rotor next to the strut. At this point, DO NOT let anyone touch the brake pedal.

3.) At this point you can pull the pads free. I just carefully wedged my finger between the rotor and the pad to lever them free. They locate/remove in a manner perpendicular to the axis of the rotor. There are two of them on each side; remove them both. You will note that the inside pad has a metal ‘clip’ attached to it. The purpose of this is actually to rub against the rotor when the pad material is getting worn low; thus creating the horrid metallic squeal that will remind you your brakes need attention.

4.) Organize the new parts. There are two pads, each with one plastic-coated plate, and one shiny metallic plate, and one metal clip. Subaru also provide some brake grease for you.

5.) Remove the old clips by just dislodging them with your fingers.

6.) Put the new clips located in the position of where the old clips went.

Fuel Pump Walbro 255lph for 2008 STi/WRX/LGT Install:

Walbro Fuel Pump for 2008 -11 STi/WRX/LGT Install:

Install guide for those looking to upgrade the factory WRX, STi, or LGT fuel pump. I recently found the stock pump to be inadequate when running high boost and E85. When ordering the pump, you DO NOT need the filter kit, it WILL NOT fit in the housing. Make sure to run the car down under the 1/4 tank mark before beginning. There will be gas spillage so make sure you have plenty of fresh air and towels around to clean up.

1.) Pop the gas cap off to relieve fuel pressure from the tank. Remove your lower rear seat by pulling upwards on each side and the middle. There are 3 snap in spots. Place your seat somewhere clean and out of the way. Once you do this you can see the fuel pump access cover and harness. Unplug this harness.

2.) Remove the 4 screws holding the access cover in place and place them somewhere safe away from the access cover.

3.) Now you can see the fuel pump access point. There are 3 fuel lines, 8 8mm nuts, and the electrical connector. Disconnect the electrical connector now and stuff it out of the way. Grab some of your handy shop towels and place them under the fuel lines in case of spillage. Once you have removed the fuel lines it should look like this:

Fuel Pump: There are 3 fuel lines, 8 8mm nuts, and the electrical connector. Disconnect the electrical connector now and stuff it out of the way. Grab some of your handy shop towels and place them under the fuel lines in case of spillage.

4.) Remove all 8 of the 8mm nuts and place them somewhere safe. Gently remove the metal bracket surrounding the entire assembly to gain access to the housing and place it somewhere safe. Slowly remove the fuel pump assembly by contorting it, be careful not to damage the float or sensor. Once the housing is removed it may spill, make sure you have plenty of towels laid down in your car. If all went well it should look like this:

Fuel Pump: Gently remove the metal bracket surrounding the entire assembly to gain access to the housing and place it somewhere safe. Slowly remove the fuel pump assembly by contorting it, be careful not to damage the float or sensor.

Group N STi Transmission Mount Install:

Group N STi Transmission Mount Install:

How to install an STi Group N Transmission Mount for manual transmission only. There is a significant difference between the STi Group N transmission mount and the stock one. The STi Group N mount is not only harder, but has more material to it. The stock mount is soft enough to compress with your hand, whereas standing on the STi Group N mount barely deflects the material.

Group N: Stock transmission mount on the left. STi Group N transmission mount on the right.


1.) To start off, look for the long crossmember holding up the transmission- it will be at the end closest to the engine. The ends of this crossmember are right near the rear mount for the front A arm, and are held in with a large 17mm bolt, one on the driver side and one on the passenger side. Remove them both completely. Fair warning- these bolts were tight from the factory. I placed a 3 foot length of pipe over my socket wrench for leverage after I had a casualty- I broke one of the 4″ long socket extensions.

2.)  remove the 2 14mm nuts that hold the bottom of the transmission mount to the crossmember that runs the length of the transmission- these were also tight but came out without breaking any of my tools.

3.) At the rear of the transmission, you will find the third and final crossmember holding the transmission in its place. There are four 14mm bolts in this crossmember there are two on the driver side.

Turboback Exhaust Install on 02-07 Subaru WRX:

Turboback Exhaust Install on 02-07 Subaru WRX:

Bone stock the WRX is one of the best performing entry level sports cars you can find, but there’s always room for improvement. Replacing the stock 2.25″ turboback exhaust and it’s 2 catalytic converters with a 3″ turboback exhaust, featuring one high flow cat, should allow the turbo to spool up easier and quicker for more low end grunt.

1.) Remove the heatshield. You’ll be amazed at the amount of bolts used to hold on this simple piece of metal. There are 5 on the left side (viewing from the front of the car), one on the back, and two on the right side. After you have all the bolts removed you’re going to need some keen geometry skills to get the heat shield out of the engine bay but once you do, the downpipe to turbo connection is easily available. Once the downpipe is exposed look for the bottom heatshield. It connects to the downpipe by one bolt.

2.) Loosen the downpipe. There are only 5 bolts holding the downpipe to the turbo. They are surprisingly easy to get to. Now would also be a good time to remove the O2 sensor from the Downpipe.

3.) Disconnect the remaining hangers. It’s a good idea to use photos of the exhaust out of the car in order to point out where the hangers are in relation to the whole system. Install the new downpipe by lining up the turbo/downpipe bolts then securing the hangers. There are 2 hangers for the downpipe shown here. The front one bolts into the transmission. The second rests on a J bracket and is screwed in.

O2 Sensor replacement on 02-07 Subaru WRX/STi:

O2 Sensor replacement on 02-07 Subaru WRX/STi:

This is a guide to replace your front 02 sensor in your 02-07 Subaru WRX/STi. This guide will go step by step through the process.

Denso 234-9120 Oxygen Sensor (Air and Fuel Ratio Sensor)

O2 sensor location in the exhaust manifold.

1.) The first thing you need to do is place the jack under your car. I chose to use the pinch weld under the passenger’s door area. Next you will want to remove the wheel from the car so you will have better access to the O2 sensor. I did this by using a 19mm socket with an extension.

2.) Upon removing the wheel, you should notice a small plastic flap with a few plastic retaining screws holding it in place. I have circled them in red in the picture below.

3.) You are going to want to remove these using flat head and phillips head screw drivers. Take care in making sure you do your best to not strip them out. If you do, you will end up having to either pry them out or pull them out with a set of pliers. If you need to replace any of these, you can usually find them at any autoparts store.

4.) Once you have all of the plastic screws pulled out, remove the plastic cover.

5.) If you pull the remaining plastic cover to the right, you will be able to see the O2 sensor. You can opt to remove the larger of the plastic fender well shields, but I did not see much point in doing so as it would not really yield much more room for access.

6.) With the O2 sensor exposed, you will want to spray it with some lubricant and my preferred lubricant is PB Blaster. With that now soaking in a bit, you are now going to want to go and pop your hood to gain access to the plug end of the sensor.

7.) Looking at your engine bay, you will want to move to the left side (passenger side). Underneath this cover are two connections, the top one is for your front O2 sensor. Go ahead and disconnect that plug.

Transmission oil change for Subaru WRX/STi:

Transmission oil change for Subaru WRX/STi:

This is a guide on how to change your transmission oil in your turbo Subaru. Transmission oil is usually changed at 30,000 mile intervals, though more frequent changes are suggested if you take part in track days.

Transmission oil:

Subaru 75W90 Extra-S Gear & Transmission Fluid – 1 Quart Bottle

Subaru 803916080 Manual Transmission Drain Plug Washer

Tools needed:

21mm Socket wrench or other tool of your choice
(I used a socket set with the large spark plug fitting and hollow
extension for extra leverage, dad’s tent is now missing one pole.)
– New sump washer
– Funnel
– 2 foot length of garden hose or similar sized tubing.
– Gear oil* – 3.9 quarts for wrx/sti gearbox/front diff. (Extra 800ml for rear diff)
– Oilpan or large container capable of holding 4+ quarts.

1.) First things first, jack the car up, or drive it onto wheel stands. Make sure the hand brake is on. T
Do not go under the car unless you’re sure it’s secure on it’s stands.

2.) Ensure the car is cool enough to work on, wait at least an hour after driving. Now you’ll need to find the transmission dipstick, which is located between
the turbo and intercooler. Pull it out.

3.) Now you can crawl under the car with your socket, dropsheet & oil pan. Looking from the middle of the car towards the front, you’ll be able to
see the drive shafts, transmission & diff, transmission plug, the engine oil sump plug.

4.) The front transmission oil plug is the one you want, loosen it and then slowly unwind it by hand until the end of the thread, then get yourself and the cat out of the way before you both get covered in oil. If all goes to plan, you’ll get most of the spent oil into your container.