Bone stock the WRX is one of the best performing entry level sports cars you can find, but there’s always room for improvement. Replacing the stock 2.25″ turboback exhaust and it’s 2 catalytic converters with a 3″ turboback exhaust, featuring one high flow cat, should allow the turbo to spool up easier and quicker for more low end grunt.
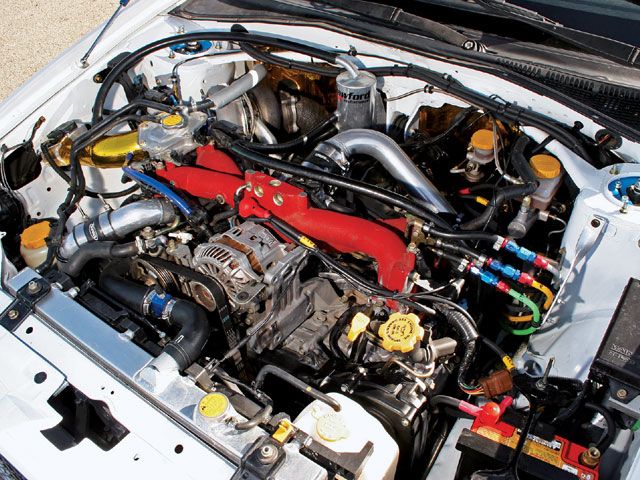
1.) Remove the heatshield. You’ll be amazed at the amount of bolts used to hold on this simple piece of metal. There are 5 on the left side (viewing from the front of the car), one on the back, and two on the right side. After you have all the bolts removed you’re going to need some keen geometry skills to get the heat shield out of the engine bay but once you do, the downpipe to turbo connection is easily available. Once the downpipe is exposed look for the bottom heatshield. It connects to the downpipe by one bolt.
2.) Loosen the downpipe. There are only 5 bolts holding the downpipe to the turbo. They are surprisingly easy to get to. Now would also be a good time to remove the O2 sensor from the Downpipe.
3.) Disconnect the remaining hangers. It’s a good idea to use photos of the exhaust out of the car in order to point out where the hangers are in relation to the whole system. Install the new downpipe by lining up the turbo/downpipe bolts then securing the hangers. There are 2 hangers for the downpipe shown here. The front one bolts into the transmission. The second rests on a J bracket and is screwed in.
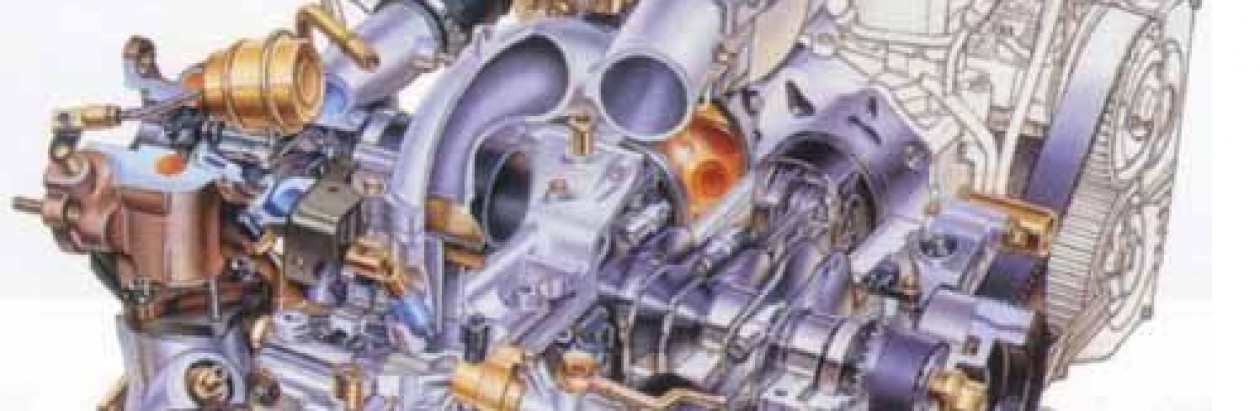
Deatschwerks injectors install on a Subaru STi w/ a FMIC:
We put together this DIY since there are some more specifics when working with the Deatschwerks injectors on a 2006 STI with a FMIC. YMMV and as with all DIY’s, you do this at your own risk. I will not be responsible for any damage you incur doing this yourself. (but seriously, it really wasn’t ‘that’ hard.)
Optional (nice to haves) – Magnetic Tray (to keep from losing bolts/screws/etc) – “Antenna” Magnet (to get ‘dropped’ bolts/screws/etc) – rags for cleaning up spilled anti-freeze
1. Let the car sit overnight or relieve the fuel pressure by unplugging the fuel pump (green plug in upper right area of passenger footwell). (NOTE: I just let my car sit overnight)
Deatschwerks injectors:
2. Start on the driver’s side (it’s easier).
a) Remove negative battery terminal.
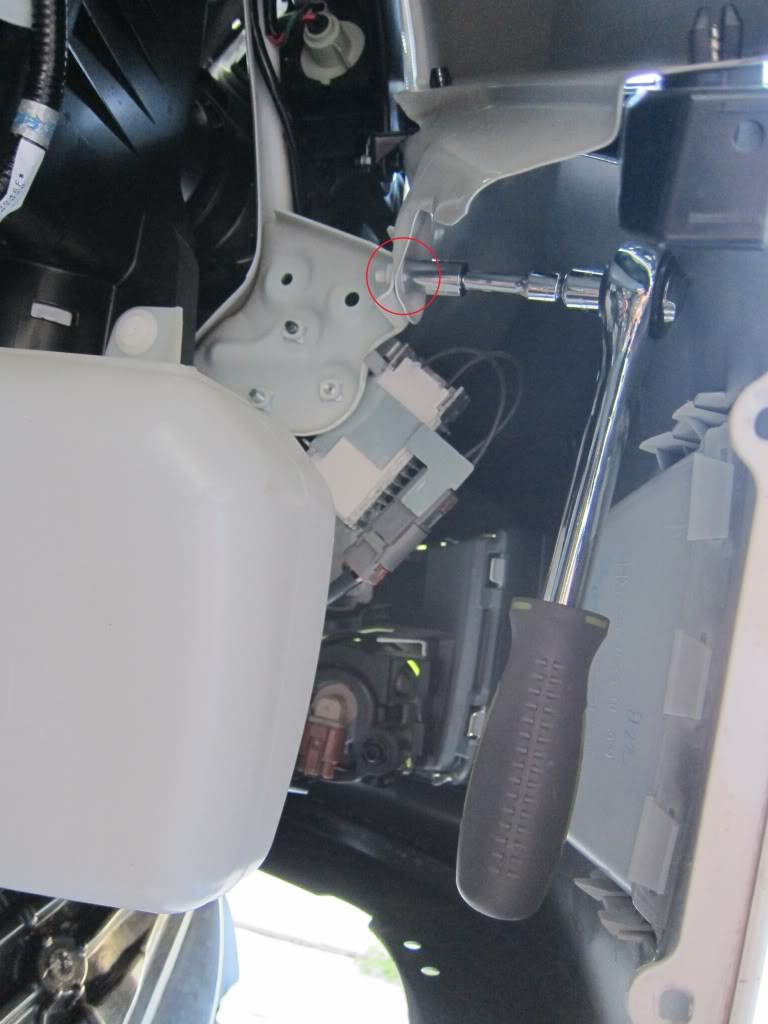
b) Remove the two 12mm bolts holding in the plastic bracket to the intake manifold and clip the two zip ties keeping the harness in the plastic bracket.
c) Now remove the plastic bracket (it will take a patient/creative rotation to get it out from the hoses/harnesses) and you’ll be able to clearly access the torx screws holding down the little bracket that holds down the injectors.
1.You may also want to unplug the blue connector and the Crankcase breather hose (regular clamp, not the crimped one) to provide maximum access to the injectors.
d) Unplug the injector, remove the torx screw (Proper size Torx Bit: T-25), swing the bracket up and out of the way, and pull the injector out. You will need a small screwdriver with a sharper tip to pop the injector up. Just be careful not to damage the injector seat or the injector housing / Rubber O-ring
3. Now, get one of your newly purchased Deatschwerks injectors. Open the tube of Super Grease (should be provided) and generously lube the lower O-Ring, and moderately-sparingly lube the upper O-Ring. ONLY LUBE the O-RINGs, try not to get lube on the injector screen or filters
4. Gently insert the Deatschwerks injector. You will want it to sit on the upper O-Ring, flush to the injector port. Then use the bottom of rubber mallet wooden handle to push the Deatschwerks injector in until it seats. There will be a noticeable but gentle “pop” not a sound but a “feel” once the Deatschwerks injector seats. If there is a fair amount of gas left in the injector port, it may even just slip in … no “pop” feeling.
This fender brace install was performed on ’11 Subaru Impreza WRX STi 5 Door with GTSpec Fender Braces.
Required Tools:
Socket wrench with multiple extenders.
10mm, 12mm, and 14mm sockets
12mm wrench
Impact Driver (Not required but makes things easier)
Tire iron Floor Jack/Jack stands
Screw Driver
Pliers/Cutting pliers
2 Zip ties
Gloves (Not required but always nice to have) PB Blaster
Passenger side
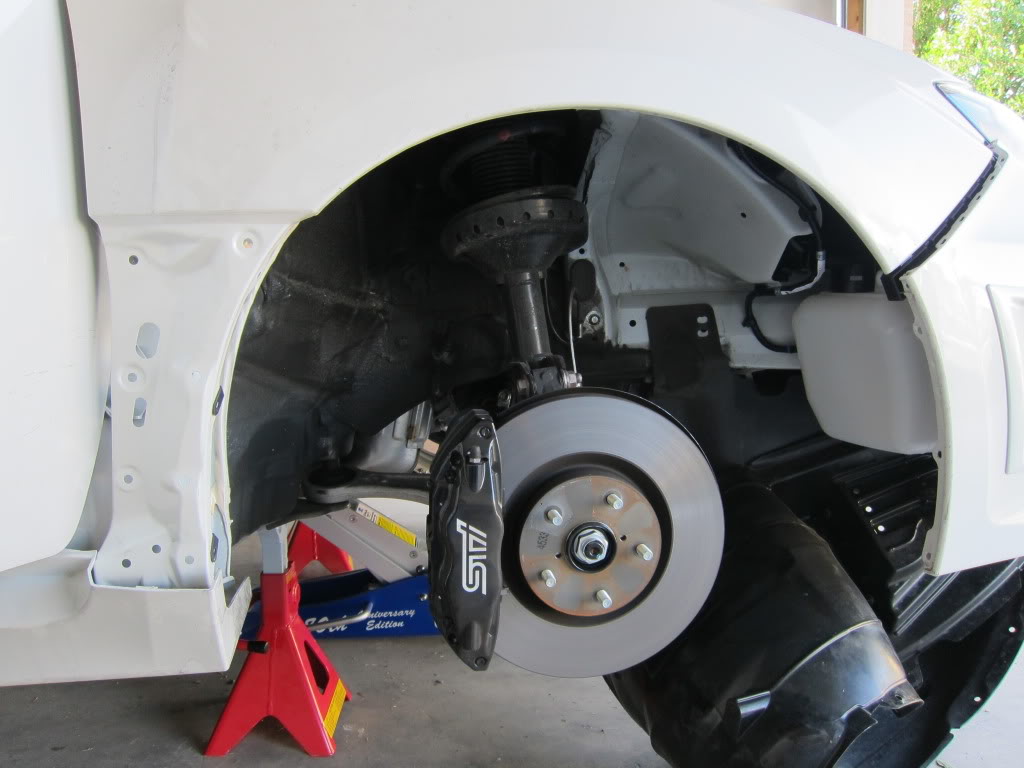
I started off on the passenger side. Get the front end on jack stands. Also put chalks on the rear tires for added safety.
Now lets start by removing your tire. (This is where having an impact wrench makes things a breeze!)
*Note* I did not remove by front bumper however i did later on. I would suggest you go ahead and remove the front bumper to save yourself some time later on down the road. It makes things easier!
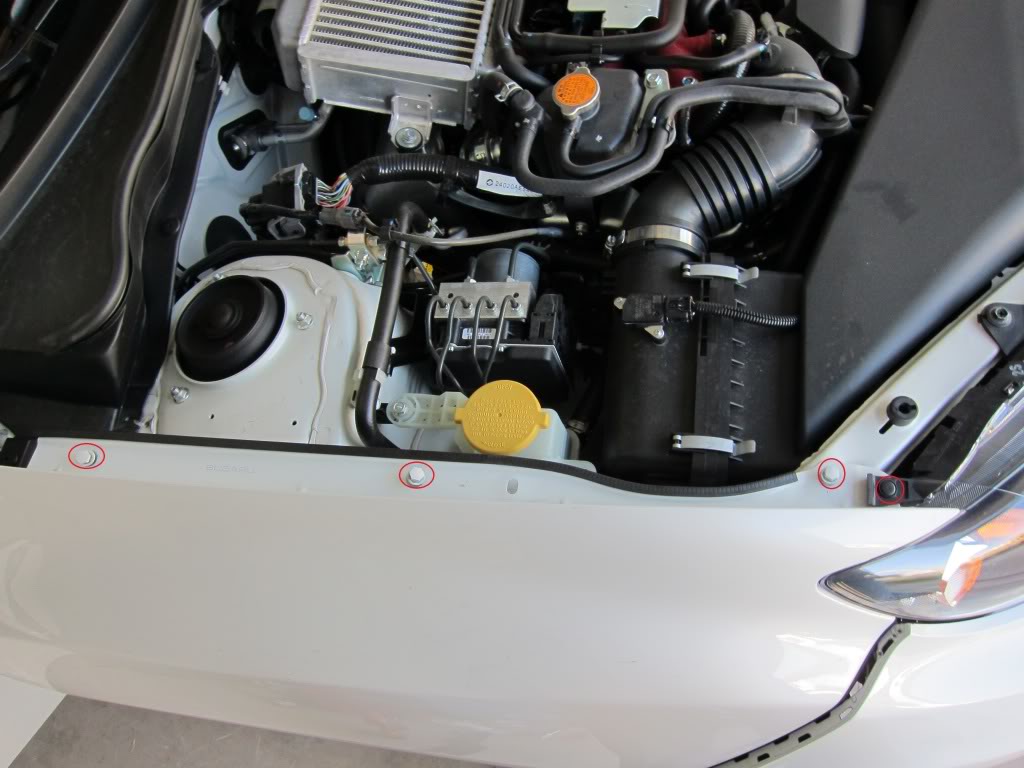
Now remove the 3 bolts in the engine bay and the one retaining clip on the headlight fixture.
Fender removal Subaru STi GR: Now remove the 3 bolts in the engine bay and the one retaining clip on the headlight fixture.
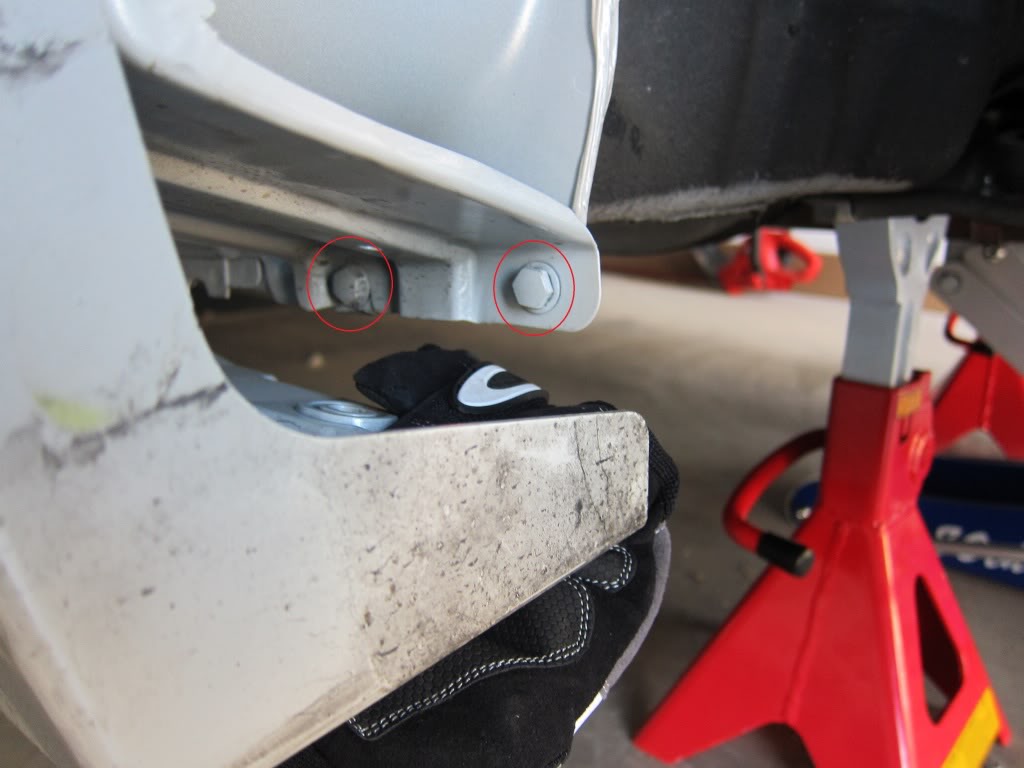
Remove the bolt behind the front bumper. (If the bumper is off it makes this next part very easy!)
Fender Removal Subaru STi GR: Remove the bolt behind the front bumper. (If the bumper is off it makes this next part very easy!)
Unscrew the black plastic bracket that secures the fender to the front bumper. (Again much easier to do with bumper off). I’d also suggest you remove the black bracket all together. This will come in handy when you reassemble the front fender.
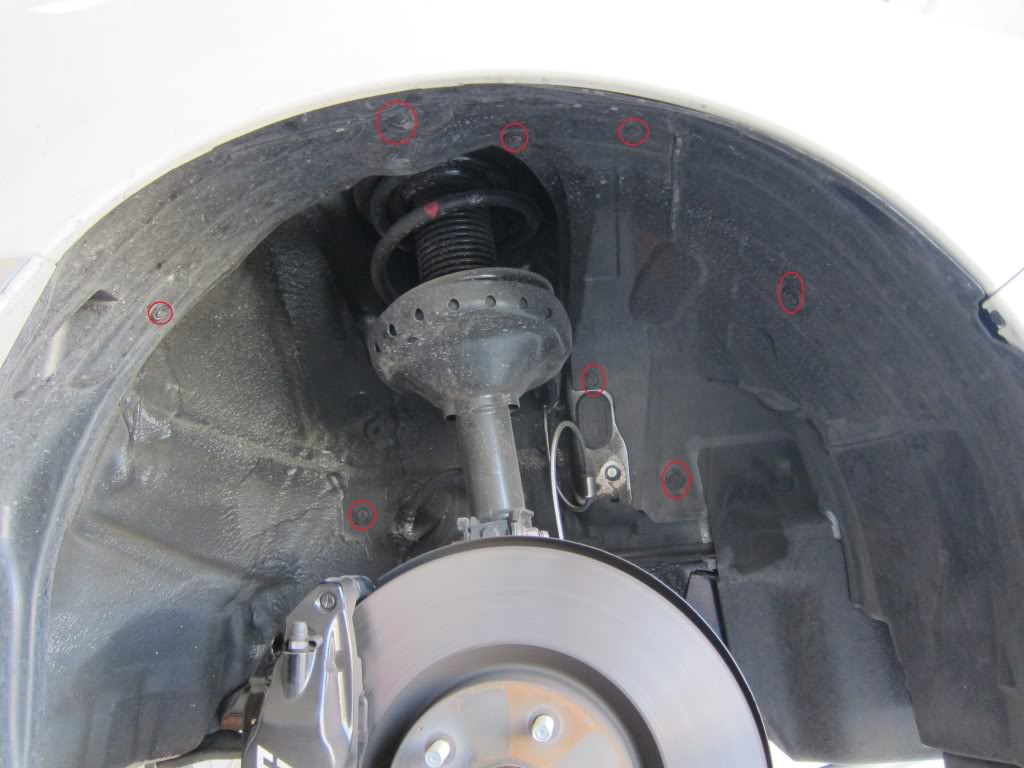
There are two bolts under the side trim. This is where removing the 3rd retaining clip from under neath the side trim gives you a bit more wiggle room.
There are two bolts under the side trim. This is where removing the 3rd retaining clip from under neath the side trim gives you a bit more wiggle room.
We use cookies on our website to give you the most relevant experience by remembering your preferences and repeat visits. By clicking “Accept”, you consent to the use of ALL the cookies.
This website uses cookies to improve your experience while you navigate through the website. Out of these, the cookies that are categorized as necessary are stored on your browser as they are essential for the working of basic functionalities of the website. We also use third-party cookies that help us analyze and understand how you use this website. These cookies will be stored in your browser only with your consent. You also have the option to opt-out of these cookies. But opting out of some of these cookies may affect your browsing experience.
Necessary cookies are absolutely essential for the website to function properly. These cookies ensure basic functionalities and security features of the website, anonymously.
Cookie
Duration
Description
cookielawinfo-checkbox-analytics
11 months
This cookie is set by GDPR Cookie Consent plugin. The cookie is used to store the user consent for the cookies in the category "Analytics".
cookielawinfo-checkbox-functional
11 months
The cookie is set by GDPR cookie consent to record the user consent for the cookies in the category "Functional".
cookielawinfo-checkbox-necessary
11 months
This cookie is set by GDPR Cookie Consent plugin. The cookies is used to store the user consent for the cookies in the category "Necessary".
cookielawinfo-checkbox-others
11 months
This cookie is set by GDPR Cookie Consent plugin. The cookie is used to store the user consent for the cookies in the category "Other.
cookielawinfo-checkbox-performance
11 months
This cookie is set by GDPR Cookie Consent plugin. The cookie is used to store the user consent for the cookies in the category "Performance".
viewed_cookie_policy
11 months
The cookie is set by the GDPR Cookie Consent plugin and is used to store whether or not user has consented to the use of cookies. It does not store any personal data.
Functional cookies help to perform certain functionalities like sharing the content of the website on social media platforms, collect feedbacks, and other third-party features.
Performance cookies are used to understand and analyze the key performance indexes of the website which helps in delivering a better user experience for the visitors.
Analytical cookies are used to understand how visitors interact with the website. These cookies help provide information on metrics the number of visitors, bounce rate, traffic source, etc.
Advertisement cookies are used to provide visitors with relevant ads and marketing campaigns. These cookies track visitors across websites and collect information to provide customized ads.