If you’ve never changed oil on a 04-07 WRX STi this guide will take your step by step through the oil change process. This guide should be applicable to most turbocharged Subaru cars throughout the years. Check at the end of the post for part numbers, oil, filters and tools needed to complete an oil change.
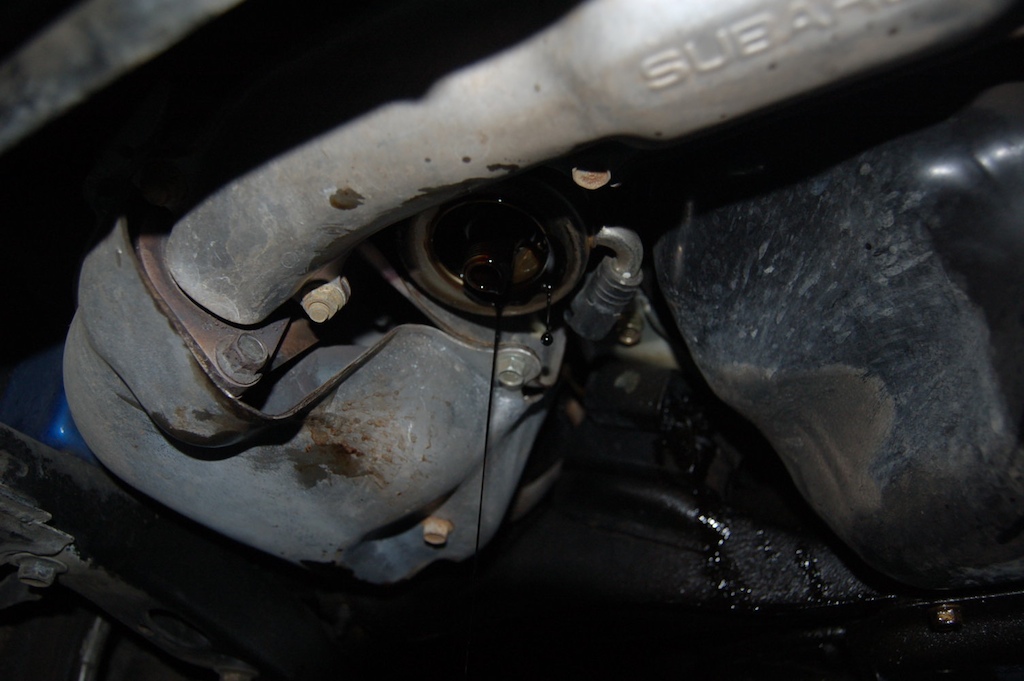
Oil Change: The legendary oil filter subaru ring of fire.
1.) Get you car on a hard, even, flat surface and get your car up on jack stands. I put mine up on 4 jack stands, so that later on when you are draining the oil, the car is already level and will drain properly.
Where to jack and put jack stands has been debated many times before.
2.) Once you get your car up on 4 jack stands, it is time to remove the brush guard. There are 5 bolts to remove and they are all 12mm.
3.) Now that you got your brush guard off its time to get under the car and start your oil change. You should take a second and locate the oil filter and the oil drain plug.
4.) If your engine is cool, go ahead and start it up and let it run for about 5 minutes. This helps with the oil change. The oil gets warm and drains much easier and quicker.
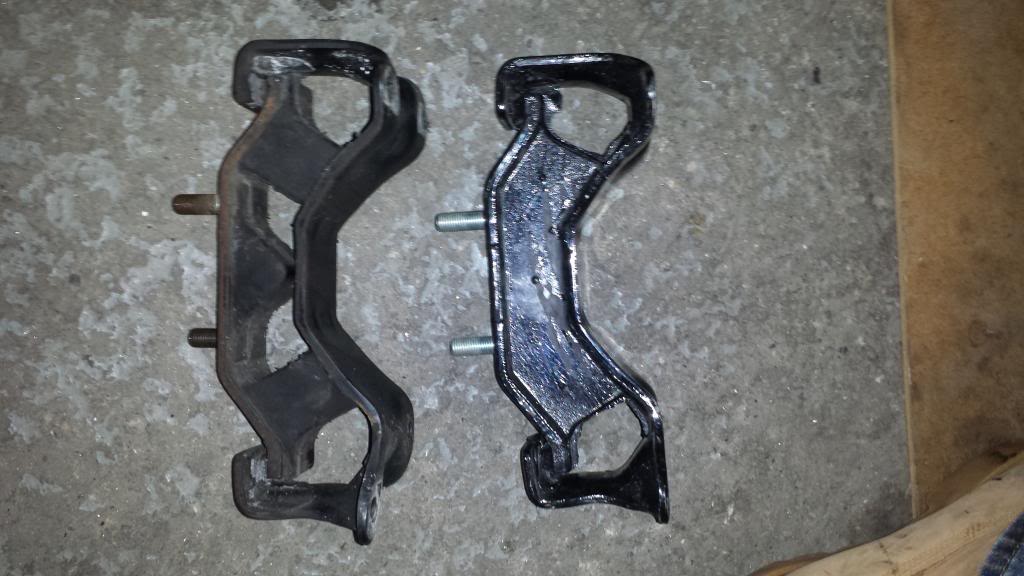
How to install an STi Group N Transmission Mount for manual transmission only. There is a significant difference between the STi Group N transmission mount and the stock one. The STi Group N mount is not only harder, but has more material to it. The stock mount is soft enough to compress with your hand, whereas standing on the STi Group N mount barely deflects the material.
1.) To start off, look for the long crossmember holding up the transmission- it will be at the end closest to the engine. The ends of this crossmember are right near the rear mount for the front A arm, and are held in with a large 17mm bolt, one on the driver side and one on the passenger side. Remove them both completely. Fair warning- these bolts were tight from the factory. I placed a 3 foot length of pipe over my socket wrench for leverage after I had a casualty- I broke one of the 4″ long socket extensions.
2.) remove the 2 14mm nuts that hold the bottom of the transmission mount to the crossmember that runs the length of the transmission- these were also tight but came out without breaking any of my tools.
3.) At the rear of the transmission, you will find the third and final crossmember holding the transmission in its place. There are four 14mm bolts in this crossmember there are two on the driver side.
Bone stock the WRX is one of the best performing entry level sports cars you can find, but there’s always room for improvement. Replacing the stock 2.25″ turboback exhaust and it’s 2 catalytic converters with a 3″ turboback exhaust, featuring one high flow cat, should allow the turbo to spool up easier and quicker for more low end grunt.
1.) Remove the heatshield. You’ll be amazed at the amount of bolts used to hold on this simple piece of metal. There are 5 on the left side (viewing from the front of the car), one on the back, and two on the right side. After you have all the bolts removed you’re going to need some keen geometry skills to get the heat shield out of the engine bay but once you do, the downpipe to turbo connection is easily available. Once the downpipe is exposed look for the bottom heatshield. It connects to the downpipe by one bolt.
2.) Loosen the downpipe. There are only 5 bolts holding the downpipe to the turbo. They are surprisingly easy to get to. Now would also be a good time to remove the O2 sensor from the Downpipe.
3.) Disconnect the remaining hangers. It’s a good idea to use photos of the exhaust out of the car in order to point out where the hangers are in relation to the whole system. Install the new downpipe by lining up the turbo/downpipe bolts then securing the hangers. There are 2 hangers for the downpipe shown here. The front one bolts into the transmission. The second rests on a J bracket and is screwed in.
1.) The first thing you need to do is place the jack under your car. I chose to use the pinch weld under the passenger’s door area. Next you will want to remove the wheel from the car so you will have better access to the O2 sensor. I did this by using a 19mm socket with an extension.
2.) Upon removing the wheel, you should notice a small plastic flap with a few plastic retaining screws holding it in place. I have circled them in red in the picture below.
3.) You are going to want to remove these using flat head and phillips head screw drivers. Take care in making sure you do your best to not strip them out. If you do, you will end up having to either pry them out or pull them out with a set of pliers. If you need to replace any of these, you can usually find them at any autoparts store.
4.) Once you have all of the plastic screws pulled out, remove the plastic cover.
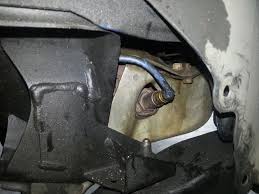
5.) If you pull the remaining plastic cover to the right, you will be able to see the O2 sensor. You can opt to remove the larger of the plastic fender well shields, but I did not see much point in doing so as it would not really yield much more room for access.
6.) With the O2 sensor exposed, you will want to spray it with some lubricant and my preferred lubricant is PB Blaster. With that now soaking in a bit, you are now going to want to go and pop your hood to gain access to the plug end of the sensor.
7.) Looking at your engine bay, you will want to move to the left side (passenger side). Underneath this cover are two connections, the top one is for your front O2 sensor. Go ahead and disconnect that plug.
Boost Gauge: INTERIOR WIRING AND GAUGE INSTALLATION
1.) Pull off the lower dash cover. It just has clips holding it on.
2.) These are the only two screws that hold the lower dash to rest of the dash. Remove these and the rest of the lower dash can be pulled off.
3.) Lower dash pulled away from the upper, left of the steering wheel.
4.) Lower dash pulled away from the upper, right side of the steering wheel.
5.) There are 4 clips holding the instrument hood to the dash. The entire hood pulls off as one whole unit, but the hard part is getting a good grip. To get better finger placement, I pulled the top of the inner part of the hood away, which revealed a little lip that I could use to pull the hood off. Caution: Do not pull heavily on the inner piece because it is bolted to the rest of the hood at the bottom and could break if you pull on it too hard. Just pull on the top part of the instrument hood itself. Also be careful not to lose the 4 yellow clips that hold the hood to the dash. They come out easily and can get lost.
6.) There are two screws for the instrument cluster. One is circled in the pic and the other is to its left.
7.) Pop the plug off the cluster on the right side.
8.) I ran the wires for the boost gauge through the upper middle hole above the gauge cluster.
9.) Tap into the purple wire on the dimmer switch for headlight power. This wire is only powered when the headlights or parking lights are turned on.
10.) Close-up of where I spliced into the purple wire. For the boost gauge, the ORANGE wire splices into this purple wire. The wire is black in my picture because I used black wire to extend the wires coming out of the back of the gauge.
11.) For ACC power, use the brown and white striped wire on the top connector above the fuse box. This wire is powered when the key is in the “ACC” position only. With the boost gauge, you connect BOTH the RED and WHITE wires to this wire.
The green and white striped wire on the same connector is on all the time, meaning it is powered even when the car is off. I found that out the hard way. (Do not use that wire.)
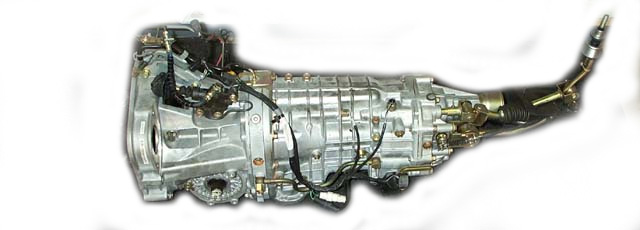
This procedure was performed on a MY04 STi with some modifications which may or may not be relevant for the purposes of this How-To. This procedure is only ONE way of removing the transmission and is not meant to be the be-all method. This is a DIY on your driveway process only. If you have access to a lift, this would be the preferred and safest method.
Perform this procedure AT YOUR OWN RISK.
Clutch: This procedure allows you to remove the transmission from a Subaru STI for the purpose of gaining access to the clutch and flywheel system for inspection and or replacement
This procedure allows you to remove the transmission from a Subaru STI for the purpose of gaining access to the clutch and flywheel system for inspection and or replacement.
This procedure allows you to remove the transmission without the benefit of a lift and is meant as a DIY for the weekend warrior. This is by no means a simple or easy procedure and it requires a good deal of strength. IT IS RECOMMENDED YOU HAVE A FRIEND THERE TO HELP. You will need a second pair of hands at times.
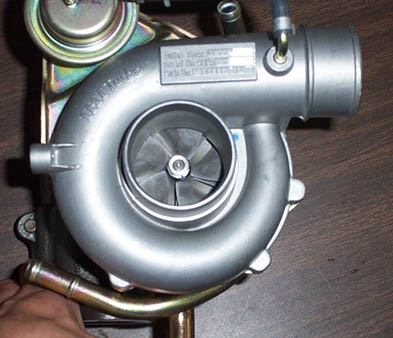
IHI VF Series
The numbering on both the VF turbos are for reference purposes and not necessarily indicative of its ‘performance’. On GC8/GF8 WRX STi, the VF turbos have gone ‘smaller’ from VF22 to 23, 24, 28, 29 while the release of the New Age STi GDB saw the introduction of a new breed of VF turbos with a bigger compressor wheel namely, VF30, VF34, VF35 for example. The previous VF turbos (VF22,23,24,28,29) have been ball bearing cored while the later ones (VF30, VF35) are Divided Thrust Bearing type core, with the VF34 being a Ball Bearing.
IHI VF22 (455cfm at 18.0psi, 250-325whp, Bolt-On)
The VF22 has the largest potential for peak horsepower. In other words, in the IHI model range, the VF 22 supports the highest boost levels. With its significantly increased turbine housing, the VF22 turbo is capable of producing upwards of 310 whp* on an EJ20. The downside of this turbo is the older center cartridge design and larger compressor housing, which makes for slower spool up but more top-end than the other VF series turbos.
This turbo is the best choice for those who are looking for loads of top end power. The top end power however, does not come without a cost. The VF22 spools significantly slower than the rest of the IHI models due to the larger P20 exhaust housing and is much less suited for daily driving than some of the other models. Although the largest VF series turbo, the VF22 is not quite optimal for stroked engines or those who wish to run more than 20PSI of boost.
The VF22’s compressor is rated at 35 lbs/minute. The VF22 was designed with the EJ20 in mind but because it has the biggest turbine in the IHI family it can be use on the EJ25 with a slight increase in performance. The VF22 is good for around a realistic 300 to 315 WHP on a 2.0L. The IHI VF-22 turbo is the largest of the VF-series turbos.
VF22: The IHI VF-22 turbo is the largest of the VF-series turbos.
IHI VF34 (440cfm at 18psi, 250-325whp, Bolt-On)
The VF34 is nearly identical to the VF30, with the same exhaust housing and compressor. However the VF34 goes back to the ball bearing design, and in doing so achieves full boost approximately 500RPM sooner than the comparable VF30. The VF34 is the most recent IHI design and as such costs slightly more than its counterpart.
Top end performance and maximum output are identical to the 30. The VF34’s compressor is rated at 35 lbs/minute but the turbo suffers from the same turbine restrictions found with the VF30. The VF34 was designed with the EJ20 in mind and will not have the same performance on an EJ25. The VF34 is good for around a realistic 290 to 305 WHP on a 2.0L.
VF34: The VF34 was designed with the EJ20 in mind and will not have the same performance on an EJ25. The VF34 is good for around a realistic 290 to 305 WHP on a 2.0L.
Timing Belt and Water Pump Replacement Subaru WRX/STi:
Timing Belt and Water Pump Replacement is critical in keeping your Subaru WRX/STi in good condition and to prevent the valves from hitting your engine’s pistons.
Tools used:
3/8 Ratchet
1/2 Ratchet
10, 12, 14, 22mm sockets
short extension
Impact wrench or strap wrench (I used both on separate occasions.) Torque Wrench
Small metal ruler to measure belt deflection.
Drain pan and funnel for the coolant.
Brake Kleen
Lots of paper towels/shop rags.
3/8 socket driver (very handy.)
Feeler gauges
2mm allen wrench
allen socket for the right camshaft (6mm maybe?)
C-Clamp
We use cookies on our website to give you the most relevant experience by remembering your preferences and repeat visits. By clicking “Accept”, you consent to the use of ALL the cookies.
This website uses cookies to improve your experience while you navigate through the website. Out of these, the cookies that are categorized as necessary are stored on your browser as they are essential for the working of basic functionalities of the website. We also use third-party cookies that help us analyze and understand how you use this website. These cookies will be stored in your browser only with your consent. You also have the option to opt-out of these cookies. But opting out of some of these cookies may affect your browsing experience.
Necessary cookies are absolutely essential for the website to function properly. These cookies ensure basic functionalities and security features of the website, anonymously.
Cookie
Duration
Description
cookielawinfo-checkbox-analytics
11 months
This cookie is set by GDPR Cookie Consent plugin. The cookie is used to store the user consent for the cookies in the category "Analytics".
cookielawinfo-checkbox-functional
11 months
The cookie is set by GDPR cookie consent to record the user consent for the cookies in the category "Functional".
cookielawinfo-checkbox-necessary
11 months
This cookie is set by GDPR Cookie Consent plugin. The cookies is used to store the user consent for the cookies in the category "Necessary".
cookielawinfo-checkbox-others
11 months
This cookie is set by GDPR Cookie Consent plugin. The cookie is used to store the user consent for the cookies in the category "Other.
cookielawinfo-checkbox-performance
11 months
This cookie is set by GDPR Cookie Consent plugin. The cookie is used to store the user consent for the cookies in the category "Performance".
viewed_cookie_policy
11 months
The cookie is set by the GDPR Cookie Consent plugin and is used to store whether or not user has consented to the use of cookies. It does not store any personal data.
Functional cookies help to perform certain functionalities like sharing the content of the website on social media platforms, collect feedbacks, and other third-party features.
Performance cookies are used to understand and analyze the key performance indexes of the website which helps in delivering a better user experience for the visitors.
Analytical cookies are used to understand how visitors interact with the website. These cookies help provide information on metrics the number of visitors, bounce rate, traffic source, etc.
Advertisement cookies are used to provide visitors with relevant ads and marketing campaigns. These cookies track visitors across websites and collect information to provide customized ads.