Motor Mount install for Subaru Impreza WRX/STi:
Without further adieu, here is the how-to. Enjoy, ask questions, and as always, practice safety first!
If you feel you are unable to complete this install, or if you have serious doubts about your jack, do not attempt this. You will be putting your hands in pinch areas if the engine were to suddenly lower. There are potential safety precautions I will mention, but as always be SAFE!! I recommend having another jack and a friend around while doing the pinch area work just in case.
Tools needed:
Flat head
Phillips
12mm shallow and deep sockets
14mm shallow and deep sockets
14mm ratcheting flex head wrench
breaker bar or impact
in-lbs torque wrench
ft-lbs torque wrench
jack
ramps or jack stands (three if you don’t have ramps, one if you do)
blocks of wood
Please review the torque values at the end of the how-to before beginning reassembly. Any bolts that I have not listed a value for simply need to be “snug”. That should be it. Let’s get started. You may or may not have to unbolt the subframe and sway bar. This depends on if you have an aftermarket sway bar or not since the OEM swaybars have bends to allow access.
You don’t have to remove the upper radiator brackets if you don’t want to. This step is in the factory service manual so I figured it would be important and it’s quick and easy to do. Skip this at your own risk.
1.) Place your car on ramps, or put the front end on jack stands. There’s a how-to for doing this.
2.) Remove the airbox intake duct by taking out the two plastic clips circled in red. Depending on your year model, they will either be phillips or flat head.
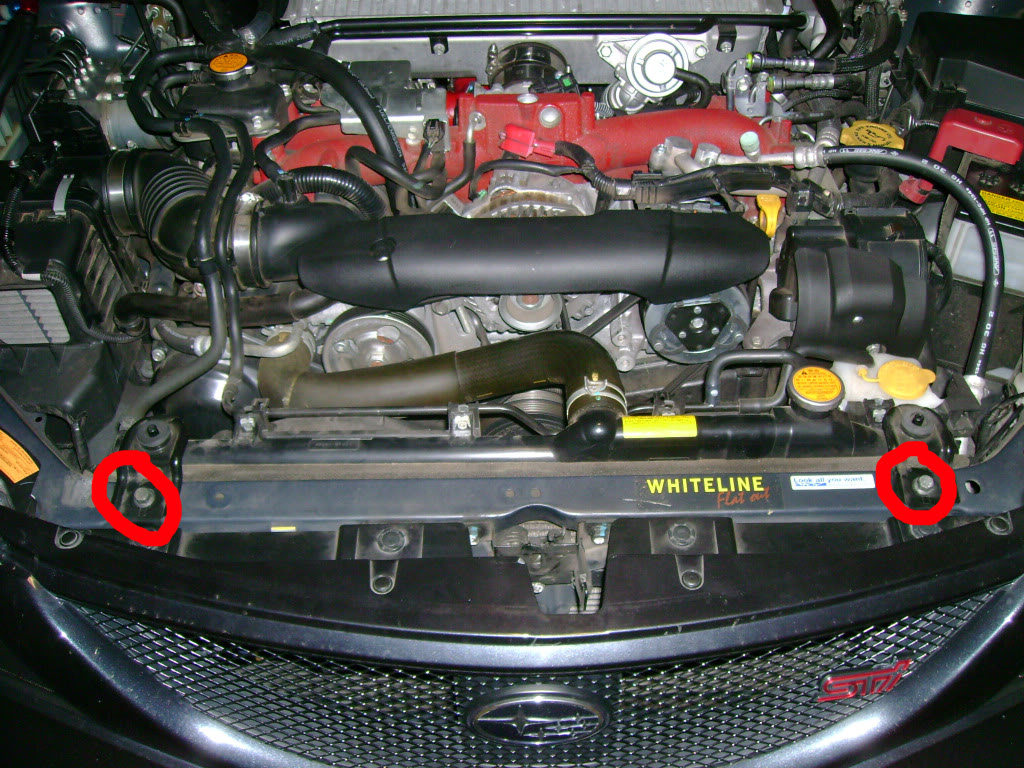
3.) Remove the two upper radiator brackets by removing the two 12mm bolts circled in red. Not shown, but loosen the two clamps at the ends of the airbox’s accordion duct. No need to remove them or the duct:
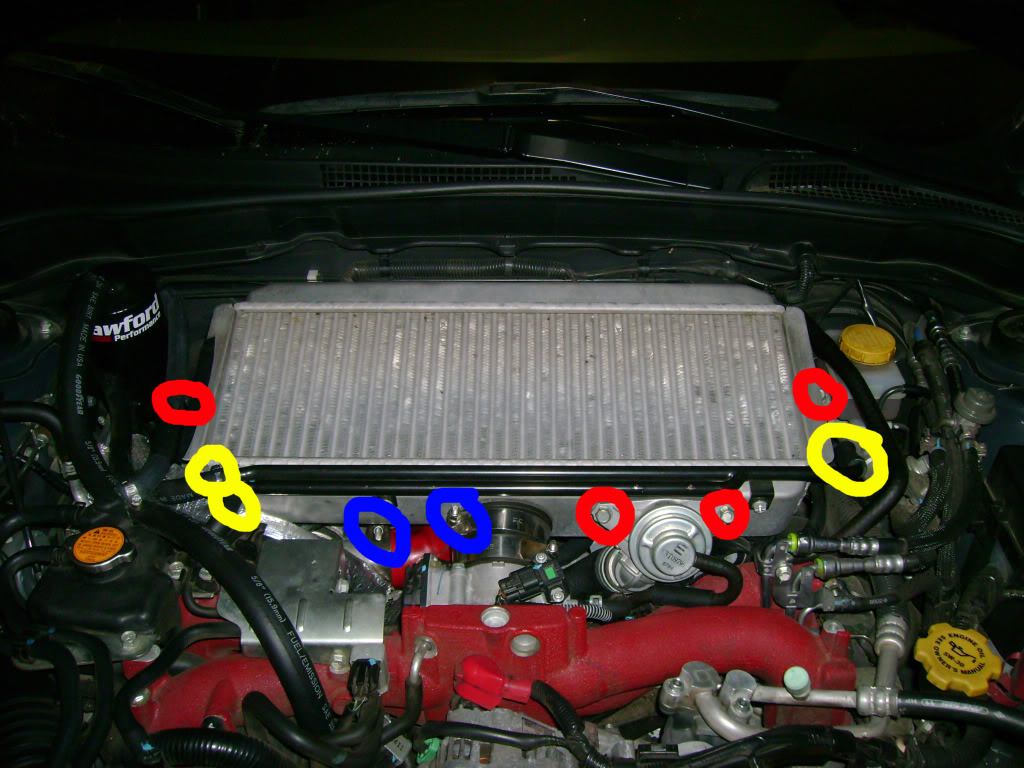
4.) Remove the intercooler. Accomplish this by removing the two 12mm bolts holding the BPV as well as the two 12mm mounting bolts at the ends (all four circled in red. Loosen the two clamps circled in blue (can be done with a phillips or 10mm socket, I believe). Finally, remove the three breather lines from the breather tube (circled in yellow). Just pull and they slip off. Finally, remove the IC by pushing towards the firewall until the TB connection is out, then pull towards the drive side to pull it off the turbo. Be careful of the fins, and set it aside.