Category Archives: Subaru

Sway bar (front) and endlinks install on GD STi:

Front sway bar and endlinks install on 02-07 STi:

This is a step by step guide in installing a front sway bar with aftermarket endlinks on a 04-07 Subaru STi.

1.) Get the car in the air and be sure to secure the car. I used jack stands in the cutouts on the side of the car’s lower frame. It may be easier to use ramps since you will need to tighten the sway bar mounting bolts when the suspension is “loaded,” that is when the full weight of the car is on the wheels/tires.

2.) Remove the front lower cover (splash guard). There are five bolts that require a 12 mm socket, three in the front and two toward the rear. There are two pop fasteners on each side as well. These can be removed by using a small flat bladed screwdriver to pop up the center round plastic piece about a quarter of an inch then pulling/wriggling out the entire fastener.

3.) Remove the jack plate. There are four bolts in the center area to remove and two nuts on each side.

Front sway bar and endlinks: Remove splash guard and skid plate.

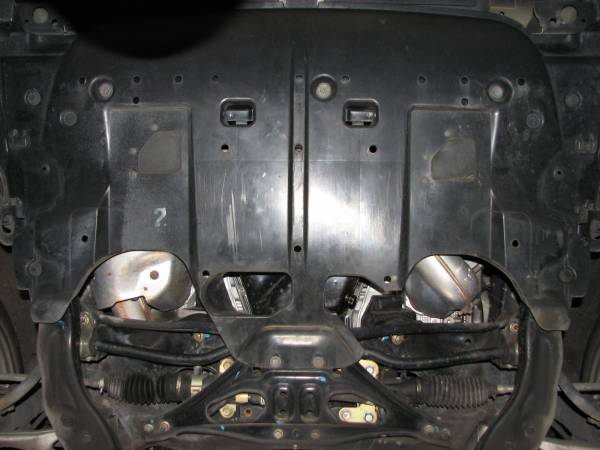
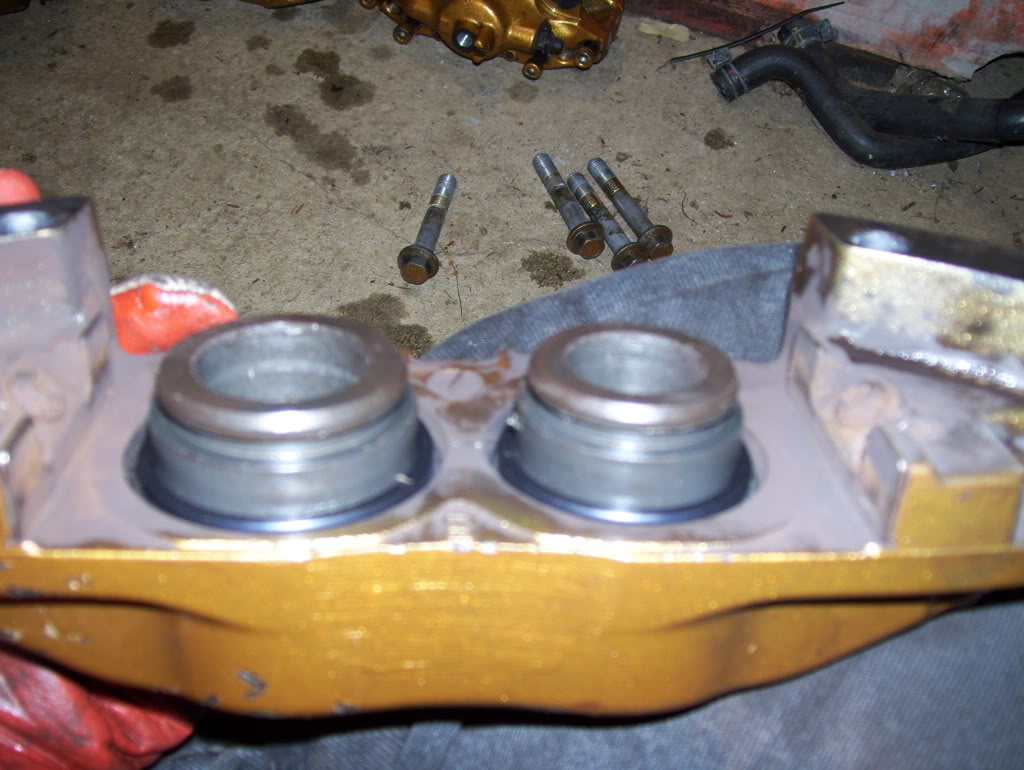
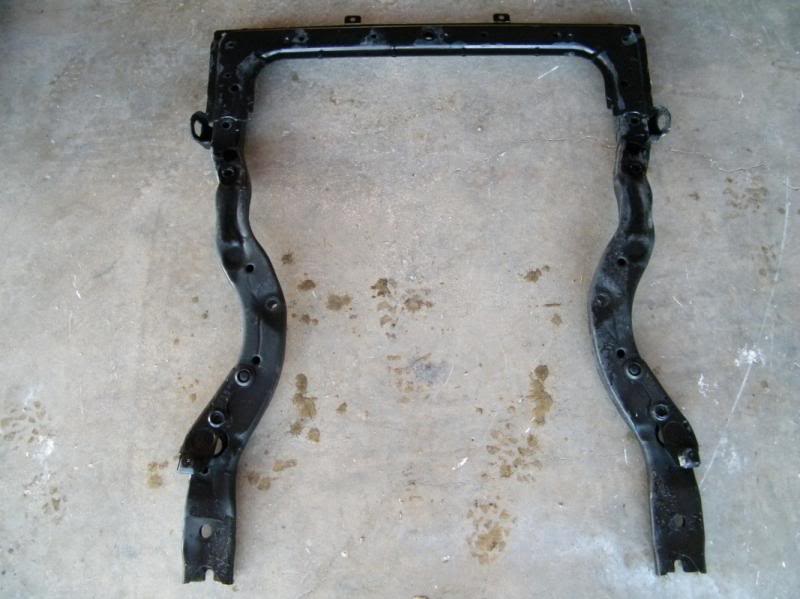
4.) The sub-frame is an odd looking, approximately C shaped, bracket under the front part of the car. The opening of the C is toward the rear of the car. It helps to remove this to make it easier to get to the bolts that hold the sway bar onto the frame.

The sub-frame has five bolts on each leg of the C and two toward the front of the car. The two rearmost bolts require a 14mm socket, the other three on each side require a 17mm socket and the two on the front require a 12mm socket. Start by removing a plastic cover on each side that is held in place by two pop fasteners.

Front sway bar and endlinks install on 02-07 STi: The sub-frame is an odd looking, approximately C shaped, bracket under the front part of the car. The opening of the C is toward the rear of the car. It helps to remove this to make it easier to get to the bolts that hold the sway bar onto the frame.

5.) Remove another pop fastener on each side of the sub-frame.

Strut Tower Brace front install WRX/STi

Strut tower front brace install WRX/STi:

This strut tower brace guide should work on both 04 and 05’s just fine (mine is an 05). I’m not sure about the 06s’ since they relocated the AC line and it looks like Whiteline makes the only strut bar that will work on an 06. A little bit of modification with the 06+ model cars might be necessary. These are also specific to the JDM Spec-C Titanium Strut Bar but should work as a general guide for any strut bar on an STi.

1.) Remove alarm horn bar from passenger strut tower bolts which are 12mm. Disconnect the horn and put it aside for now. We’ll screw the horn into the side of the strut tower once we’ve installed the strut bar.

Strut tower brace: Removing the alarm horn bracket. Some models did not come with the alarm horn option so you do not need to do this.

2.)Lower the AC line bracket down a screw. This is the AC Bracket you need to unscrew (use a philips head screw driver or 10mm ratchet). You’ll need to remove the bolt that connects the AC line to the bracket and also the bracket where it connects to the firewall. Remount the bracket down a screw by mounting the upper hole where the bottom screw hole on the firewall is. The bracket is the copper colored metal piece.

Strut Tower Brace: Remove the copper bracket off of it's mount on the firewall.
Strut Tower Brace: Remove the copper bracket off of it’s mount on the firewall.

3.) Install Strut Bar.

First remove the bolts holding the struts to the strut walls. Bolts are 12mm. They should come off pretty easily since they are only torqued down to 14.5ft-lbs.

I found it was easiest to unscrew the strut bar into 3 pieces, the 2 parts that connect to the strut tower and then the actual bar itself (bolts/screws are 12mm). I put the round strut tower parts on first and loosely bolted them down. Then I placed the strut bar on top and loosely screwed down the strut bar to the strut tower connection pieces.

Strut tower brace: Passenger side strut bar end installed.
Strut Tower Brace: Driver's side strut bar end installed.
Strut Tower Brace: Driver’s side strut bar end installed.

Brembo Caliper Rebuild Subaru STi:

Brembo Caliper Rebuild Subaru STi:

A step by step guide to rebuilding a Brembo caliper with rebuild kits. This guide includes separating the calipers as well if you want to go that route:

1.) If you have not yet removed calipers from the car remove them, I cleaned mine prior to starting. You will need to disconnect the brake lines and unbolt them from the hub. Also remove the pads, to remove the pads there are 2 pull pin clips thru a set of long pins. The pins hold the pad and metal bracket in place. Remove the 2 pull pins and slide out the 2 longer pins and everything will fall out. Keep in mind there are small plates on the back sides of the brake pads where the pistons hit the pad, these can be easily lost and are marked with arrows for direction.

2.) You then need to split the calipers apart, to do this I used a impact wrench but if you have some good strength it is possible to break the bolts. Pretty sure the bolts on the front are a 13mm and the rears use a allen wrench style bolt which i believe is a size 6.

Brembo Caliper: Separating the Brembo Calipers and getting ready for the rebuild.

3.) You will want to pop the pistons out. In order to do this I used, for the rear a inch by 5 inch block of wood, for the front you will need a little thicker of a block. Place the block where the rotor would sit so that the piston doesn’t shoot out and kill someone. (trust me these things will FLY) After doing this i made sure my bolts were very lightly tightened into place, I did this because if you leave the gap the pistons will put force in the way of least resistance which basically means its going to shoot the caliper apart and split it which could cause some pain.

Brembo Caliper: Pistons pushed out of the caliper.

4.)  After splitting the calipers and popping the pistons I removed the rubber seal between the 2 pieces as it is small and could very easily be lost. Don’t remove the o-ring prior to step 3 or step 3 is pretty much impossible.

Brembo Caliper: O-Ring removed.
Brembo Caliper: O-ring location in a brembo caliper.

Master Cylinder brace Install For STi/WRX

Master Cylinder brace Install For STi/WRX:

The brake master cylinder is located by the driver’s side strut tower and once you find it the rest is pretty self explanatory. I have a 2005 Subaru STi. Some later years might be slightly different.
Tools needed:
10 mm socket and wrenches
Zip tie (optional)

Master Cylinder Brace: A installed Cusco master cylinder brace.

1.) Find the brake master cylinder located just inboard of the drivers side strut tower. The washer fluid bottle will be in the way so unbolt the two bolts and lean it forward, no need to disconnect it altogether.

2.) There are two brackets bolted to the strut tower visible in this picture. These are the two holes used to mount the brace. Unbolt these two holes.

Master Cylinder Brace: There are two brackets bolted to the strut tower visible in this picture.

3.)The lower bracket is not compatible with the master cylinder brace. Its best to remove the bracket, then zip tie the lines to the master cylinder brace at the end to keep them secure.

Master Cylinder Brace: Remove this bracket.

4.)The next bolt to take out is difficult to get a picture of but you will see it easily you can barely see it here, it is located slightly farther towards the back of the car, undo it as well.

Master Cylinder Brace: The hidden bolt is located slightly farther towards the back of the car, undo it as well.

Pitch Stop Install on Subaru WRX/STi

Pitch Stop Mount Install on Subaru WRX/STi:

This is a step by step guide on how to install an aftermarket Pitch Stop Mount to your 02-07 Subaru WRX or STi.

Pitch Stop Mount: In the foreground a oem plastic pitch mount and in the background a Perrin Performance pitch stop mount.

1.) Locate and remove the three 10 mm Gold colored bolts that secure the black vacuum lines to the bottom of the intercooler. You will need a shallow socket as it gets tight around the BOV. Careful not to drop them into the engine bay, it will be a PITA to find and retrieve them.

2.) Locate and remove the two 12 mm bolts that secure the recirculating BOV to the bottom of the intercooler. Again be careful not to drop these into the engine bay as it’s a jungle down there and it will be a PITA to retrieve them.

3.) Locate and remove the two 12 mm bolts that secure the intercooler to the engine. These are located one on each side of the intercooler.

4.) Now the intercooler is only held in place by the rubber intake hoses with the clamps. The one that is on top, from the intercooler to the throttle body/intake manifold is easier so do them first. Using the Flat head screw driver or an 8 mm socket loosen the clamps holding the intake piping to the Intake manifold and intercooler. And leave it for now.

5.) This is a little tough to do, but its not impossible. You should be able to do it even if you have large hands. Using the flat head or 8 mm socket, loosen the clamp that holds the intake tube coming from the cold side of the turbo to the intercooler. This is located underneath the intercooler.

Oil Change 04-07 Subaru WRX/STi DIY:

Oil Change 04-07 Subaru WRX/STi DIY:

If you’ve never changed oil on a 04-07 WRX STi this guide will take your step by step through the oil change process. This guide should be applicable to most turbocharged Subaru cars throughout the years. Check at the end of the post for part numbers, oil, filters and tools needed to complete an oil change.

Oil Change: The legendary oil filter subaru ring of fire.

1.) Get you car on a hard, even, flat surface and get your car up on jack stands. I put mine up on 4 jack stands, so that later on when you are draining the oil, the car is already level and will drain properly.
Where to jack and put jack stands has been debated many times before.

2.) Once you get your car up on 4 jack stands, it is time to remove the brush guard. There are 5 bolts to remove and they are all 12mm.

3.) Now that you got your brush guard off its time to get under the car and start your oil change. You should take a second and locate the oil filter and the oil drain plug.

4.) If your engine is cool, go ahead and start it up and let it run for about 5 minutes. This helps with the oil change. The oil gets warm and drains much easier and quicker.

Brake Pad WRX install 02-05

Brake Pad WRX install 02-05:

This is a basic brake pad removal and install walk through with a Subaru Impreza WRX. Make sure to go slowly to ensure you don’t introduce air into the brake system.

1.)Loosen your lug nuts for the corner you are working on, jack the vehicle up and put it on a jack stand, then remove the wheel.

Brake pad: A Subaru Impreza WRX stock brake caliper.

2.)You now need to dislocate the caliper. There are two 14mm bolts that need to be removed: A lower one, and an upper one. Once removed you can wiggle the caliper back off the rotor, and lay it up on top of the rotor next to the strut. At this point, DO NOT let anyone touch the brake pedal.

3.) At this point you can pull the pads free. I just carefully wedged my finger between the rotor and the pad to lever them free. They locate/remove in a manner perpendicular to the axis of the rotor. There are two of them on each side; remove them both. You will note that the inside pad has a metal ‘clip’ attached to it. The purpose of this is actually to rub against the rotor when the pad material is getting worn low; thus creating the horrid metallic squeal that will remind you your brakes need attention.

4.) Organize the new parts. There are two pads, each with one plastic-coated plate, and one shiny metallic plate, and one metal clip. Subaru also provide some brake grease for you.

5.) Remove the old clips by just dislodging them with your fingers.

6.) Put the new clips located in the position of where the old clips went.

Fuel Pump Walbro 255lph for 2008 STi/WRX/LGT Install:

Walbro Fuel Pump for 2008 -11 STi/WRX/LGT Install:

Install guide for those looking to upgrade the factory WRX, STi, or LGT fuel pump. I recently found the stock pump to be inadequate when running high boost and E85. When ordering the pump, you DO NOT need the filter kit, it WILL NOT fit in the housing. Make sure to run the car down under the 1/4 tank mark before beginning. There will be gas spillage so make sure you have plenty of fresh air and towels around to clean up.

1.) Pop the gas cap off to relieve fuel pressure from the tank. Remove your lower rear seat by pulling upwards on each side and the middle. There are 3 snap in spots. Place your seat somewhere clean and out of the way. Once you do this you can see the fuel pump access cover and harness. Unplug this harness.

2.) Remove the 4 screws holding the access cover in place and place them somewhere safe away from the access cover.

3.) Now you can see the fuel pump access point. There are 3 fuel lines, 8 8mm nuts, and the electrical connector. Disconnect the electrical connector now and stuff it out of the way. Grab some of your handy shop towels and place them under the fuel lines in case of spillage. Once you have removed the fuel lines it should look like this:

Fuel Pump: There are 3 fuel lines, 8 8mm nuts, and the electrical connector. Disconnect the electrical connector now and stuff it out of the way. Grab some of your handy shop towels and place them under the fuel lines in case of spillage.

4.) Remove all 8 of the 8mm nuts and place them somewhere safe. Gently remove the metal bracket surrounding the entire assembly to gain access to the housing and place it somewhere safe. Slowly remove the fuel pump assembly by contorting it, be careful not to damage the float or sensor. Once the housing is removed it may spill, make sure you have plenty of towels laid down in your car. If all went well it should look like this:

Fuel Pump: Gently remove the metal bracket surrounding the entire assembly to gain access to the housing and place it somewhere safe. Slowly remove the fuel pump assembly by contorting it, be careful not to damage the float or sensor.