2.) Start with the front wheel. First thing to do is clean all the fittings that will be loosened to prevent dirt from getting in the stainless steel brake lines. Use compressed air then some brake cleaner to do the job.
3.)Then, remove the 12mm bolt holding the line to the strut.
The brake master cylinder is located by the driver’s side strut tower and once you find it the rest is pretty self explanatory. I have a 2005 Subaru STi. Some later years might be slightly different.
Tools needed:
10 mm socket and wrenches
Zip tie (optional)
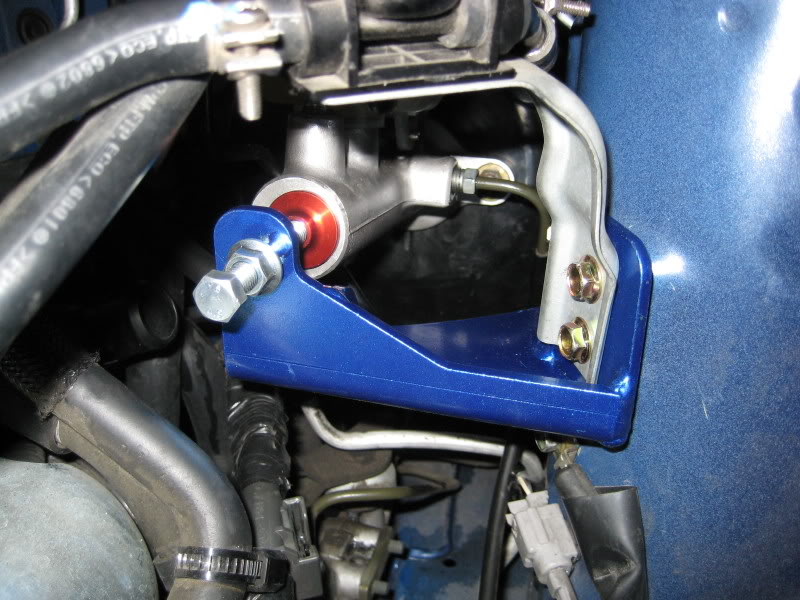
Master Cylinder Brace: A installed Cusco master cylinder brace.
1.) Find the brake master cylinder located just inboard of the drivers side strut tower. The washer fluid bottle will be in the way so unbolt the two bolts and lean it forward, no need to disconnect it altogether.
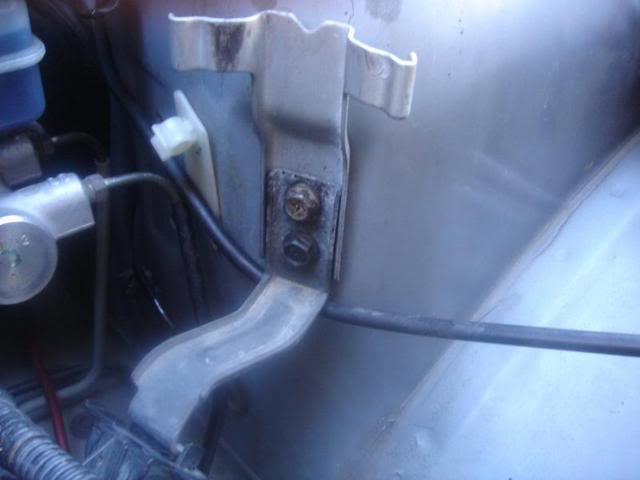
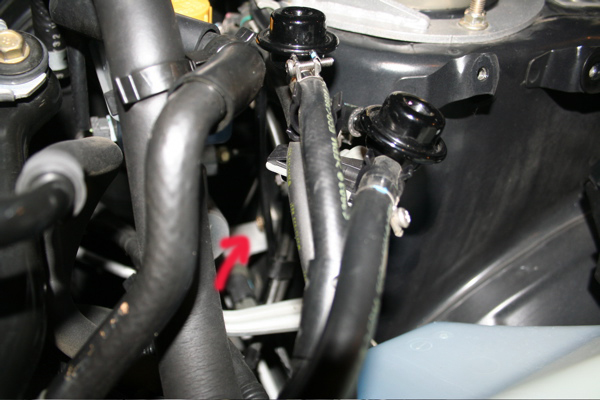
2.) There are two brackets bolted to the strut tower visible in this picture. These are the two holes used to mount the brace. Unbolt these two holes.
Master Cylinder Brace: There are two brackets bolted to the strut tower visible in this picture.
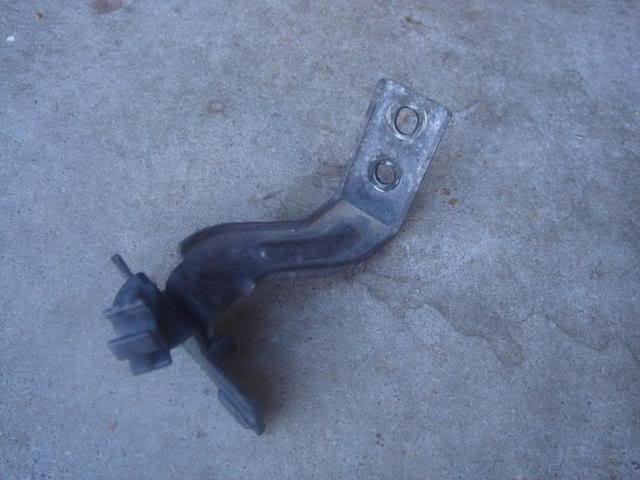
3.)The lower bracket is not compatible with the master cylinder brace. Its best to remove the bracket, then zip tie the lines to the master cylinder brace at the end to keep them secure.
4.)The next bolt to take out is difficult to get a picture of but you will see it easily you can barely see it here, it is located slightly farther towards the back of the car, undo it as well.
Master Cylinder Brace: The hidden bolt is located slightly farther towards the back of the car, undo it as well.
If you’ve never changed oil on a 04-07 WRX STi this guide will take your step by step through the oil change process. This guide should be applicable to most turbocharged Subaru cars throughout the years. Check at the end of the post for part numbers, oil, filters and tools needed to complete an oil change.
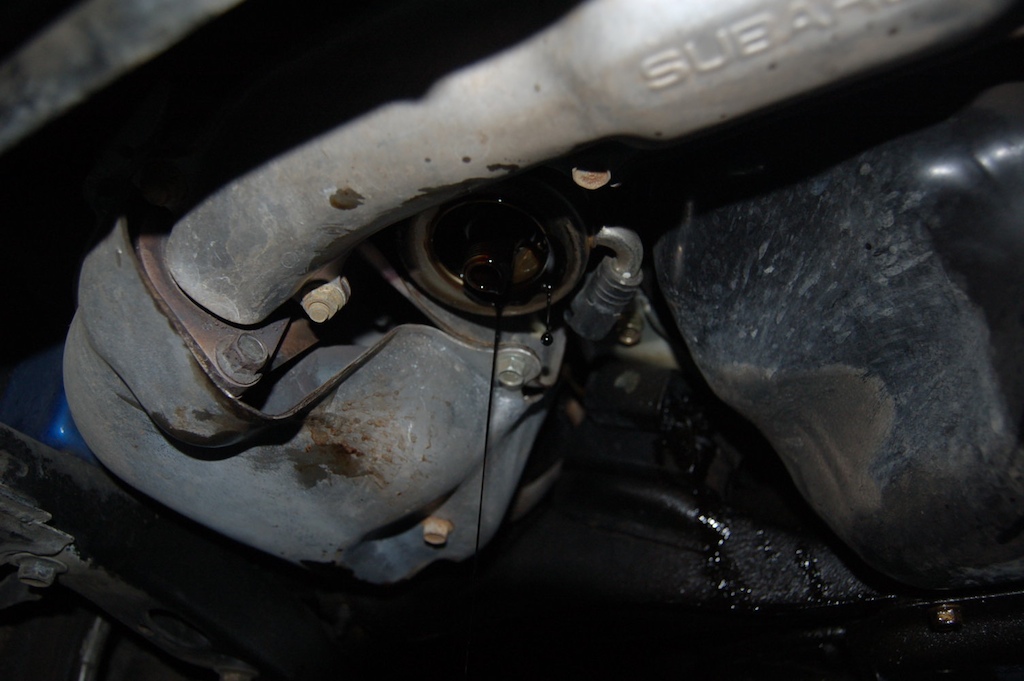
Oil Change: The legendary oil filter subaru ring of fire.
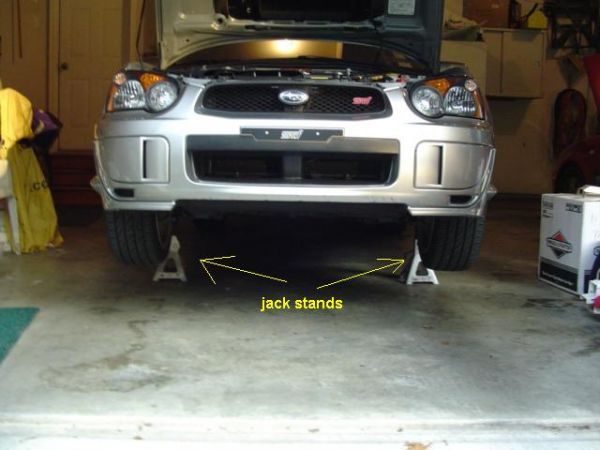
1.) Get you car on a hard, even, flat surface and get your car up on jack stands. I put mine up on 4 jack stands, so that later on when you are draining the oil, the car is already level and will drain properly.
Where to jack and put jack stands has been debated many times before.
2.) Once you get your car up on 4 jack stands, it is time to remove the brush guard. There are 5 bolts to remove and they are all 12mm.
3.) Now that you got your brush guard off its time to get under the car and start your oil change. You should take a second and locate the oil filter and the oil drain plug.
4.) If your engine is cool, go ahead and start it up and let it run for about 5 minutes. This helps with the oil change. The oil gets warm and drains much easier and quicker.
This is a guide on how to change your transmission oil in your turbo Subaru. Transmission oil is usually changed at 30,000 mile intervals, though more frequent changes are suggested if you take part in track days.
21mm Socket wrench or other tool of your choice
(I used a socket set with the large spark plug fitting and hollow
extension for extra leverage, dad’s tent is now missing one pole.)
– New sump washer
– Funnel
– 2 foot length of garden hose or similar sized tubing.
– Gear oil* – 3.9 quarts for wrx/sti gearbox/front diff. (Extra 800ml for rear diff)
– Oilpan or large container capable of holding 4+ quarts.
1.) First things first, jack the car up, or drive it onto wheel stands. Make sure the hand brake is on. T
Do not go under the car unless you’re sure it’s secure on it’s stands.
2.) Ensure the car is cool enough to work on, wait at least an hour after driving. Now you’ll need to find the transmission dipstick, which is located between
the turbo and intercooler. Pull it out.
3.) Now you can crawl under the car with your socket, dropsheet & oil pan. Looking from the middle of the car towards the front, you’ll be able to
see the drive shafts, transmission & diff, transmission plug, the engine oil sump plug.
4.) The front transmission oil plug is the one you want, loosen it and then slowly unwind it by hand until the end of the thread, then get yourself and the cat out of the way before you both get covered in oil. If all goes to plan, you’ll get most of the spent oil into your container.
Here is a guide for Subaru headlights to remove the amber turn signal and clear the headlight. This guide also covers on how to reseal your headlight.
A blobeye STi with modified headlights that’s had it’s amber turn signals removed.
1.) Before we start to remove the headlight assembly itself, we have to remove the grill; so pop the hood and unhitch the 4 small, and 2 large clips. Small top ones can be unclipped by using a finger (if yours is narrow enough), or a small flat-head screwdriver.
*If in doubt, you can refer to manual*
2.) Now the grill is out of the way, we can remove the 3 10mm bolts holding the assembly in place.
3.) Remove the 2 plastic rivets on each side by the headlights. It makes it a lot easier to get the headlight out as you can now shift/move/bent the bumper a bit to get that tad more clearance.
4.) Now to pull the headlight out of the clips its being held in there. Yes, even more stuff holding them in! Obviously Subaru didn’t want them coming out easily. I’ve found disconnecting the low beam, pulling the inner-most corner of the assembly out first, then maneuvering the outer edge out the easiest way. Followed by maneuvering the headlight so you can then disconnect the high beam and park/indicator plugs.
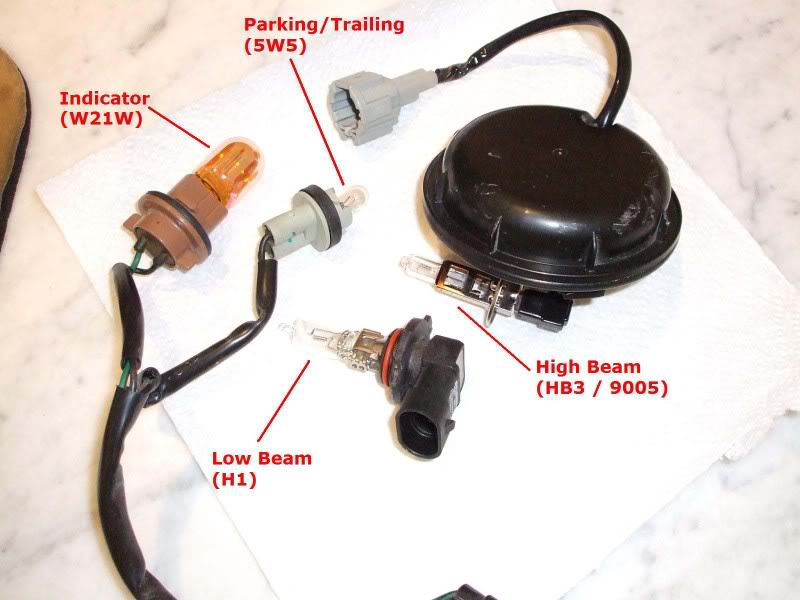
5.) OK, so you’ve managed to remove one headlight.You can now take this inside, but whatever you do, when you put it down, lay it on something soft, like a (clean) towel or carpet, that won’t scratch the lens. Now to go about removing all the globes and associated wiring.
6.) Low beam. Turn the Bulb stem anti-clockwise so the slots line up with the recesses, then pull out.
7.) Indicator & Parking. Again, same as low beam, twist anti-clockwise, and pull out.
8.) High beam. First remove the water/dust-proof cover by the same method as above. Pull off the negative/ground (black) carefully by using a pair of pliers, should slide right off. Then push-slide the retaining clip in so that you can get the high beam bulb out. The plug-ends (grey and black socket things) can be removed from the back by either holding them (note, not holding the wires) and pulling firmly, or using those pliers you had before.
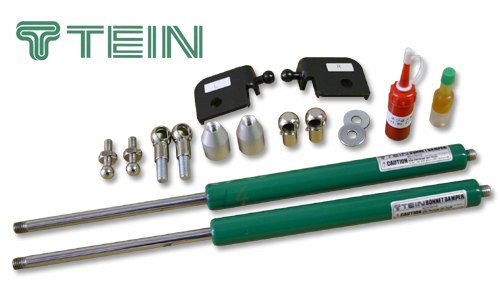
Tein hood dampers: Note the Red bottle is the thread locker, clear bottle is grease!
Note the Red bottle is the thread locker, clear bottle is grease!
2. Assemble the dampers by attaching the aluminum extensions to the long ball joint and damper body
Apply thread locker to all threads.
The small ball joint goes on the other end!
3. Next, remove the center fender bolt using a 10mm socket and ratchet, install the joint ball post and washer into this bolt hole, use the tread locker. Torque to 7.5ftlbs.
4. Use a razor to make a clean cut to the factory rubber molding from the fender to the beginning of the engine bay.
5. Take an assembled Tein Hood Damper and remove the locking pin from the Ball Joint (female end), using a little grease cover the male end and place female end over the male end, re-insert locking pin.
Note, the left hand side can be rotated as pictured above to insert the locking pin and then rotated back to the hood.
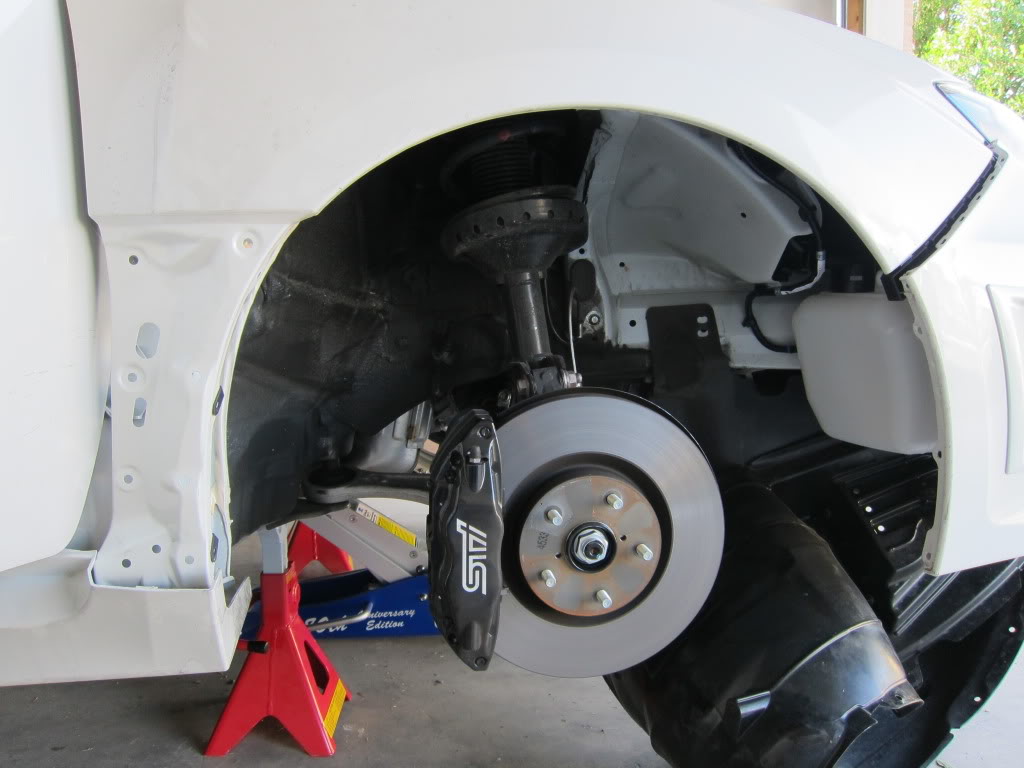
This fender brace install was performed on ’11 Subaru Impreza WRX STi 5 Door with GTSpec Fender Braces.
Required Tools:
Socket wrench with multiple extenders.
10mm, 12mm, and 14mm sockets
12mm wrench
Impact Driver (Not required but makes things easier)
Tire iron Floor Jack/Jack stands
Screw Driver
Pliers/Cutting pliers
2 Zip ties
Gloves (Not required but always nice to have) PB Blaster
Passenger side
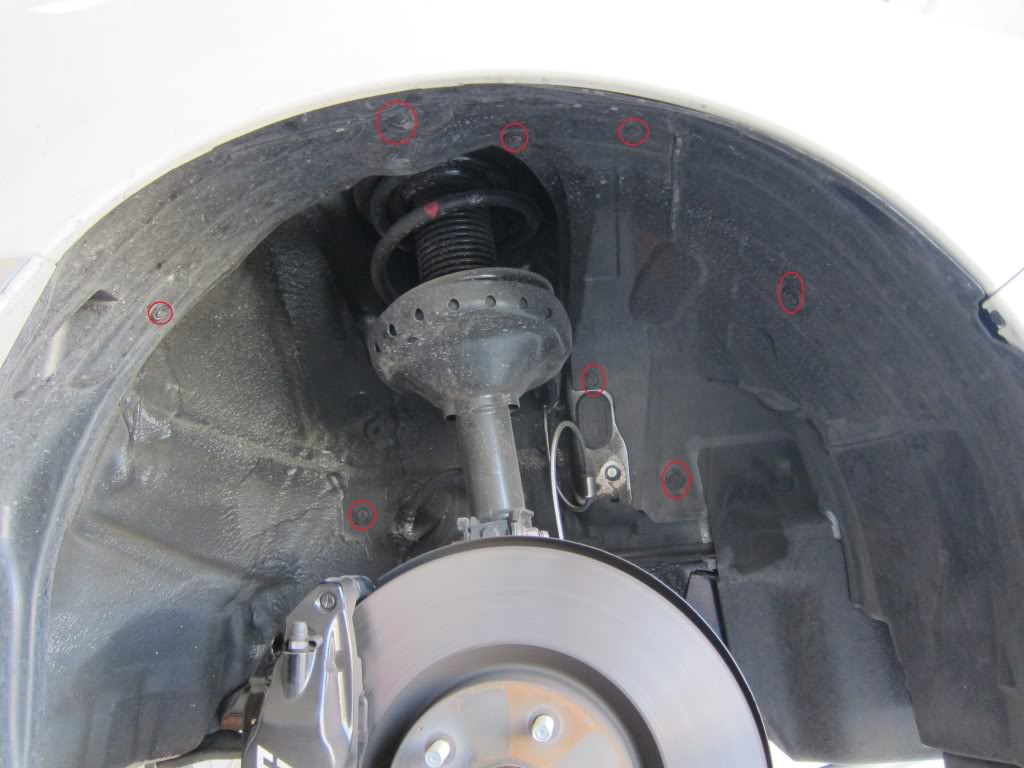
I started off on the passenger side. Get the front end on jack stands. Also put chalks on the rear tires for added safety.
Now lets start by removing your tire. (This is where having an impact wrench makes things a breeze!)
*Note* I did not remove by front bumper however i did later on. I would suggest you go ahead and remove the front bumper to save yourself some time later on down the road. It makes things easier!
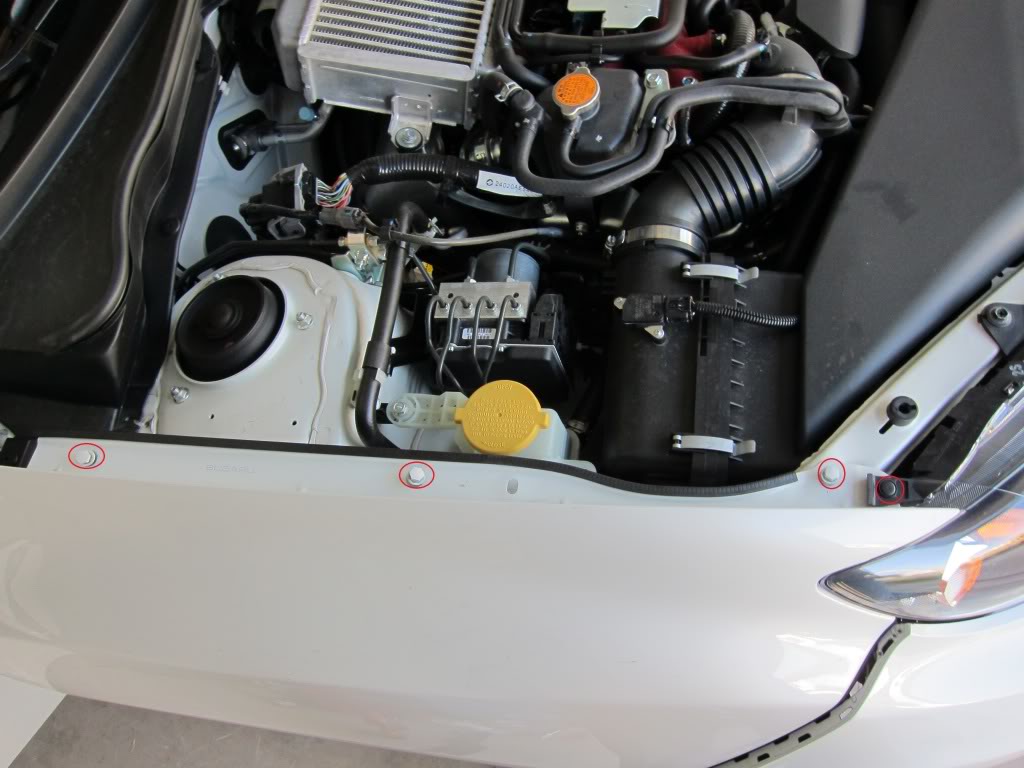
Now remove the 3 bolts in the engine bay and the one retaining clip on the headlight fixture.
Fender removal Subaru STi GR: Now remove the 3 bolts in the engine bay and the one retaining clip on the headlight fixture.
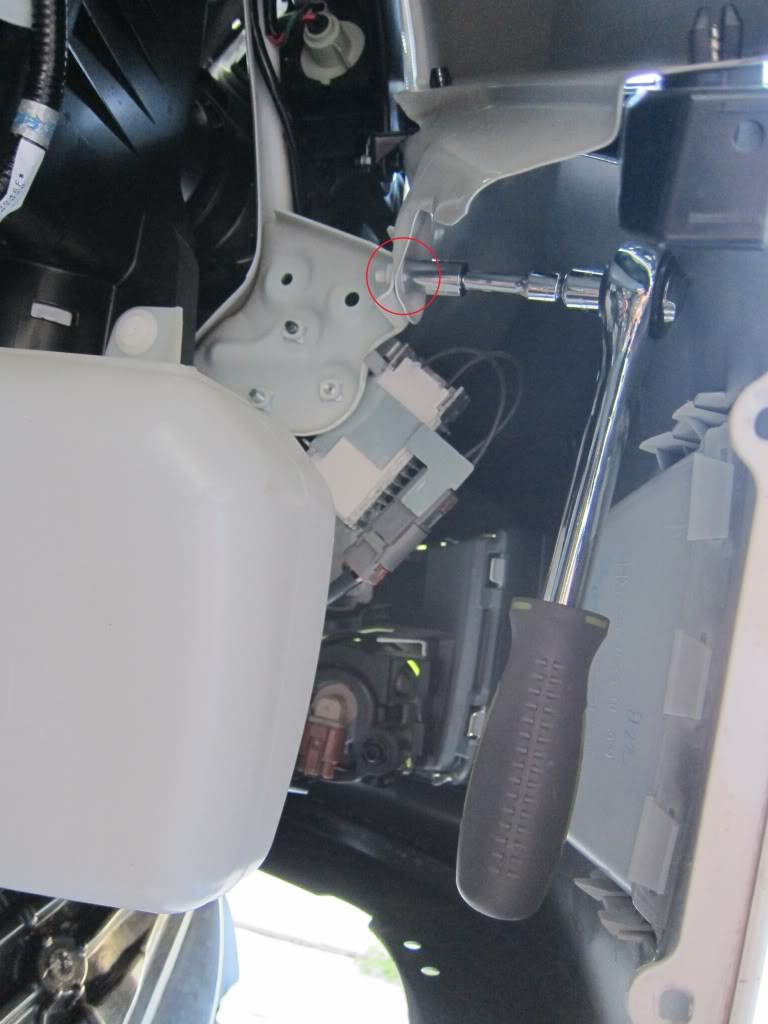
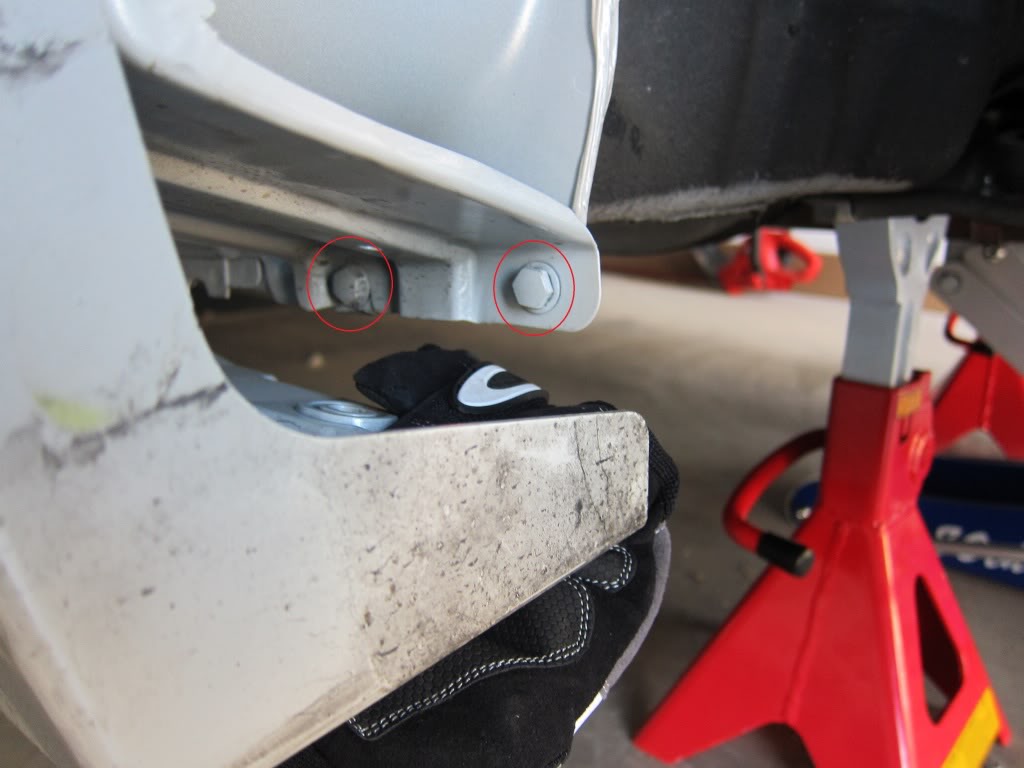
Remove the bolt behind the front bumper. (If the bumper is off it makes this next part very easy!)
Fender Removal Subaru STi GR: Remove the bolt behind the front bumper. (If the bumper is off it makes this next part very easy!)
Unscrew the black plastic bracket that secures the fender to the front bumper. (Again much easier to do with bumper off). I’d also suggest you remove the black bracket all together. This will come in handy when you reassemble the front fender.
There are two bolts under the side trim. This is where removing the 3rd retaining clip from under neath the side trim gives you a bit more wiggle room.
There are two bolts under the side trim. This is where removing the 3rd retaining clip from under neath the side trim gives you a bit more wiggle room.
Consider your stock engine management for just a moment. Your stock engine control unit (ECU) is a very complex piece of circuitry that calculates hundreds of variables every second. All of these variables rely on inputs within a + or – range. When you modify your vehicle, these values change. As long as the changes are within the values the ECU expects to receive, your engine runs fine. Once the values are exceeded, the ECU is programmed to compensate to return the values to normal levels.
A typical way of engine management is to use a Cobb Accessport.
This is a layman’s explanation of how your stock ECU can actually work against you when modifying your vehicle. This also explains why modifications can feel great once they are bolted on but the butt dyno results seem to fade over time. This is due to ECU compensation.
What is the first step in finding what engine management I need? Finding a tuner. The Tuner FAQ will help with the general rules of finding a good tuner. Remember, it’s always better to have a custom tune vs. a plug and play or “staged” map. Always defer to the tuner’s advice as to what to choose as ultimately he will be the one to provide custom support. Discuss your goals and budget and your tuner should set you on the right path. If you are a “plug and play” kind of person, review the options below and decide for yourself along with input from locals in your regional forum and the car parts review forum.
What will engine management do for me? Generally speaking, engine management optimizes several engine functions to create more horsepower and efficiency. The stock ECU is designed to ensure your car runs fine and monitors the engine’s output parameters. Utilizing an aftermarket engine management solution takes this to the next level.
We use cookies on our website to give you the most relevant experience by remembering your preferences and repeat visits. By clicking “Accept”, you consent to the use of ALL the cookies.
This website uses cookies to improve your experience while you navigate through the website. Out of these, the cookies that are categorized as necessary are stored on your browser as they are essential for the working of basic functionalities of the website. We also use third-party cookies that help us analyze and understand how you use this website. These cookies will be stored in your browser only with your consent. You also have the option to opt-out of these cookies. But opting out of some of these cookies may affect your browsing experience.
Necessary cookies are absolutely essential for the website to function properly. These cookies ensure basic functionalities and security features of the website, anonymously.
Cookie
Duration
Description
cookielawinfo-checkbox-analytics
11 months
This cookie is set by GDPR Cookie Consent plugin. The cookie is used to store the user consent for the cookies in the category "Analytics".
cookielawinfo-checkbox-functional
11 months
The cookie is set by GDPR cookie consent to record the user consent for the cookies in the category "Functional".
cookielawinfo-checkbox-necessary
11 months
This cookie is set by GDPR Cookie Consent plugin. The cookies is used to store the user consent for the cookies in the category "Necessary".
cookielawinfo-checkbox-others
11 months
This cookie is set by GDPR Cookie Consent plugin. The cookie is used to store the user consent for the cookies in the category "Other.
cookielawinfo-checkbox-performance
11 months
This cookie is set by GDPR Cookie Consent plugin. The cookie is used to store the user consent for the cookies in the category "Performance".
viewed_cookie_policy
11 months
The cookie is set by the GDPR Cookie Consent plugin and is used to store whether or not user has consented to the use of cookies. It does not store any personal data.
Functional cookies help to perform certain functionalities like sharing the content of the website on social media platforms, collect feedbacks, and other third-party features.
Performance cookies are used to understand and analyze the key performance indexes of the website which helps in delivering a better user experience for the visitors.
Analytical cookies are used to understand how visitors interact with the website. These cookies help provide information on metrics the number of visitors, bounce rate, traffic source, etc.
Advertisement cookies are used to provide visitors with relevant ads and marketing campaigns. These cookies track visitors across websites and collect information to provide customized ads.