
Banjo Bolt (Union) removal and install on a Subaru WRX STi:
Next, the up-pipe bracket needs to be removed to be able to get a wrench onto the Banjo Bolt/Union screw. Remove the nut (on the up-pipe stud) and the other bracket bolt (See pic “Up pipe bracket“).
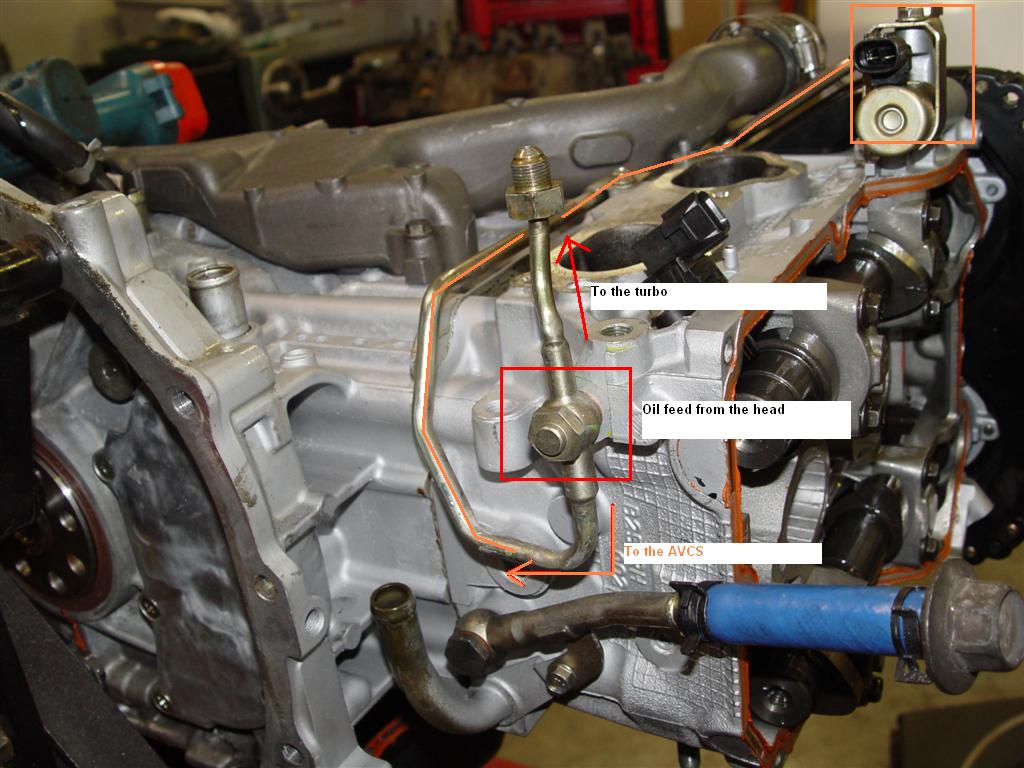
You can just barely see the Banjo Bolt/Union screw from above once the up-pipe bracket is removed.
Next, remove the Banjo Bolt/Union screw using the 17 mm ratcheting wrench . I was only able to get about two clicks of travel on the wrench at a time. After a few turns I was able to get my fingers on the Banjo Bolt to speed up the removal.
Once the old banjo bolt is removed, you can try to replace the copper washer between the oil pipeline and the engine block with a new one. I was OK with leaving the old one there. I did use a new copper washer on the new banjo bolt. You can clean up the screen in the old banjo bolt and re-use it, I suppose. I felt better putting a new one in.
The torque spec on the Banjo Bolt/Union screw is 21.4 ft-lbs (29 N-m). I could not get a torque wrench in there so I estimated the tightness based on the way it felt when loosening the old one. Be careful not to over-tighten! I ran the engine for a few minutes and checked for leaks before reinstalling the up-pipe bracket and heat shield.
Next, install the up-pipe bracket using the 14 mm deep-well socket and extension. The torque is 24.6 ft-lbs (33 N-m).
Re-install the stock heat shield using the 10 mm socket. I tightened them to “snug.”
Finally, re-install anything else you needed to remove to access the Banjo bolt.