This is a step by step guide on replacing the valve cover gasket on Subaru flat four engines. This guide will work for most Subaru turbo cars 02-07+ and most other naturally aspirated Subaru cars.
1.) Jack your car up and drain the oil. Remember to put the car on jack stands. You don’t want the car dropping on you.A lot of people do this job with the oil still in the pan, but its better to rather play it safe and drain the oil completely.
4.) After removing all that, you should see this a total of 8 outer bolts and the 2 inner which holds the spark plug coils.
Valve cover gasket: In the center are the two coil packs that need to be removed.
5.) Unscrew them and label them. You don’t want the bolts going into the wrong place. It was a very hard to get any decent clearance so take your time.
ATF Power Steering Fluid Replacement Subaru STi/WRX:
This is a step by step guide in replacing the ATF power steering fluid on your Subaru STi/WRX. This is pretty much a two person job unless you have a suction gun. I like to use Mobil 1 ATF Synthetic fluid.
ATF Power Steering Fluid Replacement Subaru STi/WRX: A how to guide on replacing the power steering fluid on a Subaru WRX/STi.
3.) Raise the car up (use jack stands “Safety first”), not to high. A person must sit in the car while another person fills the power steering reservoir.
4.) Under the car – Remove the Plastic engine cover under the car, using the 12 mm socket (5 bolts) and flat tip screw driver (4 clips).
5.) Remove the center jack plate, using 14 mm socket (4 nuts), and 12mm socket and 12 mm wrench (2 rear bolts & 2 front nuts/bolts).
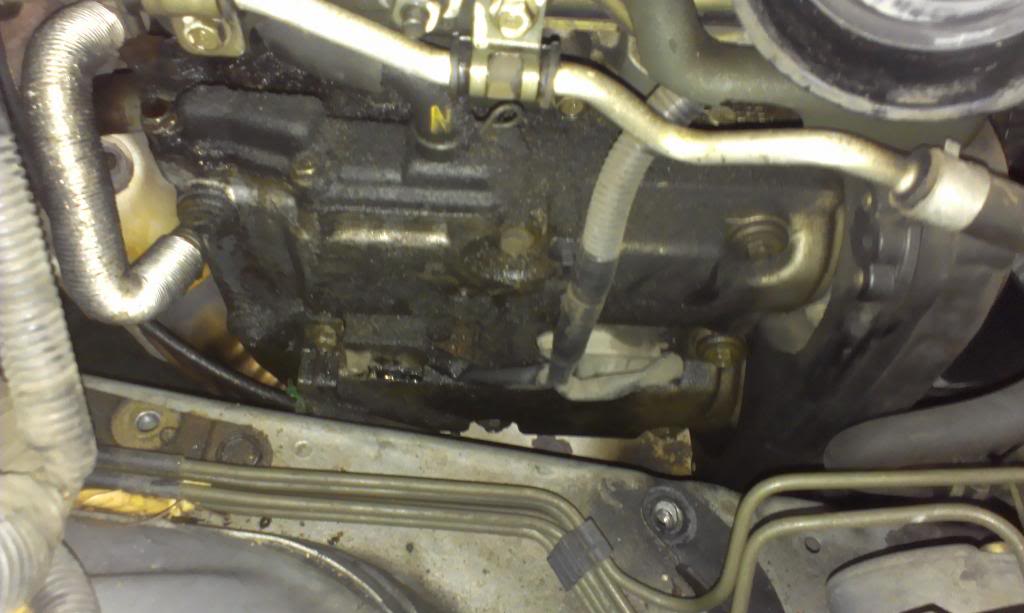
6.) Place a oil pan under the power steering gear box (just above jack plate location).
7.) Using the pliers slide one of the clips off the rubber hose (pipe joint) on the power steering gear box. Fluid will drain out immediately, so have that pan already in place under the hose.
8.) Slowly pour in some ATF into the reservoir, while another person sits in the car and SLOWLY turns the steering wheels from lock to lock – perform this at least 3 times. Watch the fluid in the reservoir so that it doesn’t drain out, and watch under the car to see when the old fluid is flushed out. The OEM fluid was brown and I used Mobile 1 ATF Synthetic which was red, so I could see when all the old fluid was flushed.
9.) Re-attach rubber hose (pipe joint) and slide the clip back into place. Put jack plate back on and put plastic undercover back on.
10.) Pour in ATF to the MAX cold line on the reservoir and be ready to add more when the person turns the steering wheel.
11.) Slowly turn the steering wheel lock to lock (3x or more) and watch the reservoir until bubbles stop appearing. Add ATF as needed! DO NOT LET THE RESERVOIR GET TOO LOW!!! This will suck more air into the system.
12.) Start the car and Slowly turn the steering wheel lock to lock (3x or more) and watch the reservoir until bubbles stop appearing. Add ATF as needed.
13.) Lower car onto the ground. Slowly turn the steering wheel lock to lock (3x or more) and watch the reservoir until bubbles stop appearing. Add ATF as needed.
14.) “In case the following happens, leave it about a half an hour and then do” STEP 11 to STEP 13 again:
a. Fluid level changes over 3 mm (0.12 in)
b. Bubbles remain on the upper surface of the fluid
c. Grinding noise is generated from power steering pump.
15.) Replace power steering cap and reinstall the intake scoop.
Now enjoy your smoother steering with your brand new ATF on your Subaru WRX/STi!
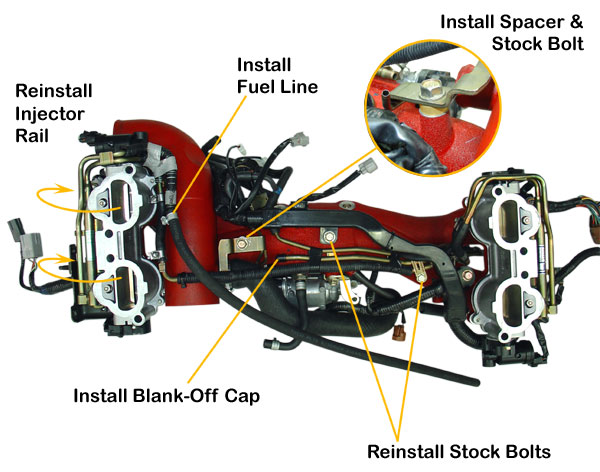
Don’t forget to tighten down your intake manifold bolts down to the correct torque values.
Intake manifold Subaru STi: Make sure to tighten down the bolts.
Otherwise you’ll end up with a broken sounding engine like this:
Luckily forgetting to tighten down the intake manifold bolts didn’t cause any permanent damage, but I wouldn’t go driving around like this either.
If you do TGV deletes like in this post. Make sure to use new intake gaskets where the TGV’s and the intake manifold meet up. What’s even more important is to make sure you tighten down those intake manifold bolts that hold the intake manifold to the TGV’s.
This is a step by step guide on removing and re-installing a oil pan on your Subaru Impreza STi or WRX. This guide is also useful for installing a STi spec oil pan onto your WRX. This guide also is helpful if you are removing your stock oil pickup tube that is known to crack on the STi. I suggest purchasing a Killer B Motorsport Pickup Tube along with a brand new STi oil pan. Both can be purchased from down below from Amazon.
1) Remove the plastic under tray from your engine. This is secured using a few bolts and plastic push clips.
2) Remove the plastic under trays from either side of the car, the long ones.
Oil pan removal and install: Remove plastic to gain access to the bottom of the engine.
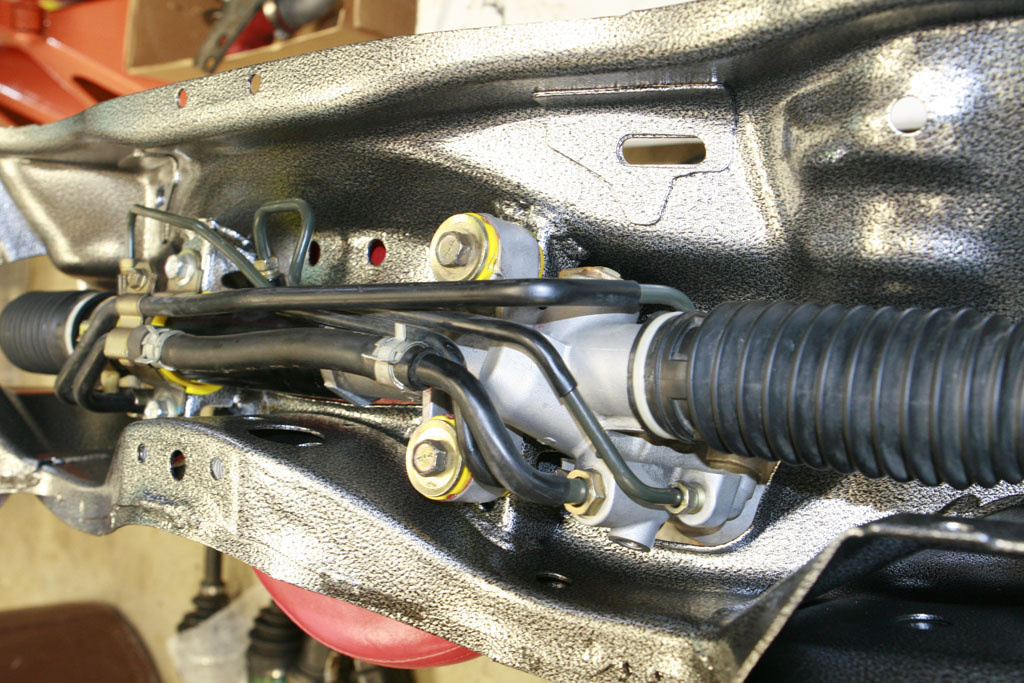
3) Remove the jacking plate. This is held on by 2 12mm bolts with nuts in the front, 2 12mm bolts in the rear and 4 14mm nuts on the sides.
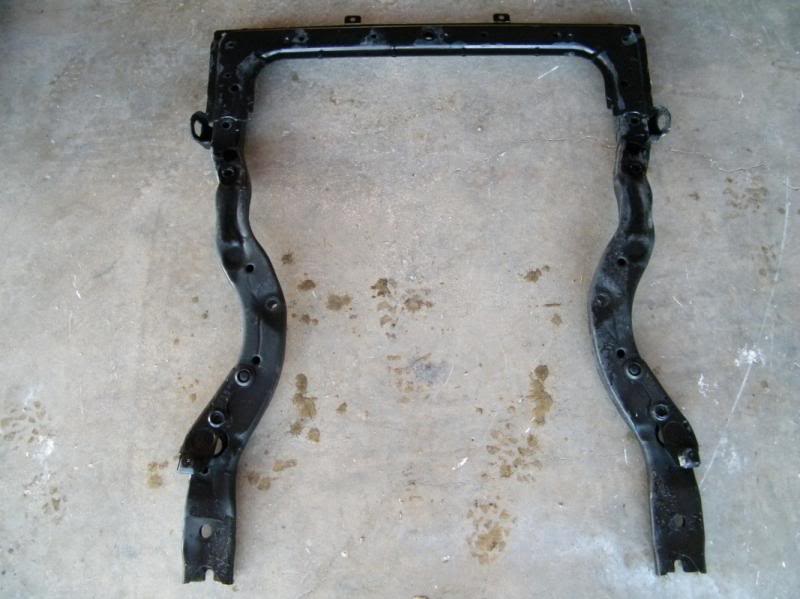
4) Remove your subframe. This is secured by a few 19mm bolts, 2 12mm bolts in front and 4 14mm bolts. I highly recommend soaking these all in your PB blaster and waiting 5 minutes. Check out some of my other posts for instuctions.
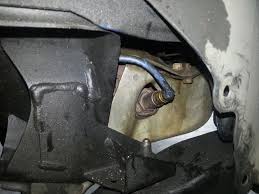
5) Remove the front oxygen sensor. The correct way is to unplug the clip, unhook it from the metal mount and then pull the wire through the fender-well so that the wire isn’t being stretched and twisted as you unscrew it.
2.) Start with the front wheel. First thing to do is clean all the fittings that will be loosened to prevent dirt from getting in the stainless steel brake lines. Use compressed air then some brake cleaner to do the job.
3.)Then, remove the 12mm bolt holding the line to the strut.
ALK (Anti-Lift Kit)install on 02-07 Subaru WRX/STi:
This is a step by step guide on how to install a Anti-Lift Kit (ALK) onto a 02-07 WRX/STi. These ALK (Anti-Lift Kits) are designed to be used with the STi’s aluminum control arms.
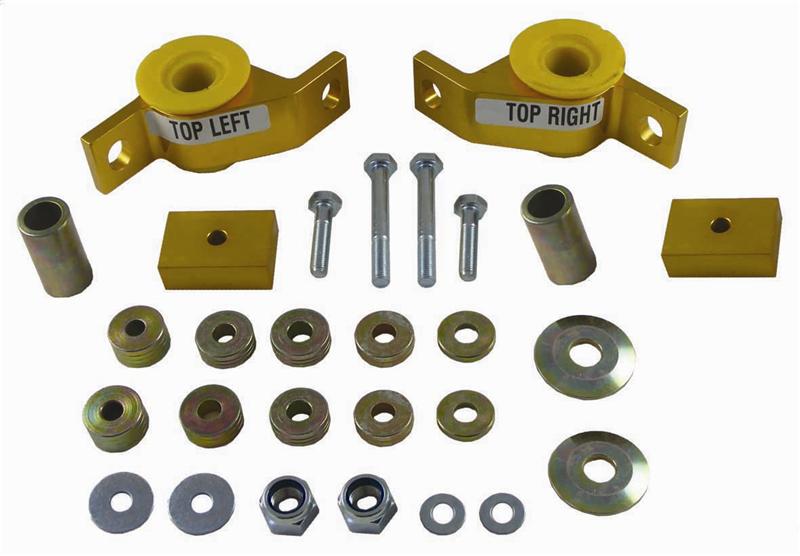
1.) First unpackage your Anti-Lift Kit (ALK) it’ll look something like this.
Anti-Lift Kit (ALK): This is all the components you’ll get with this kit.
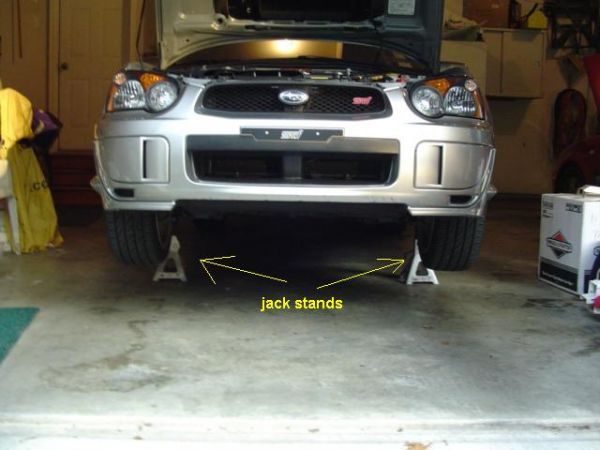
2.) Get your tools ready and mount the car up properly on jack stands to prevent the car falling down on you. Get as much clearance as you can as you’ll need a lot of room to work with.
Anti-Lift Kit (ALK): Get the front of your STi up on jack stands.
3.) Make sure you have a decent breaker bar. I’ve destroyed a breaker bar doing this before. Do not use a 3/8 inch drive. Use a 1/2 inch drive so you don’t break a breaker bar and a socket.
This is a step by step guide in installing a front sway bar with aftermarket endlinks on a 04-07 Subaru STi.
1.) Get the car in the air and be sure to secure the car. I used jack stands in the cutouts on the side of the car’s lower frame. It may be easier to use ramps since you will need to tighten the sway bar mounting bolts when the suspension is “loaded,” that is when the full weight of the car is on the wheels/tires.
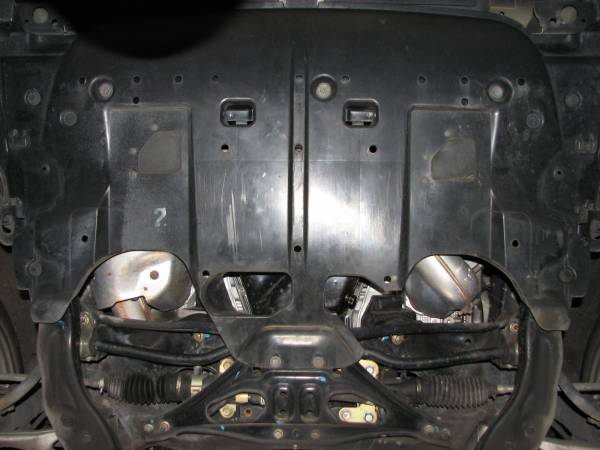
2.) Remove the front lower cover (splash guard). There are five bolts that require a 12 mm socket, three in the front and two toward the rear. There are two pop fasteners on each side as well. These can be removed by using a small flat bladed screwdriver to pop up the center round plastic piece about a quarter of an inch then pulling/wriggling out the entire fastener.
3.) Remove the jack plate. There are four bolts in the center area to remove and two nuts on each side.
Front sway bar and endlinks: Remove splash guard and skid plate.
4.) The sub-frame is an odd looking, approximately C shaped, bracket under the front part of the car. The opening of the C is toward the rear of the car. It helps to remove this to make it easier to get to the bolts that hold the sway bar onto the frame.
The sub-frame has five bolts on each leg of the C and two toward the front of the car. The two rearmost bolts require a 14mm socket, the other three on each side require a 17mm socket and the two on the front require a 12mm socket. Start by removing a plastic cover on each side that is held in place by two pop fasteners.
Front sway bar and endlinks install on 02-07 STi: The sub-frame is an odd looking, approximately C shaped, bracket under the front part of the car. The opening of the C is toward the rear of the car. It helps to remove this to make it easier to get to the bolts that hold the sway bar onto the frame.
5.) Remove another pop fastener on each side of the sub-frame.
This strut tower brace guide should work on both 04 and 05’s just fine (mine is an 05). I’m not sure about the 06s’ since they relocated the AC line and it looks like Whiteline makes the only strut bar that will work on an 06. A little bit of modification with the 06+ model cars might be necessary. These are also specific to the JDM Spec-C Titanium Strut Bar but should work as a general guide for any strut bar on an STi.
1.) Remove alarm horn bar from passenger strut tower bolts which are 12mm. Disconnect the horn and put it aside for now. We’ll screw the horn into the side of the strut tower once we’ve installed the strut bar.
Strut tower brace: Removing the alarm horn bracket. Some models did not come with the alarm horn option so you do not need to do this.
2.)Lower the AC line bracket down a screw. This is the AC Bracket you need to unscrew (use a philips head screw driver or 10mm ratchet). You’ll need to remove the bolt that connects the AC line to the bracket and also the bracket where it connects to the firewall. Remount the bracket down a screw by mounting the upper hole where the bottom screw hole on the firewall is. The bracket is the copper colored metal piece.
Strut Tower Brace: Remove the copper bracket off of it’s mount on the firewall.
First remove the bolts holding the struts to the strut walls. Bolts are 12mm. They should come off pretty easily since they are only torqued down to 14.5ft-lbs.
I found it was easiest to unscrew the strut bar into 3 pieces, the 2 parts that connect to the strut tower and then the actual bar itself (bolts/screws are 12mm). I put the round strut tower parts on first and loosely bolted them down. Then I placed the strut bar on top and loosely screwed down the strut bar to the strut tower connection pieces.
Strut tower brace: Passenger side strut bar end installed.Strut Tower Brace: Driver’s side strut bar end installed.
We use cookies on our website to give you the most relevant experience by remembering your preferences and repeat visits. By clicking “Accept”, you consent to the use of ALL the cookies.
This website uses cookies to improve your experience while you navigate through the website. Out of these, the cookies that are categorized as necessary are stored on your browser as they are essential for the working of basic functionalities of the website. We also use third-party cookies that help us analyze and understand how you use this website. These cookies will be stored in your browser only with your consent. You also have the option to opt-out of these cookies. But opting out of some of these cookies may affect your browsing experience.
Necessary cookies are absolutely essential for the website to function properly. These cookies ensure basic functionalities and security features of the website, anonymously.
Cookie
Duration
Description
cookielawinfo-checkbox-analytics
11 months
This cookie is set by GDPR Cookie Consent plugin. The cookie is used to store the user consent for the cookies in the category "Analytics".
cookielawinfo-checkbox-functional
11 months
The cookie is set by GDPR cookie consent to record the user consent for the cookies in the category "Functional".
cookielawinfo-checkbox-necessary
11 months
This cookie is set by GDPR Cookie Consent plugin. The cookies is used to store the user consent for the cookies in the category "Necessary".
cookielawinfo-checkbox-others
11 months
This cookie is set by GDPR Cookie Consent plugin. The cookie is used to store the user consent for the cookies in the category "Other.
cookielawinfo-checkbox-performance
11 months
This cookie is set by GDPR Cookie Consent plugin. The cookie is used to store the user consent for the cookies in the category "Performance".
viewed_cookie_policy
11 months
The cookie is set by the GDPR Cookie Consent plugin and is used to store whether or not user has consented to the use of cookies. It does not store any personal data.
Functional cookies help to perform certain functionalities like sharing the content of the website on social media platforms, collect feedbacks, and other third-party features.
Performance cookies are used to understand and analyze the key performance indexes of the website which helps in delivering a better user experience for the visitors.
Analytical cookies are used to understand how visitors interact with the website. These cookies help provide information on metrics the number of visitors, bounce rate, traffic source, etc.
Advertisement cookies are used to provide visitors with relevant ads and marketing campaigns. These cookies track visitors across websites and collect information to provide customized ads.